Posted by Tosha Smith and Kristen Nelson on 20th Apr 2022
Back to the Blog: Reversible Chicken Feed Tote Bag

A Note from CKC: Lately, I have been seeing people all over social media making tote bags out of all kinds of recycled materials, from blankets to Amazon mailers. And it reminded me: Hey! We have a tutorial for that! So I had to make this week's "Back to the Blog" feature our feedsack tote pattern, originally published in 2017. Even if you don't keep chickens, this pattern has applications for you. And we are so happy to give it new life on the new CKC Blog. Happy Earth Week!
Did you see our new Gertrude's Gathering Apron and Dress pattern that released today? It's AMAZING!
And on top of that, today we also have a FREE accessory pattern for all the hen-lovers out there. 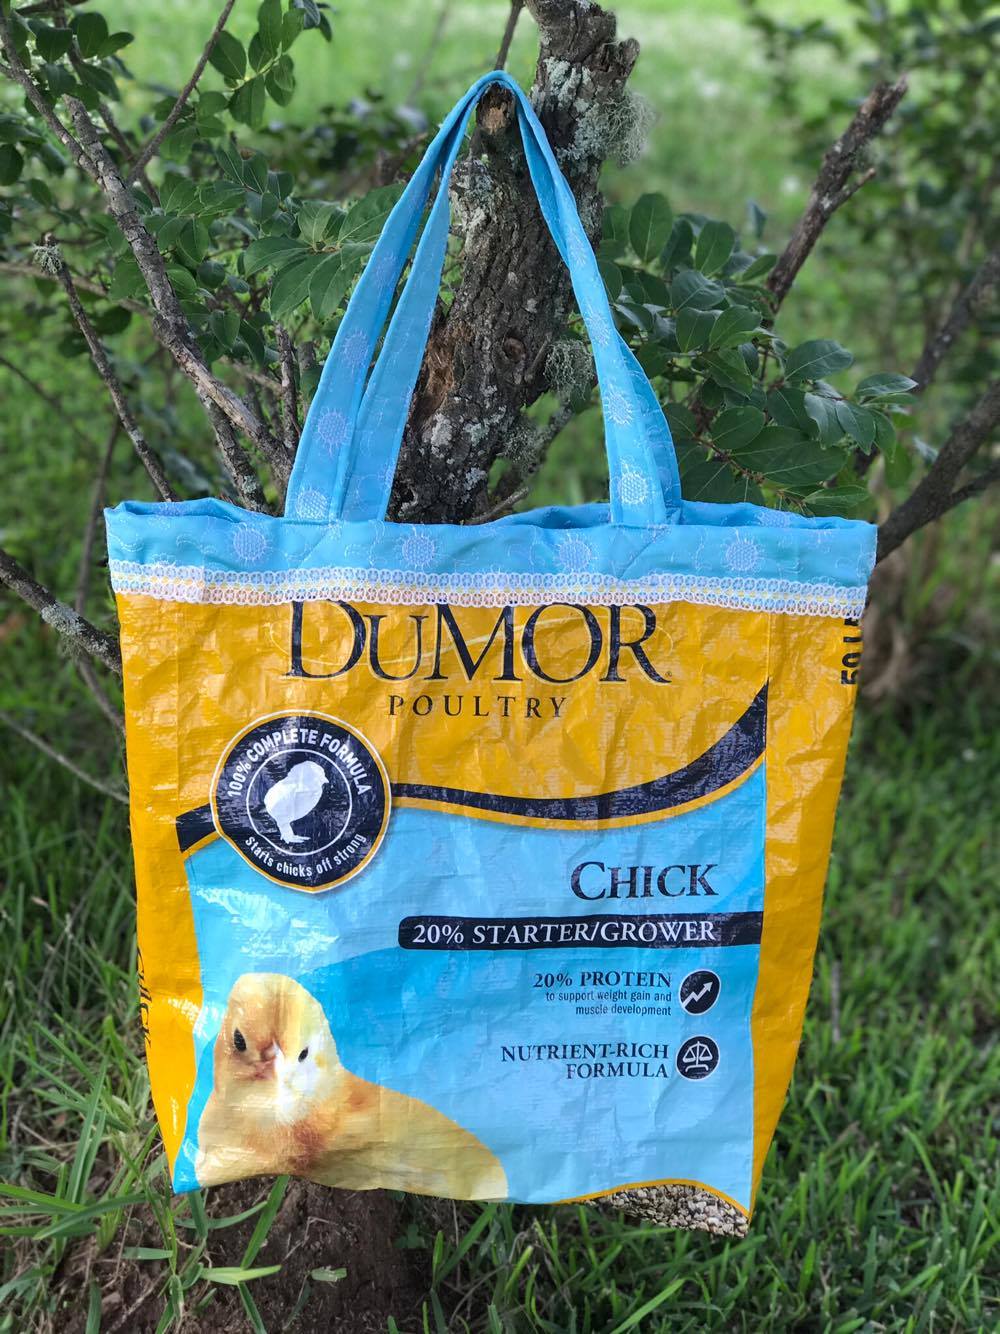
Isn't this fabulous?! Tosha has done it again with her awesomeness. This reversible chicken feed tote bag can be made using any size of sturdy feed bag. Simply follow the tutorial below. Here's Tosha!
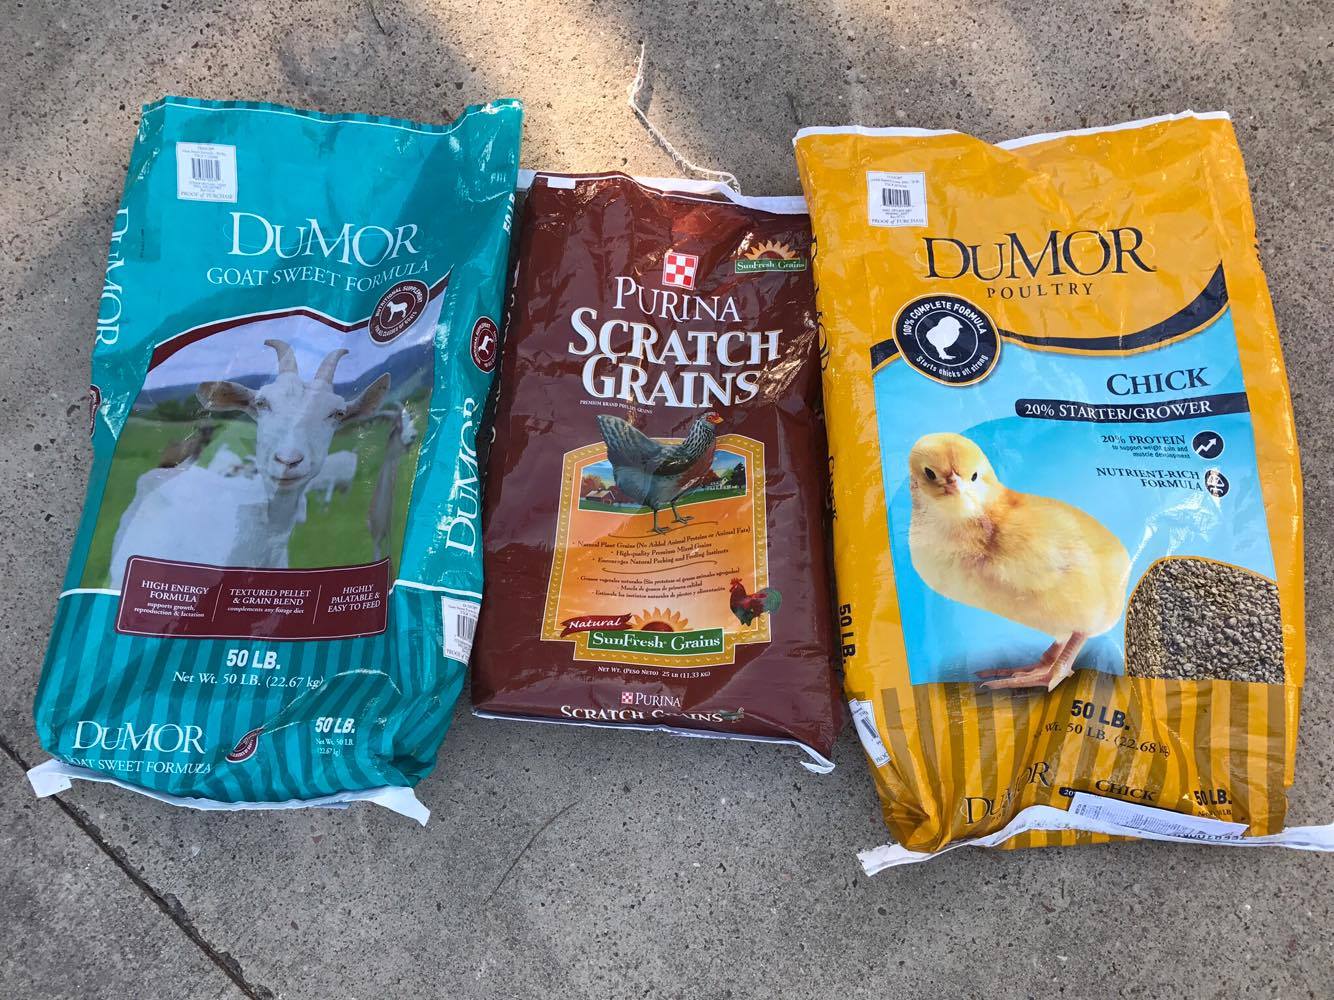
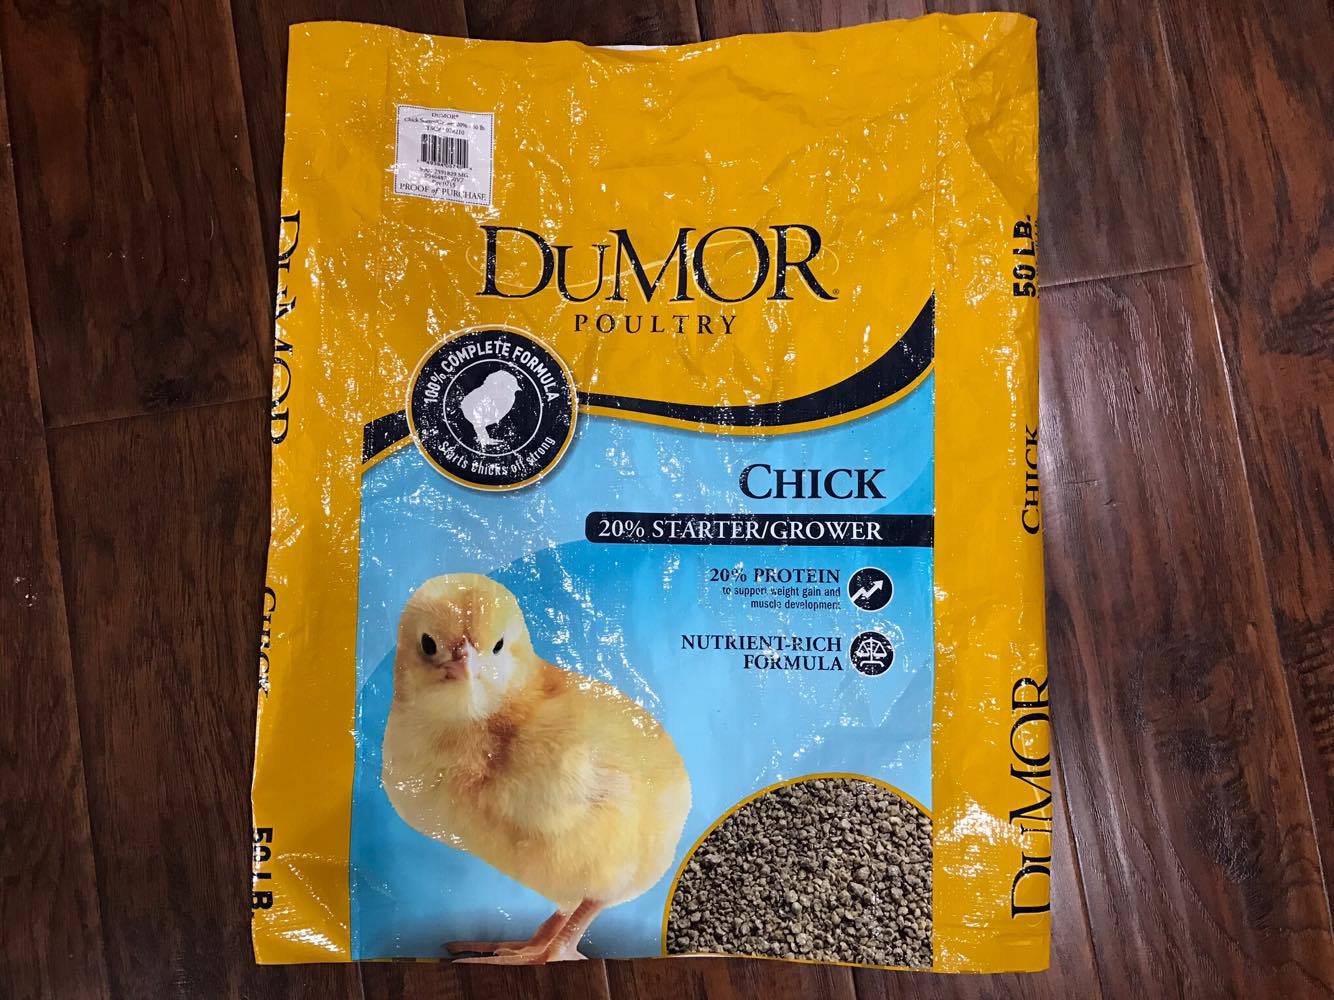
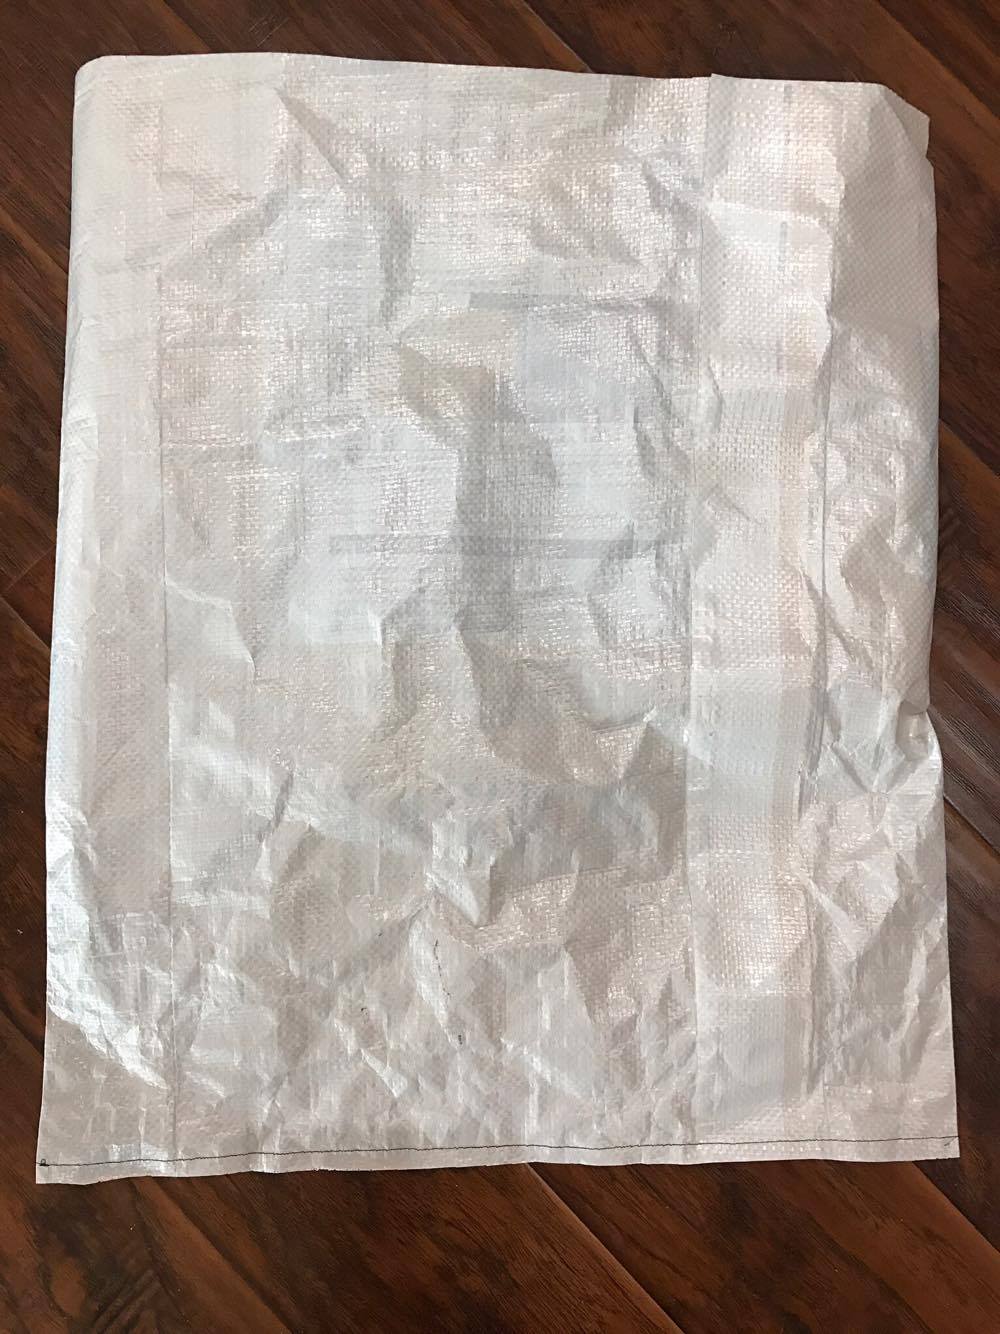
First, you will choose which feed bag to use. Some are cuter than others but they all work as long as they are made of the canvas-type material rather than just paper. You will want to empty the bags before you begin.

Rinse the bags out with water and then hang to dry. Some good places to dry them are over chairs, tree limbs, fence posts, etc.
When your bag is dry, cut straight across bottom of the bag. How much you take off will depend on how tall you want your bag to be. (Remember you will need a little space at the top and bottom for the seams and folding.)
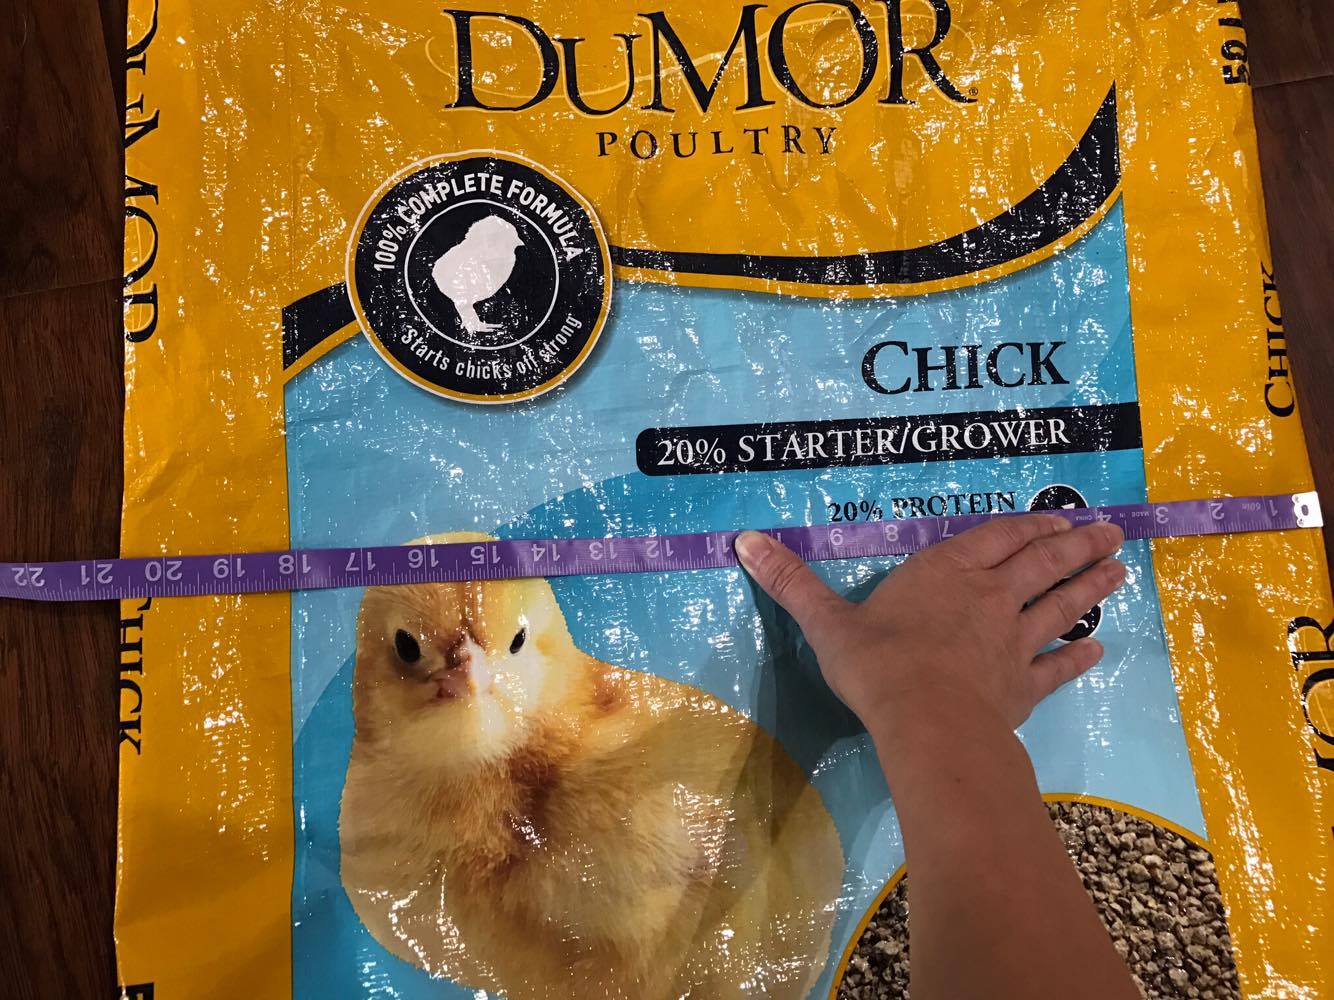
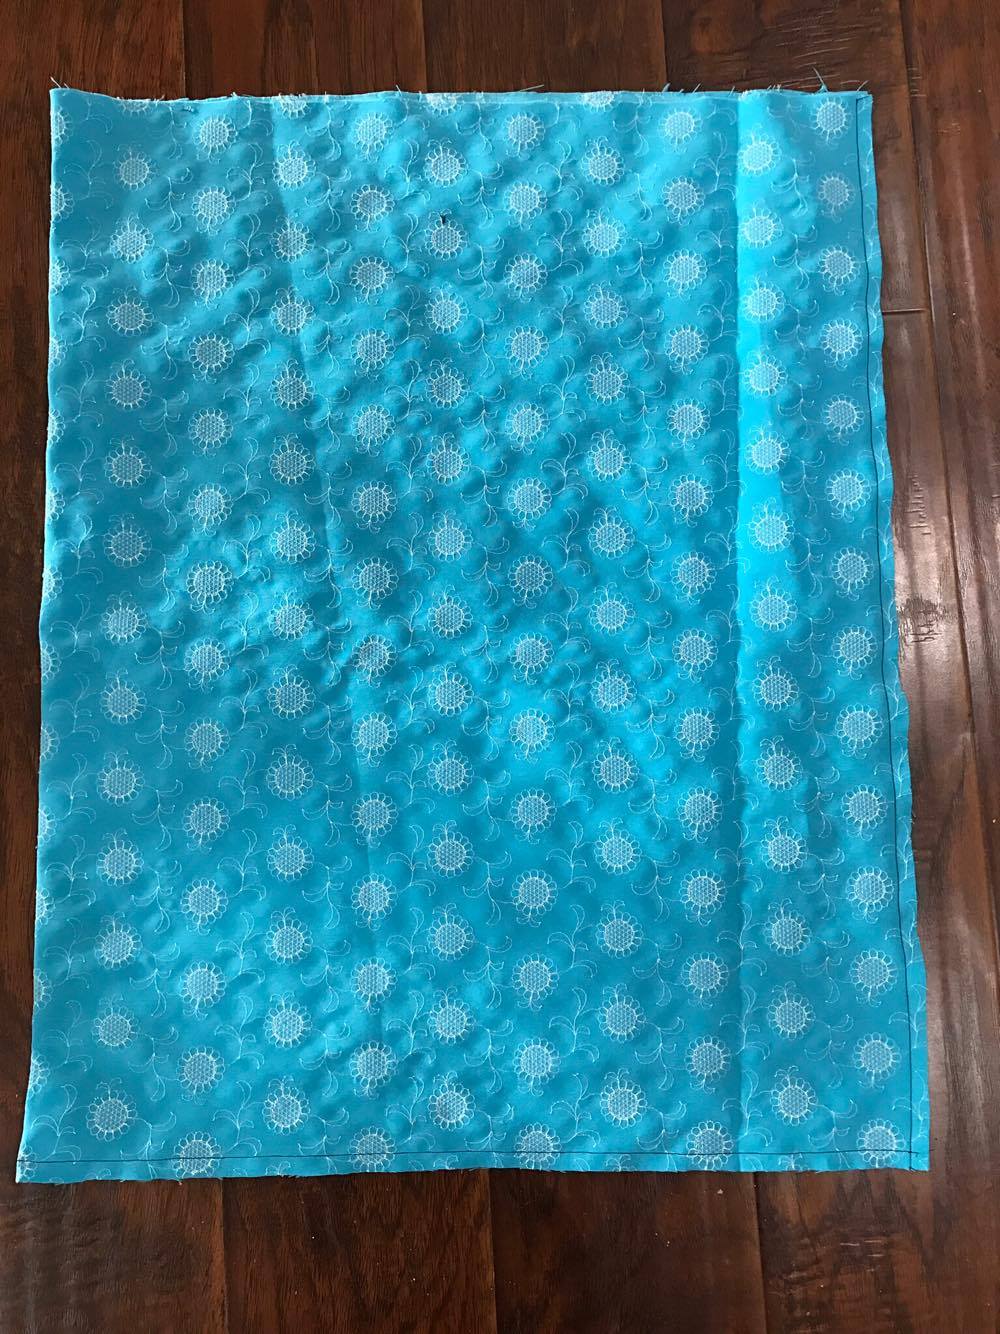
Measure the width of your bag. Mine was 20.75" across, which made it a total of 41.5" around, but all you need to remember is the 20.75".  Also measure the height and make note of it.
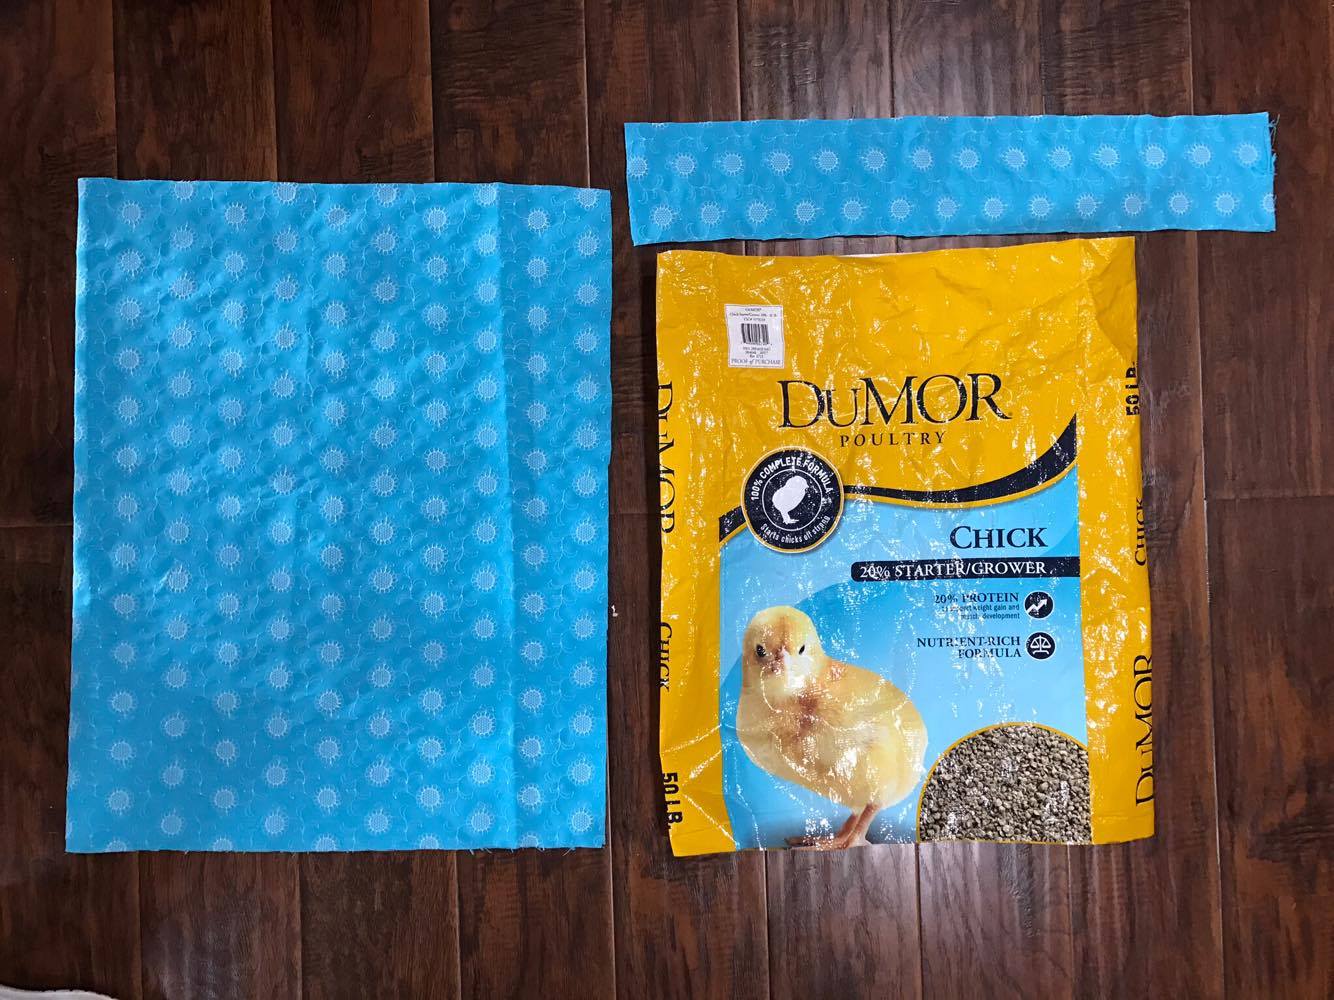
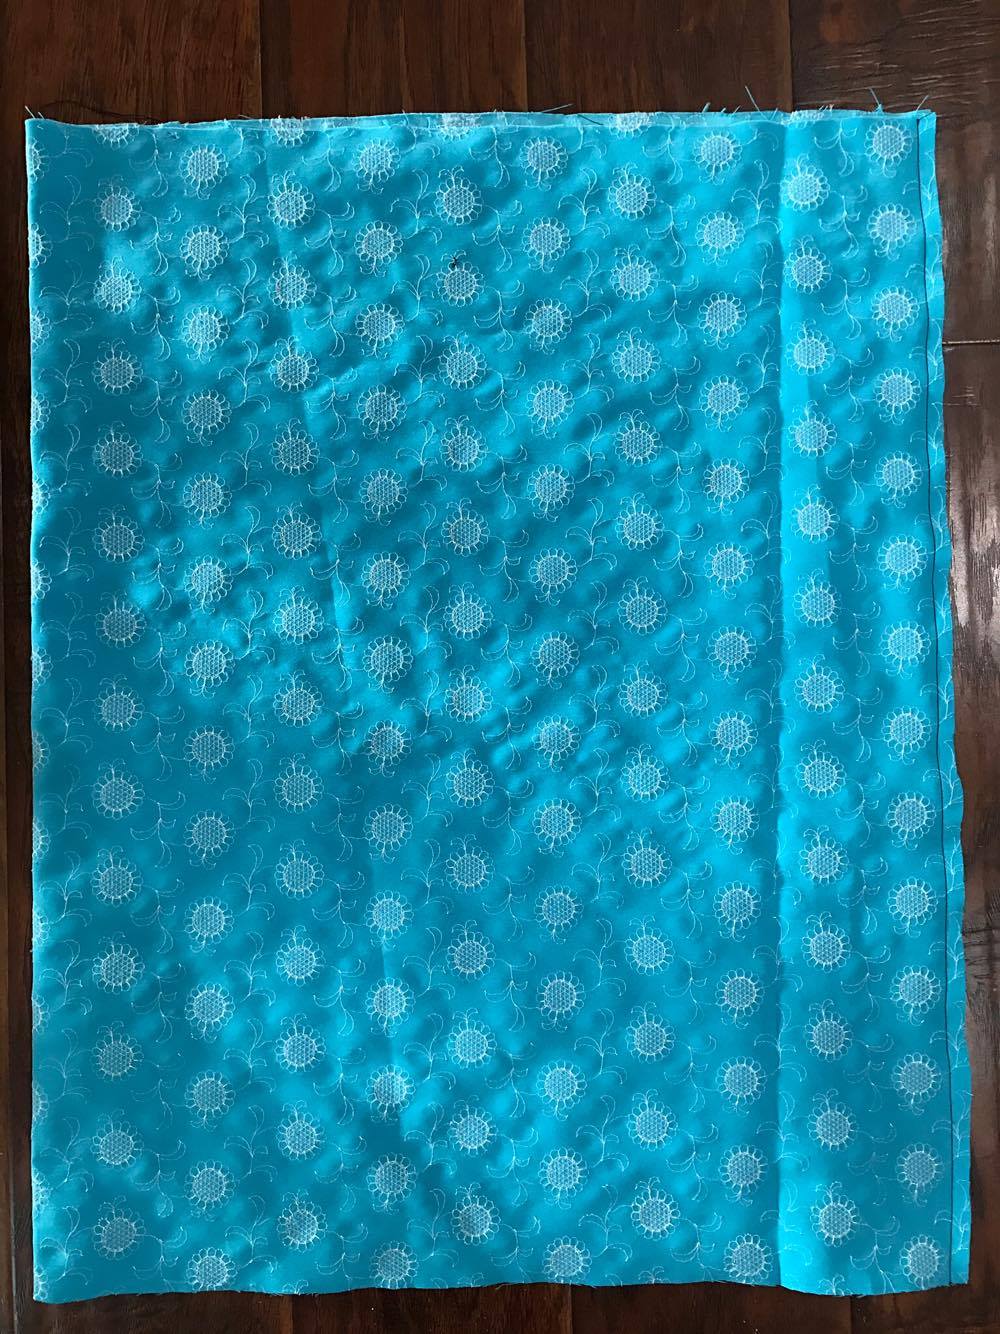
Now it's time to cut your liner and straps out of your fabric! With your liner on the fold, measure the width of your bag (mine was 20.75") and add .5" (so I cut 21.25" on the fold). Opened up, that would be 42.5". Depending on the size bag you started off with, your measurements may vary slightly. For the height of the fabric, measure and cut the fabric so it is 2" taller than the feed bag. Also cut two straps at 5"x 28". When you're done cutting, your pile should look like the photo above.
Turn your bag inside out and sew across the bottom using a 1/2" seam allowance.
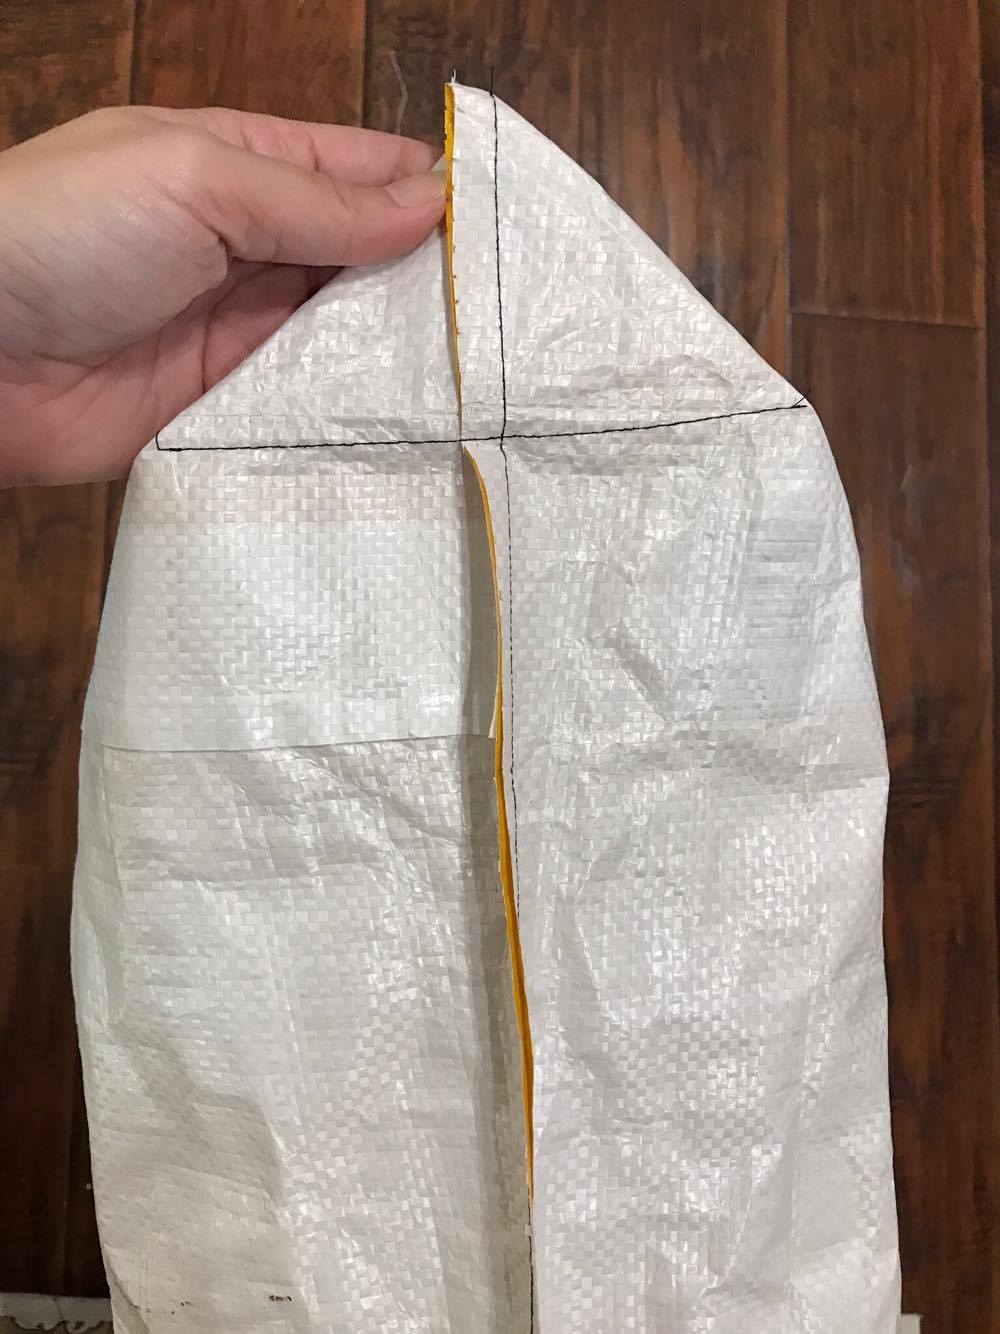
Pinch the corners and and make sure the side and bottom of the bag are pressed flat. Sew across the corner through all thicknesses, as shown above. Depending on how big of a base you want, this measurement can vary slightly. My stitching line was 6" across.
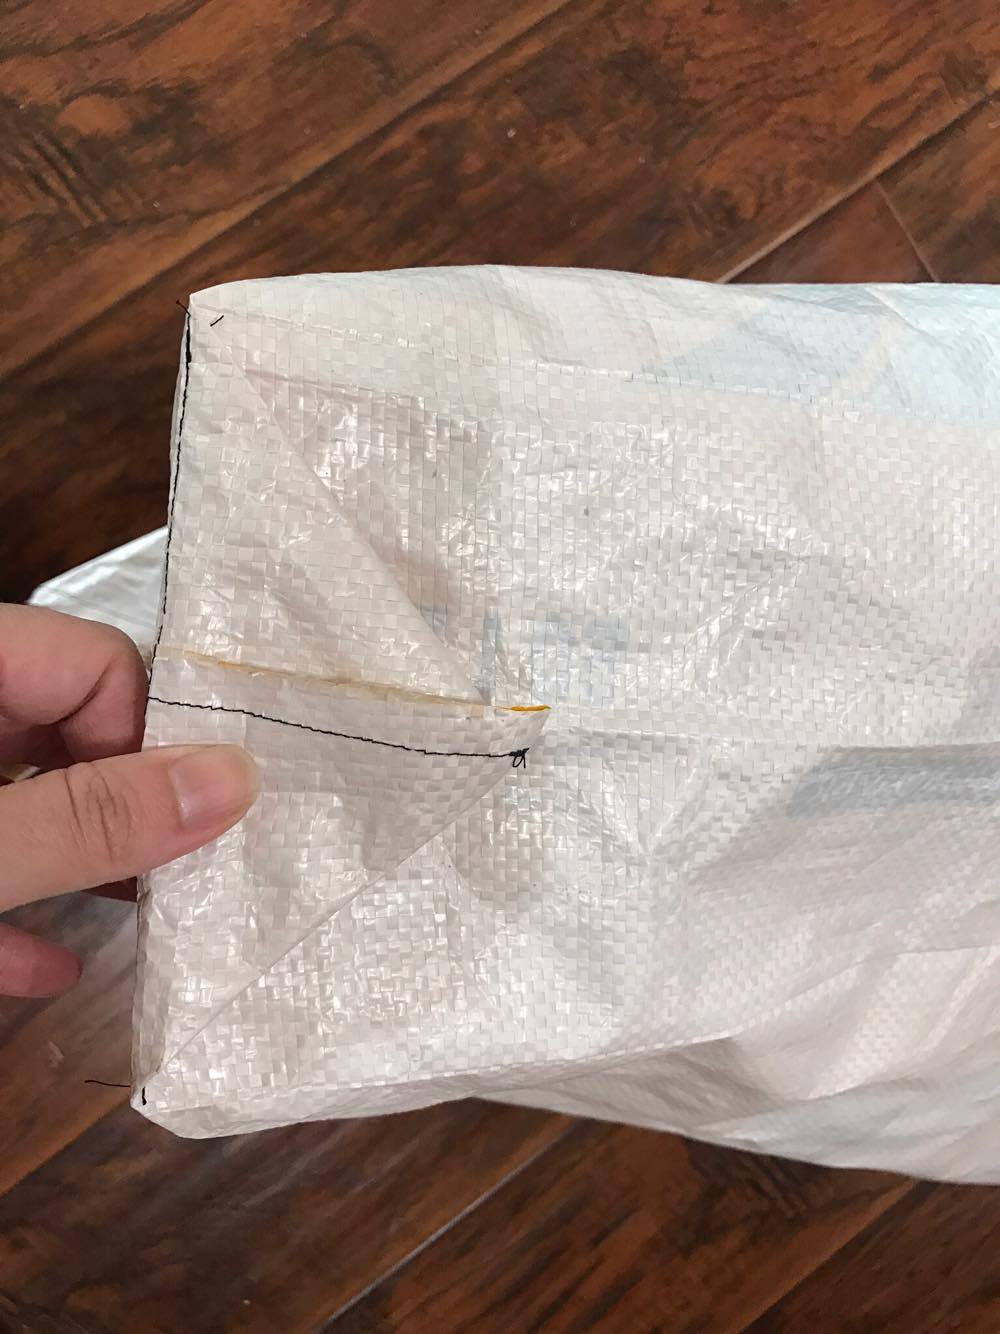
On each side, fold up the corners. You can tack these to the sides with a quick hand stitch if you'd like but it's not mandatory. Set the bag aside for now.
Take the bag liner and fold it width-wise, with right sides together. Sew down the side, again using a 1/2" seam allowance.
Next, sew across the bottom, again with the same seam allowance.
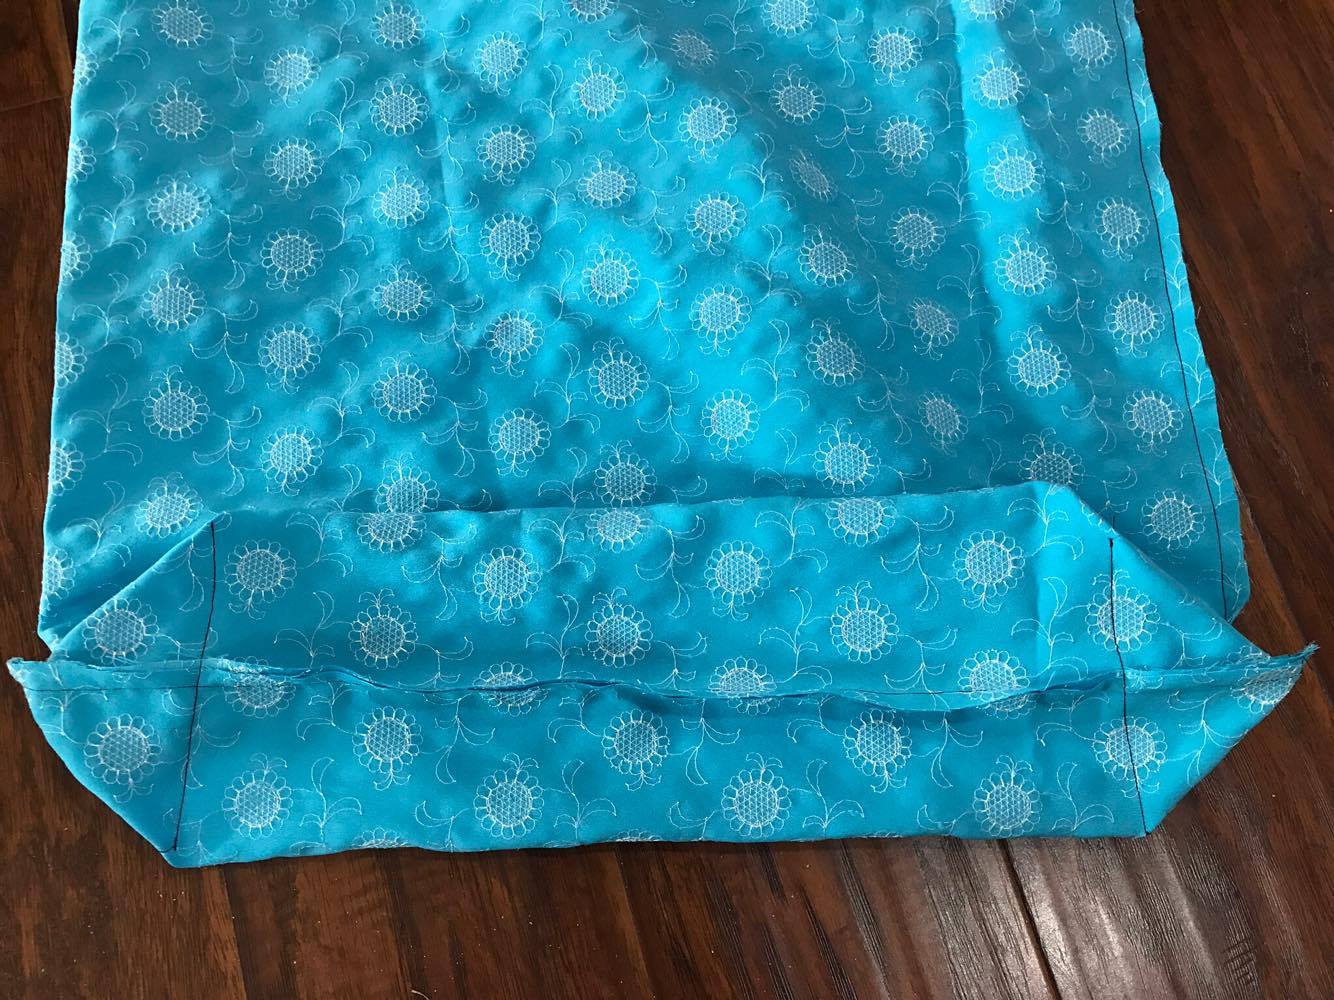
At the bottom, pinch and sew the corners exactly as you did on the bag.
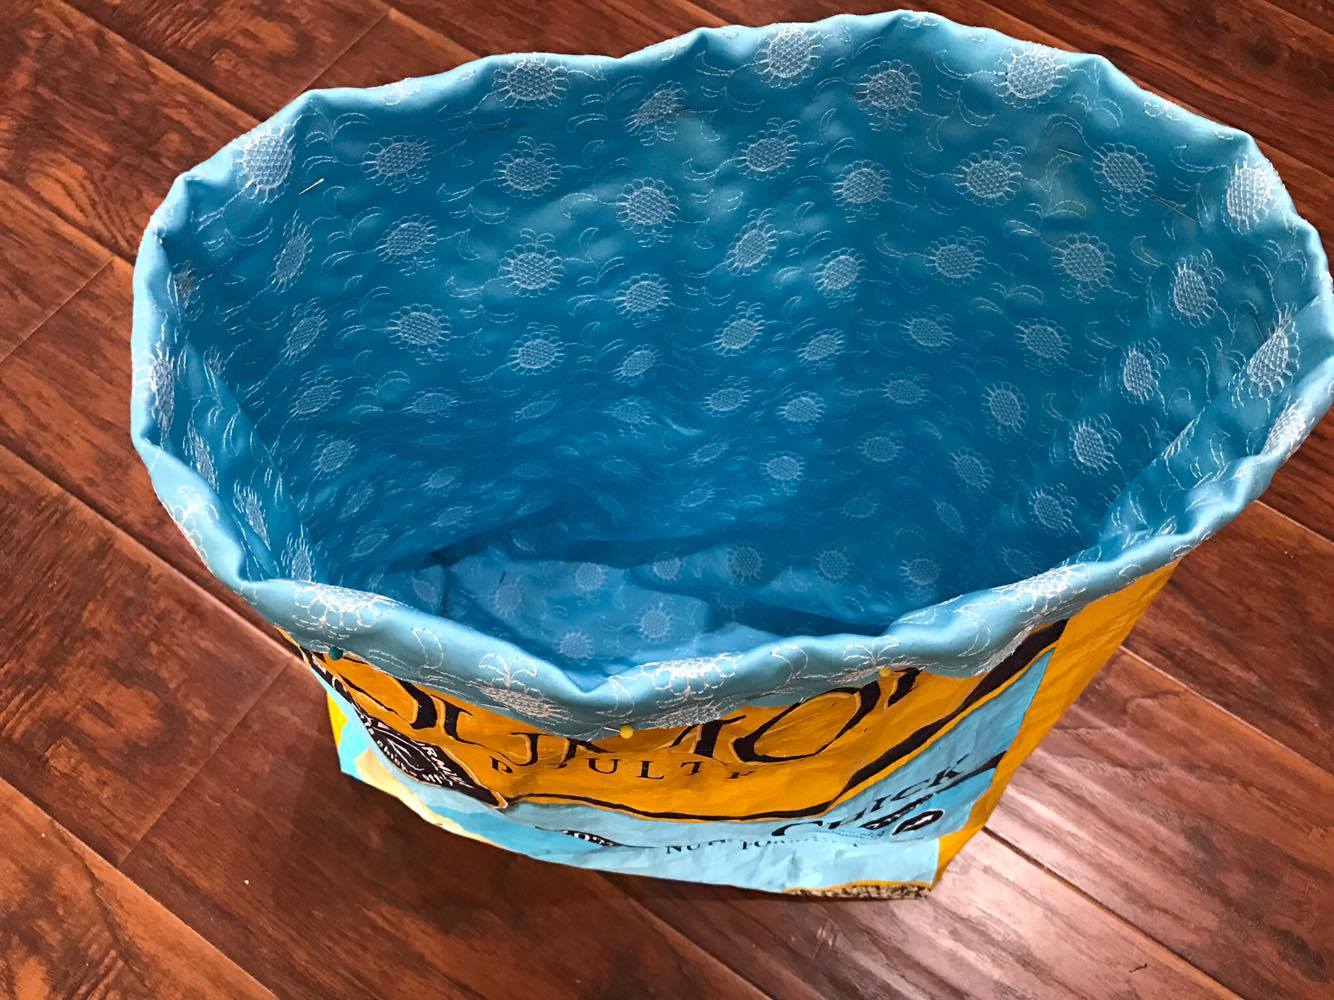
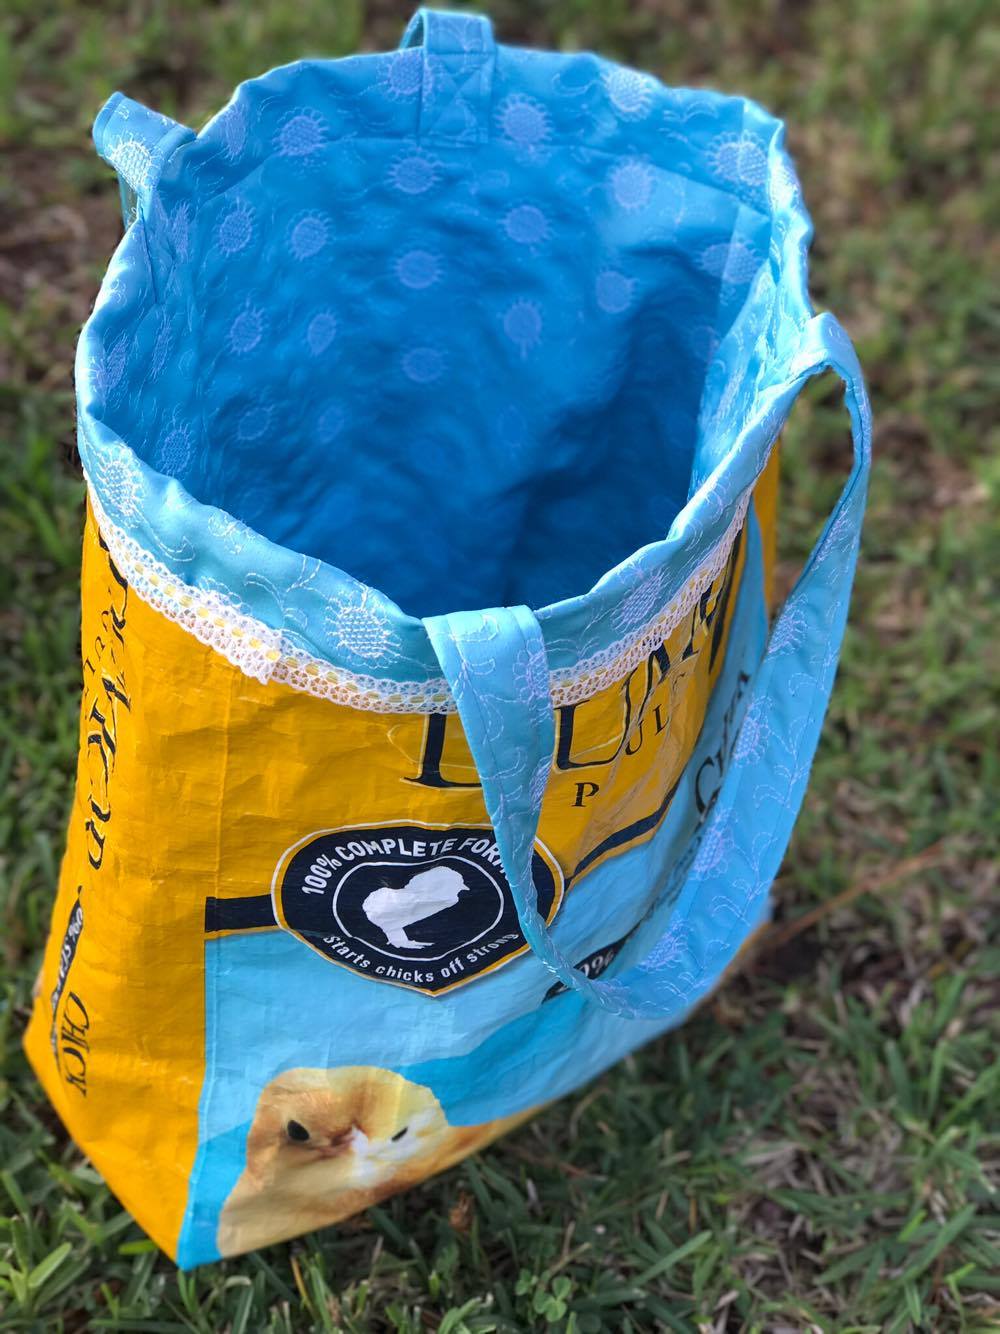
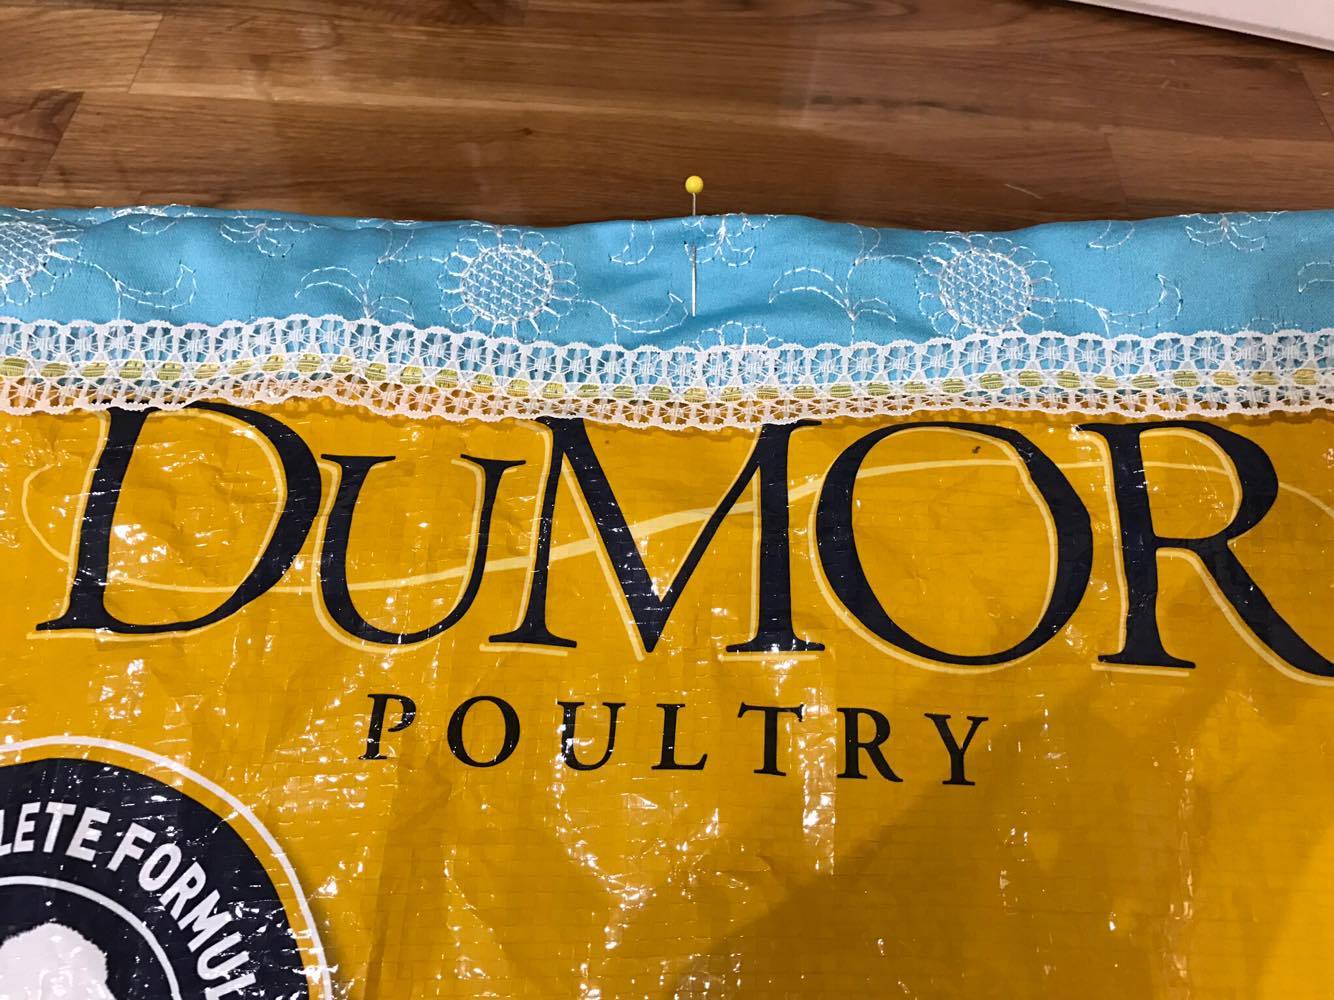
Now slide the liner into the bag with wrong sides together. Remember that I told you to add 2" to the length of the bag earlier? Well, that's so you can fold it over the raw edge of the bag and down on the outside!
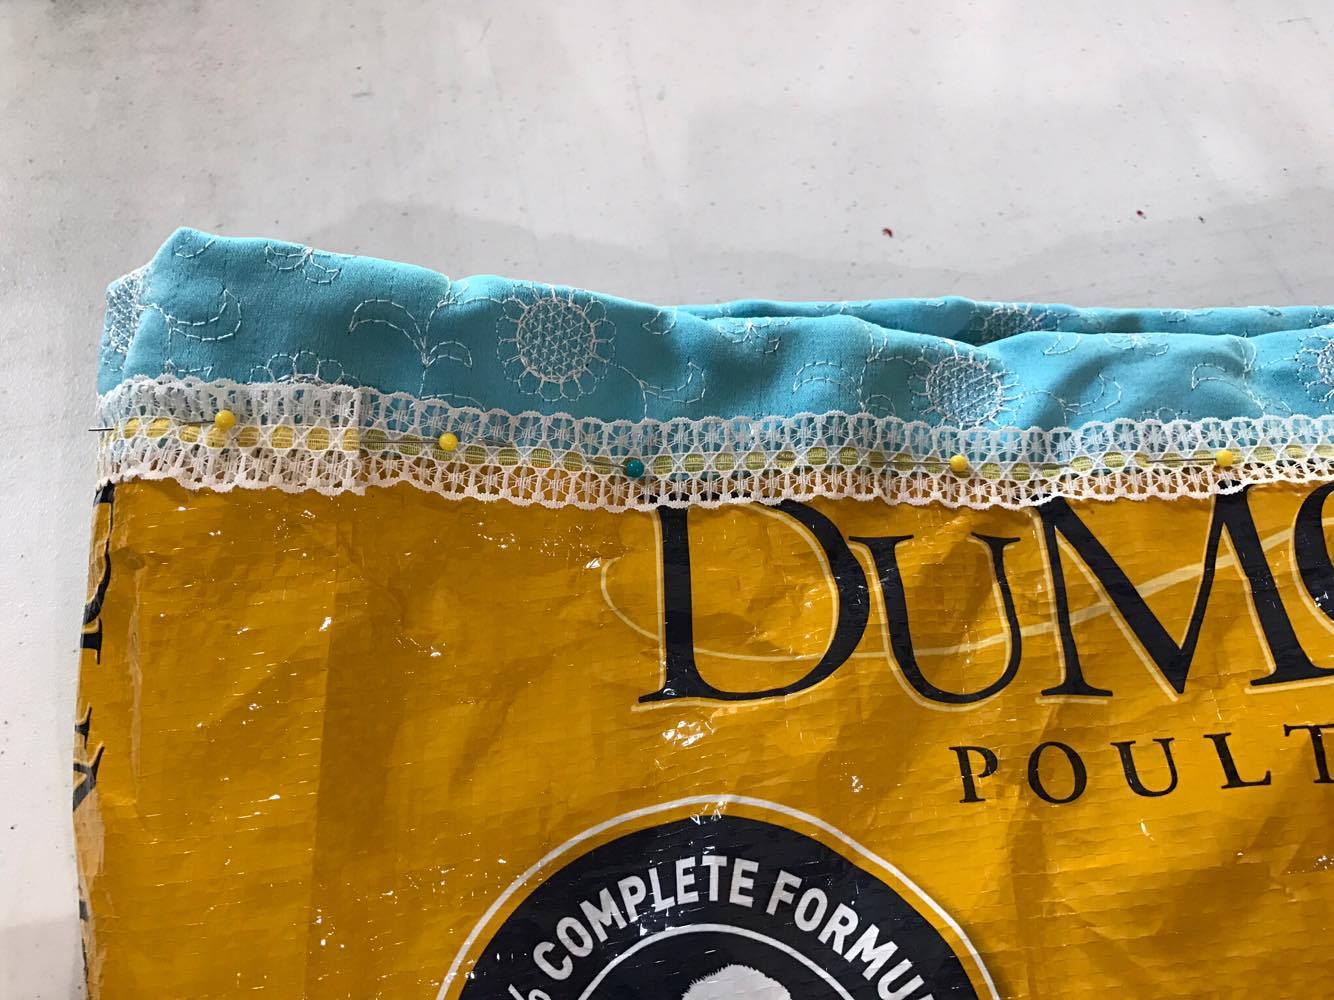
Then you can either fold the raw edge of the liner under 1/2", or just add a cute trim to cover it! Pin through all thicknesses and then sew in place!

Take one of your strap pieces. Fold each end to the wrong side 1/2" and iron to set the fold.

Next, fold the long raw edges in to meet in the center on the wrong side of the fabric, as shown above.
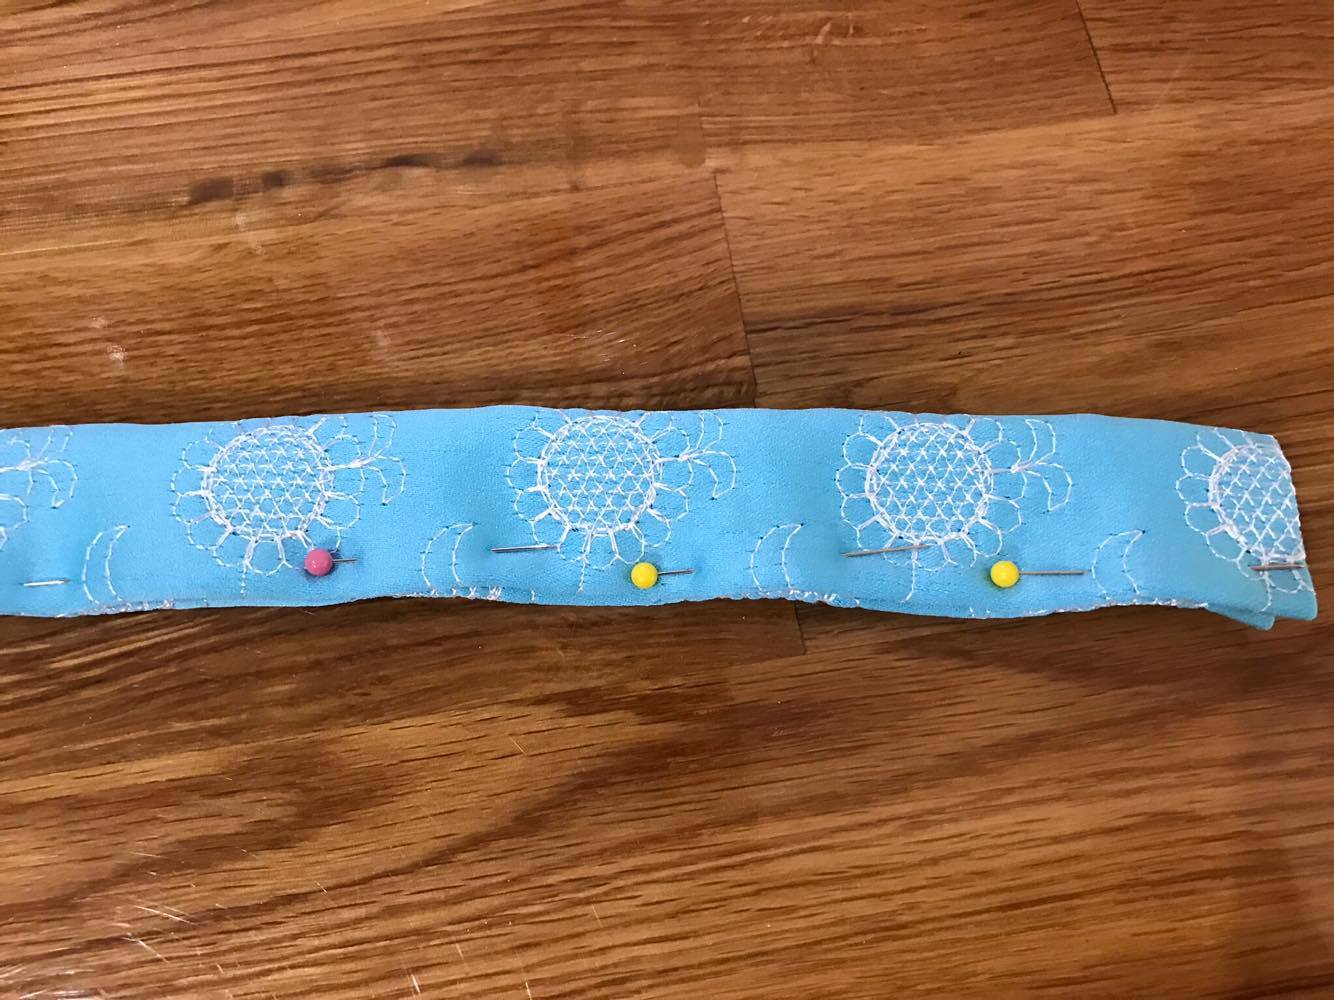
Fold the entire strap in half lengthwise, enclosing all raw edges.
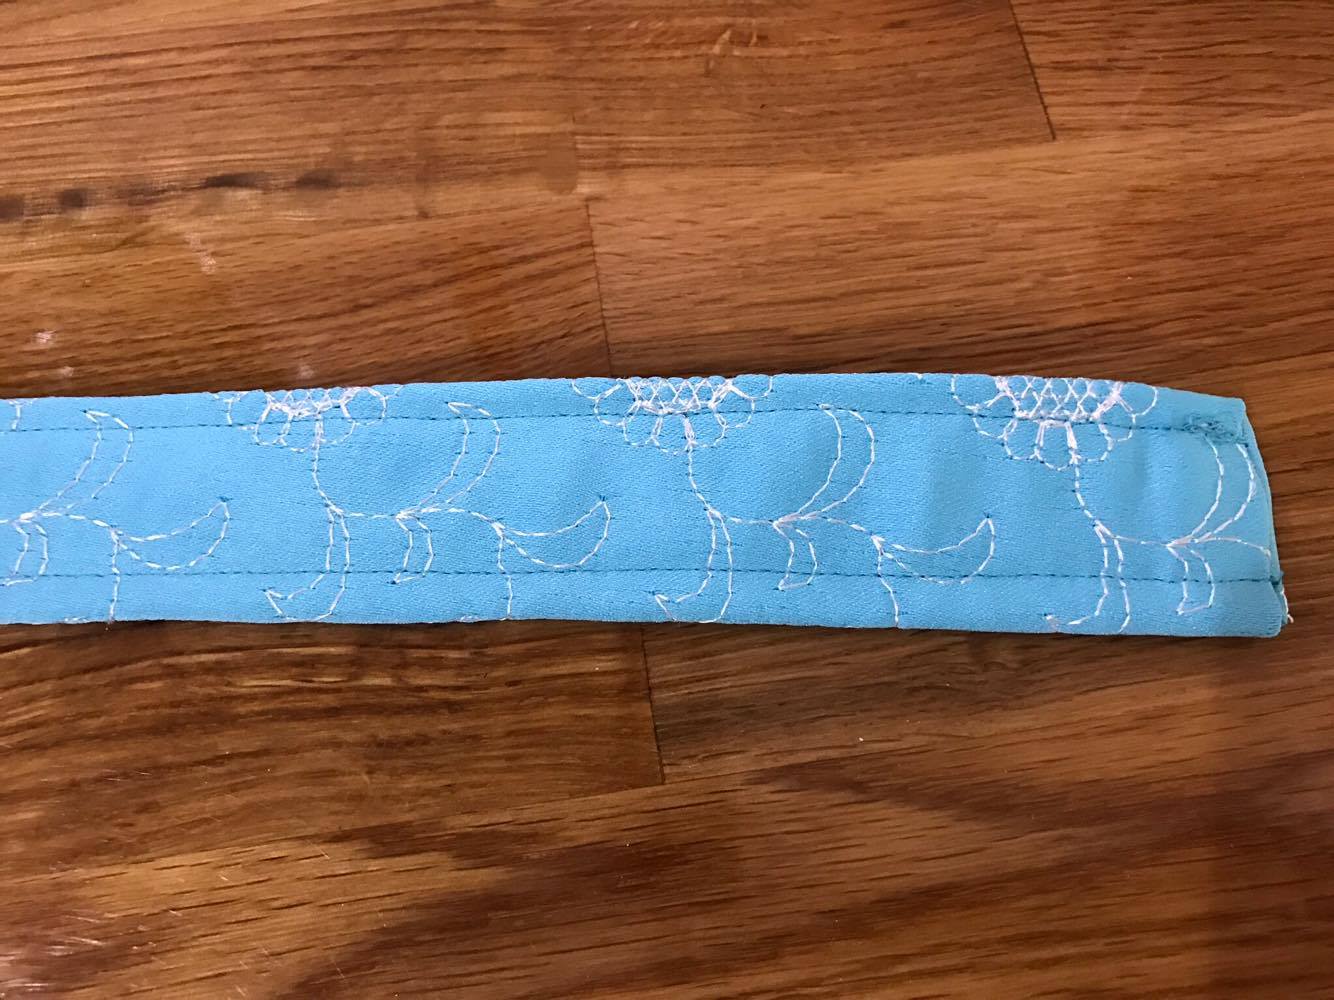
Sew along both sides all the way down the strap. Repeat with the second strap.
Now you're ready to mark the strap placement on the bag. First, find the center front and center back of the bag, and mark both points with pins.
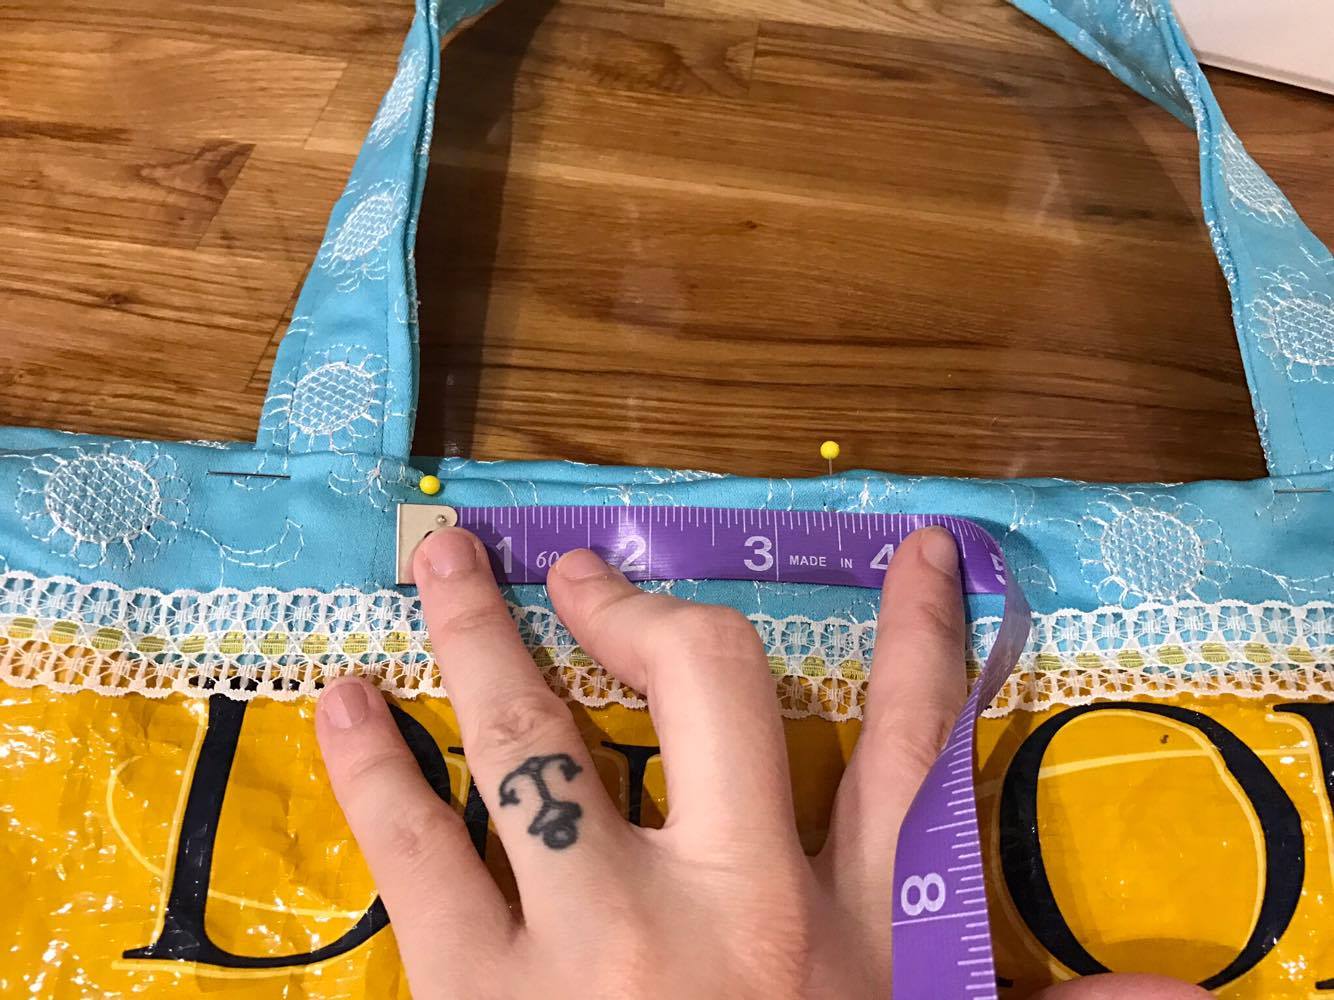
Measure over 3.5" from the center pin, and place the inside edge of a strap at that point on the INSIDE of bag. Pin in place.
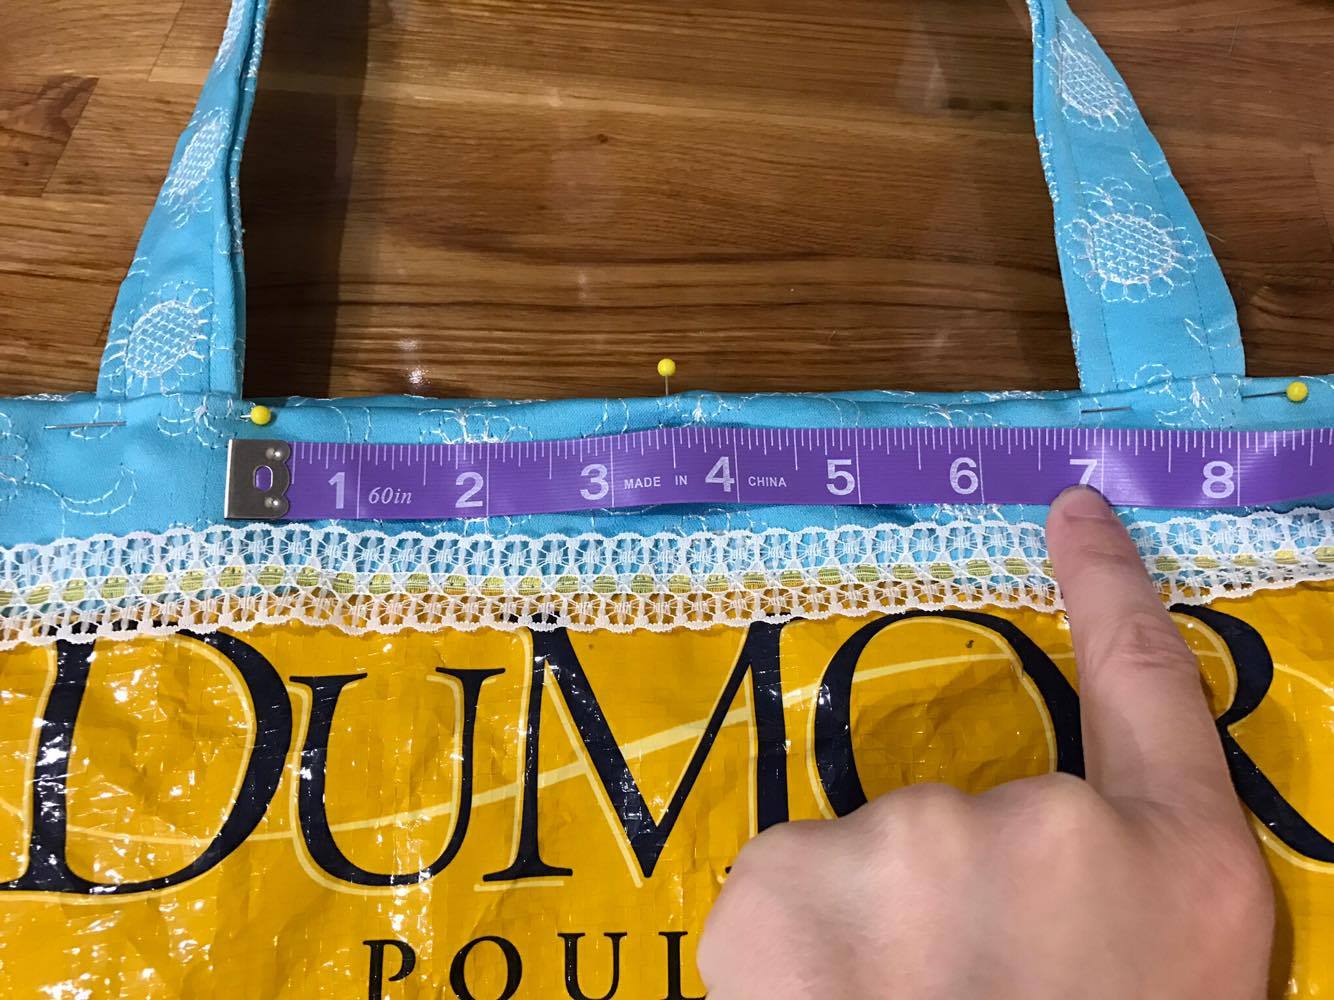
Do the same on the other side so there is 7" between the two ends of the strap, as shown above. Repeat with the other strap on the back of the bag.
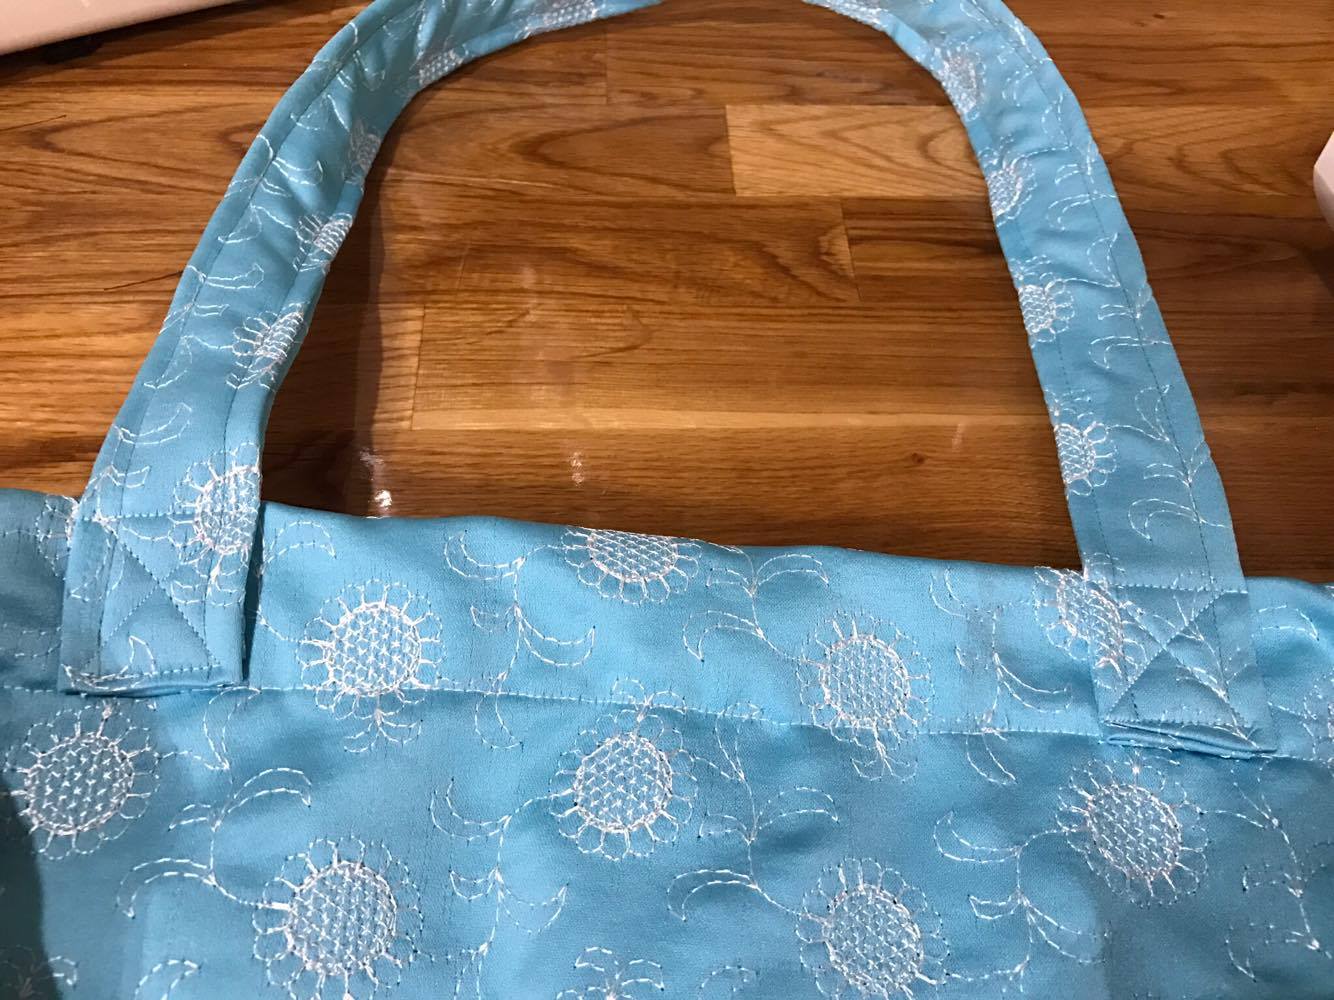
Sew an X over the end of each strap, as shown above.
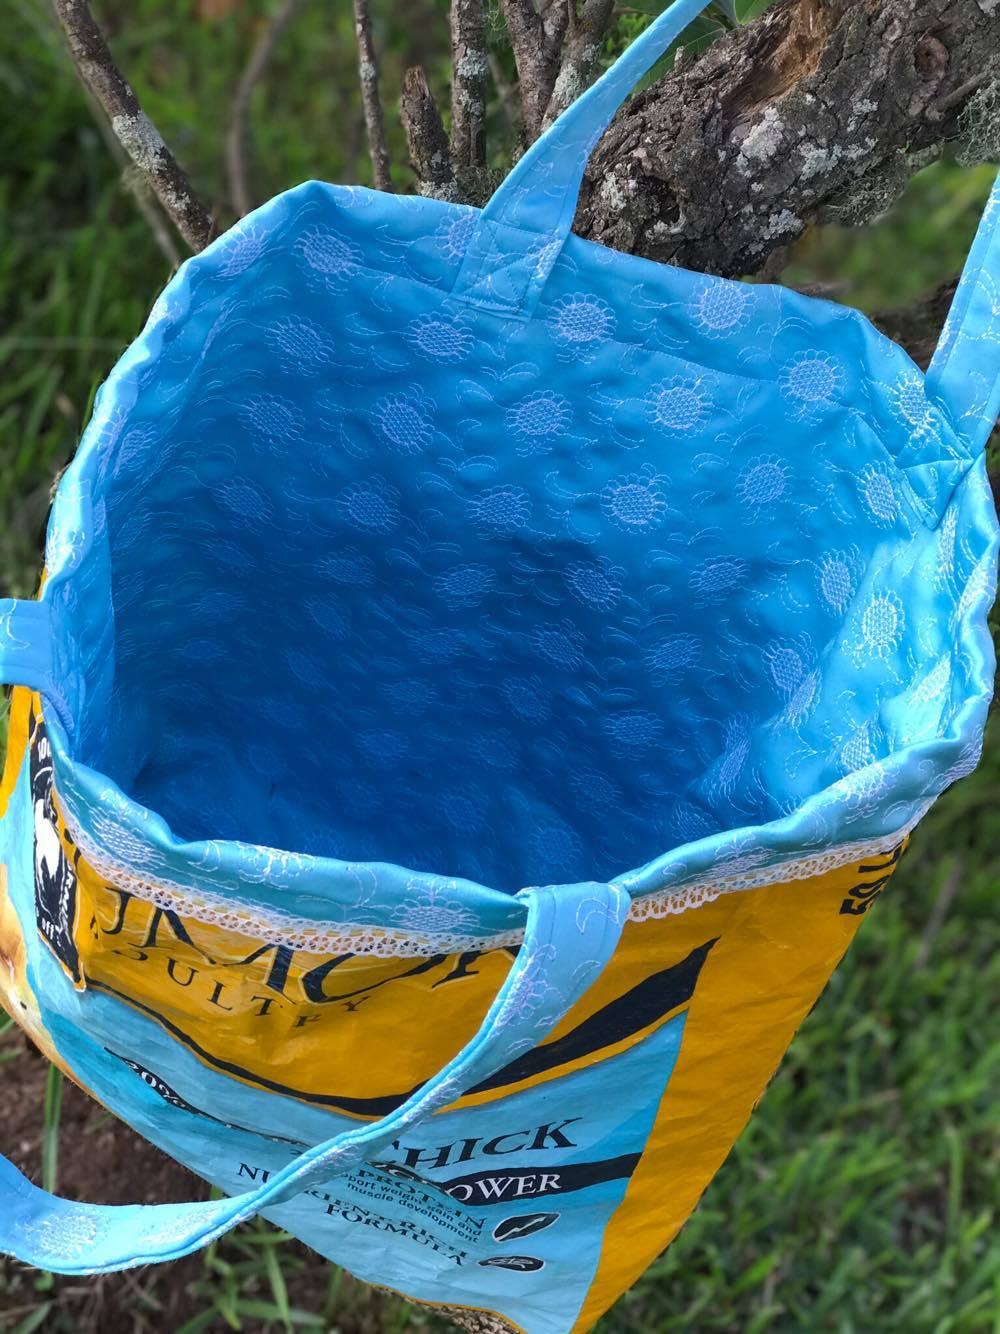
Your bag is now complete! And not only is it adorable, but it's also super sturdy!
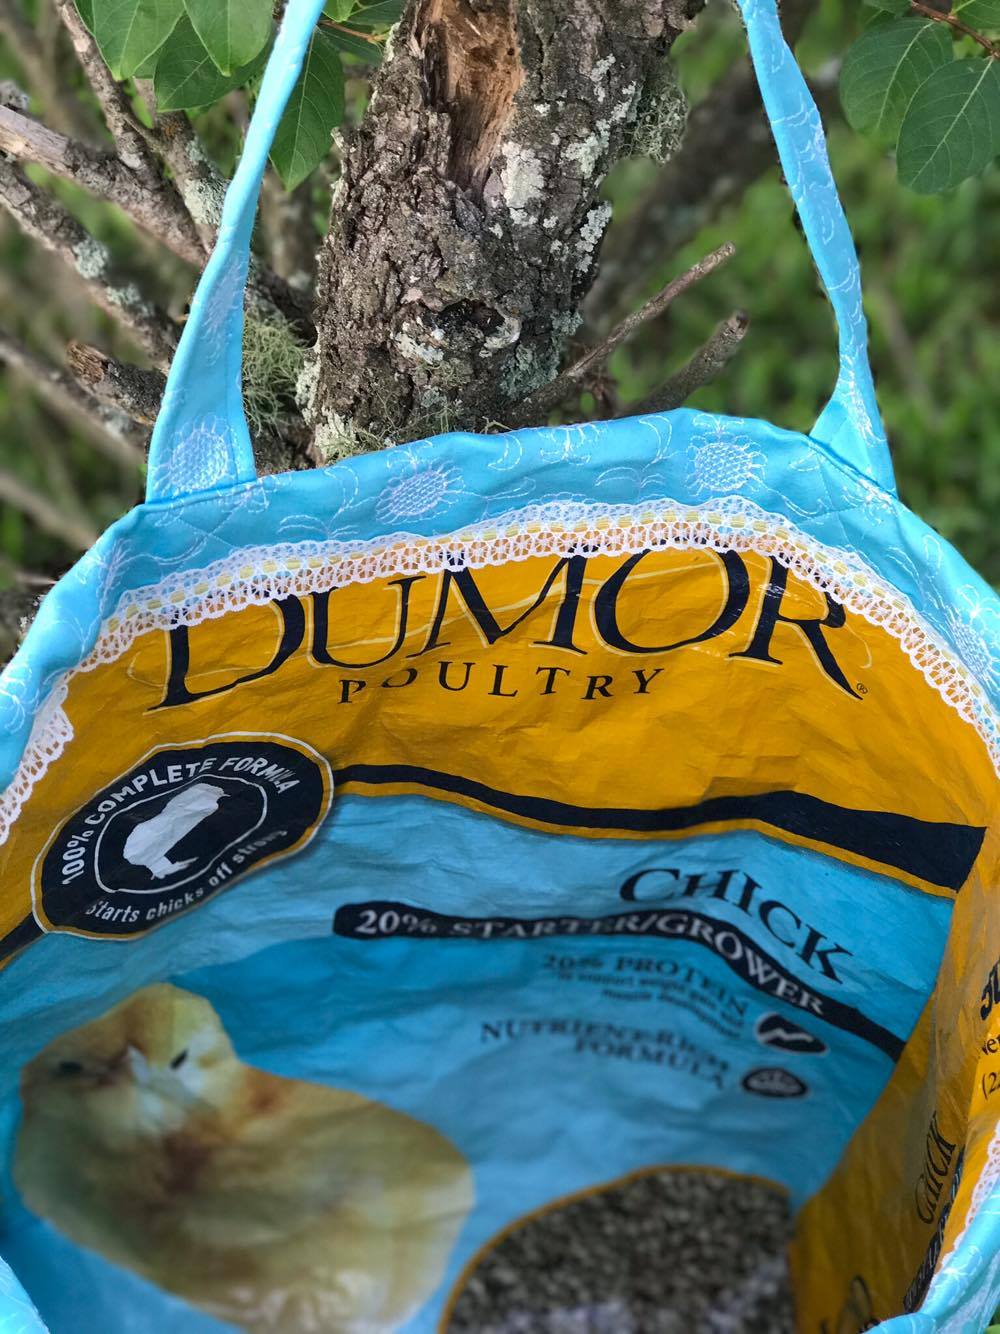
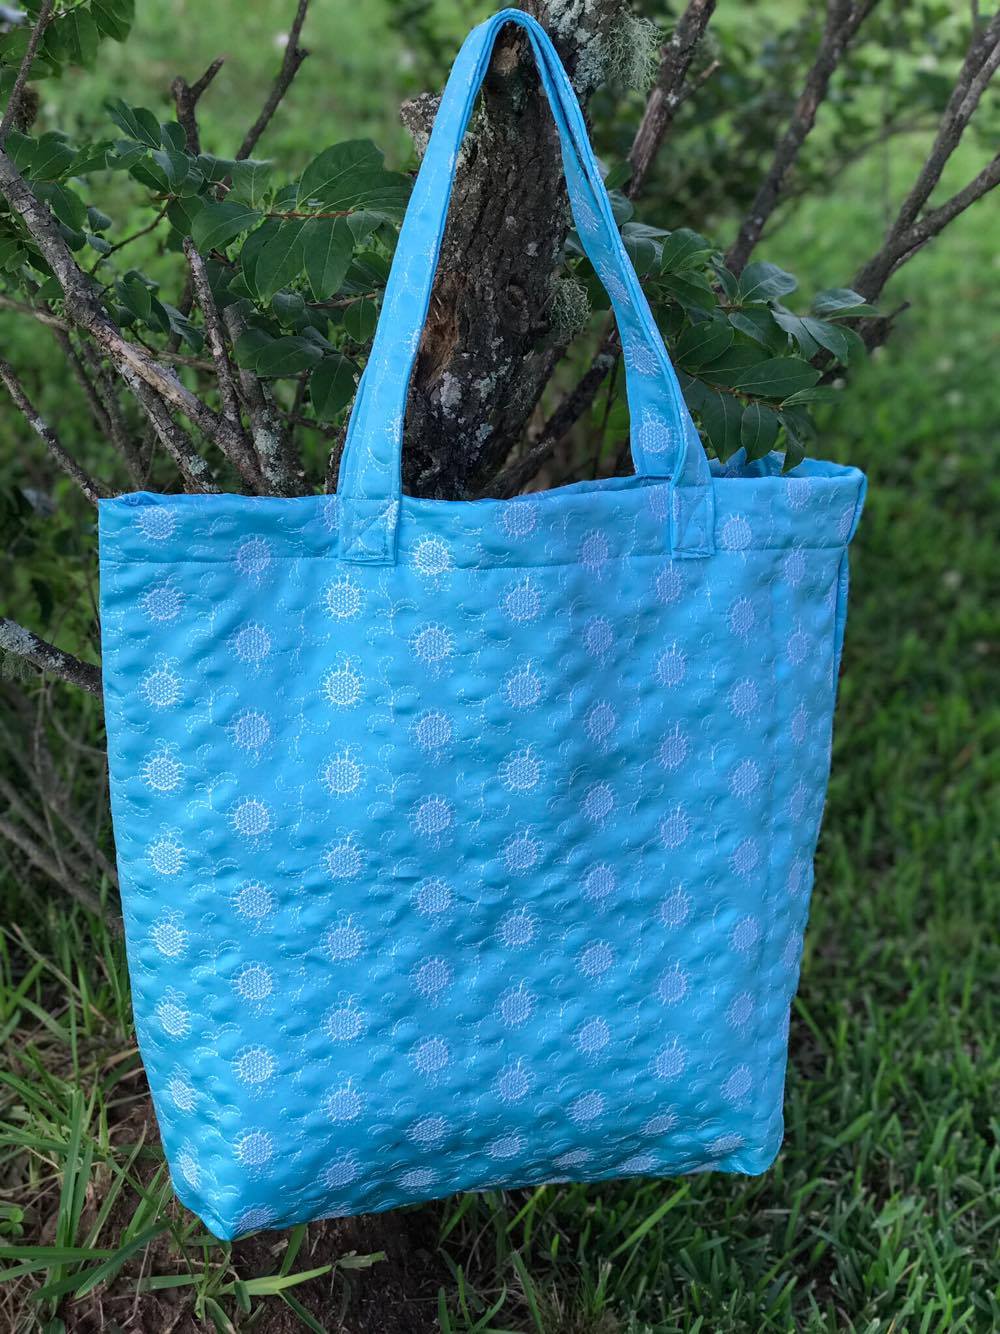
Oh, and remember how we said the bag is reversible? If you flip it inside out, you can put wet items on the inside of the bag! So cool! That's it for our tutorial. You're all set to make your own feed tote bags! We hope you find them as fun and useful as we do. If you feel like sharing, we would love to see photos when you're done making yours. A huge thank you to Tosha for this awesome tutorial! Let's Create! ~ Kristen