
Posted by Kristen Nelson on 15th Nov 2021
How to Make an Opening for Nickolas' Drop-Bottom PJs
Did you see our brand new Nickolas' Drop-Bottom PJ's pattern? It's super adorable for both babies and kids. My own older kiddos are even requesting them in adult sizes!


We love the traditional drop bottom kiddo look that makes these PJ's impossible to resist a giggle. When we first designed Nickolas' PJ's, the drop bottom was just a faux flap to look cute. As we got close to release, however, some of our testers begged to make the panel functional for those perfect photo ops. So although you can still make the PJ's the easier faux panel way (and some kids may prefer it), today's blog post gives you a new option for Nickolas:

A functional drop-bottom panel! My little guy loves this version.
The panel can fasten up with either buttons or snaps, so if you're new to either don't worry because the pattern includes tips and video blog posts to help out beginners.
Let's get started with our tutorial!
First, complete the Nickolas' PJ's pattern as instructed. You can create the bottom opening either right after Step 12 (there's a note inside the pattern at that point, with a link to this blog post) -OR- you can even wait until you have the PJ's fully sewn and add it at the end. (That's how I did it today because mine were already made.)

Cut one piece of fusible interfacing that is the same width as the panel piece you cut from the pattern, but 2" shorter. (Shorter length, same width.)
For example, if your panel was 8" x 10", your interfacing piece should be 6" x 10".
Note: You can use any "weight" of interfacing. I normally use medium but for today's blog post I used a heavy one so you can easily see the lines for the tutorial. The purpose of the interfacing is to create stability around the opening and protect the corners from tearing.
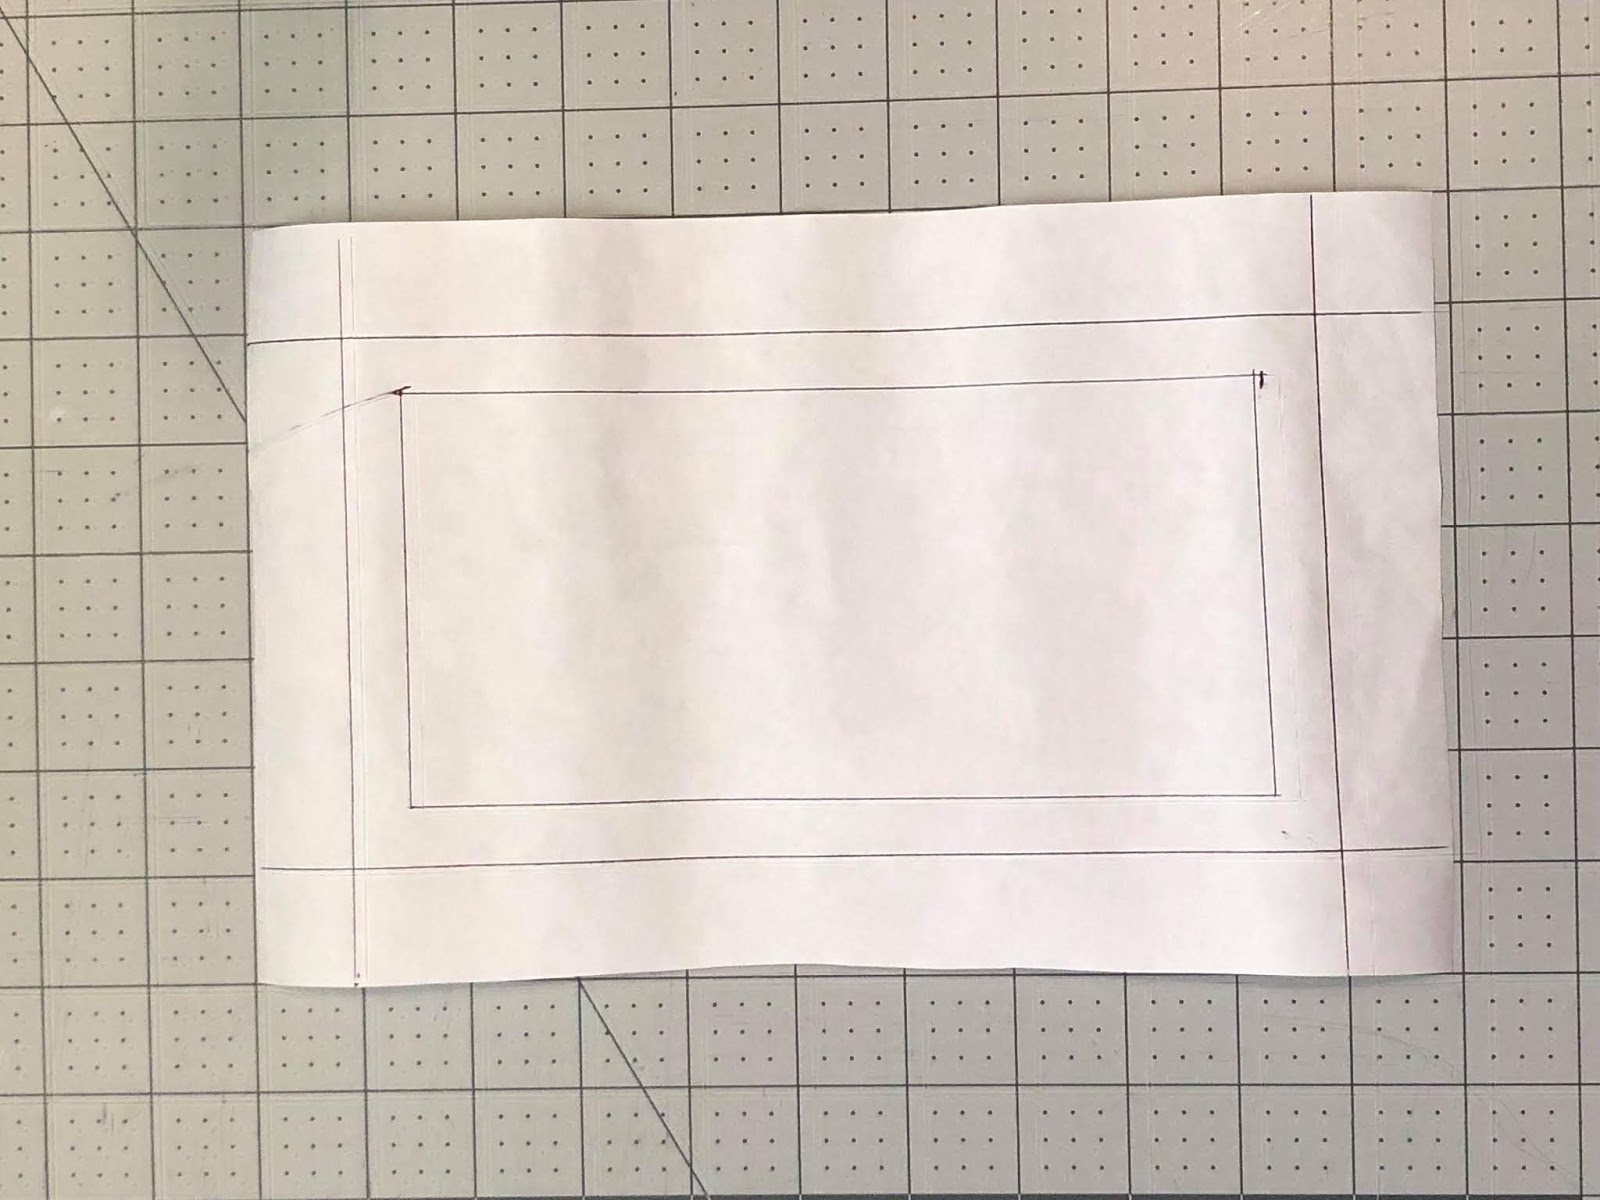
Using a pencil and a ruler, draw a 1" border all around the interfacing.
Then draw another rectangle inside the border that is 1/2" from the first border you drew (1 1/2" total from the outside edge.) See photo above.

Open up the PJ's and lay out on a flat surface. Make sure the bum panel is pulled down away from the PJ's (unfastened). Take the interfacing piece and lay it on the inside of the PJ's with its adhesive side touching the wrong side of the PJ's. Place the bottom edge of the interfacing so it is touching the stitching lines of the panel you sewed previously. Check to make sure you center the interfacing piece from side to side. It may help to mark the center of the interfacing with a pencil and match it to the center seam of the PJ's. See photo above.
Also check to make sure your panel is pointing the right direction. (Most sizes are wider than they are tall. It will match your panel stitching line pretty closely if it's correct.)

Pin the interfacing in place around the edges, being careful not to stretch the fabric. You want your opening to be a straight rectangle rather than distorted. This may take some working to get it flat, especially on the smaller sizes.
Check to make sure the bottom of the interfacing is right next to the panel stitching, and that all the extra layers behind such as sleeves and panel are completely out of the way.

VERY CAREFULLY use an iron to adhere the interfacing to the inside of the PJ's. It's very important that you be aware of what the iron is touching - it can melt pins and fleece and even some bias tapes! Use a warm rather than hot iron if your interfacing will allow, and start ironing at the bottom and work your way up, removing pins as you go. This isn't a difficult step - it's just very important to be careful.
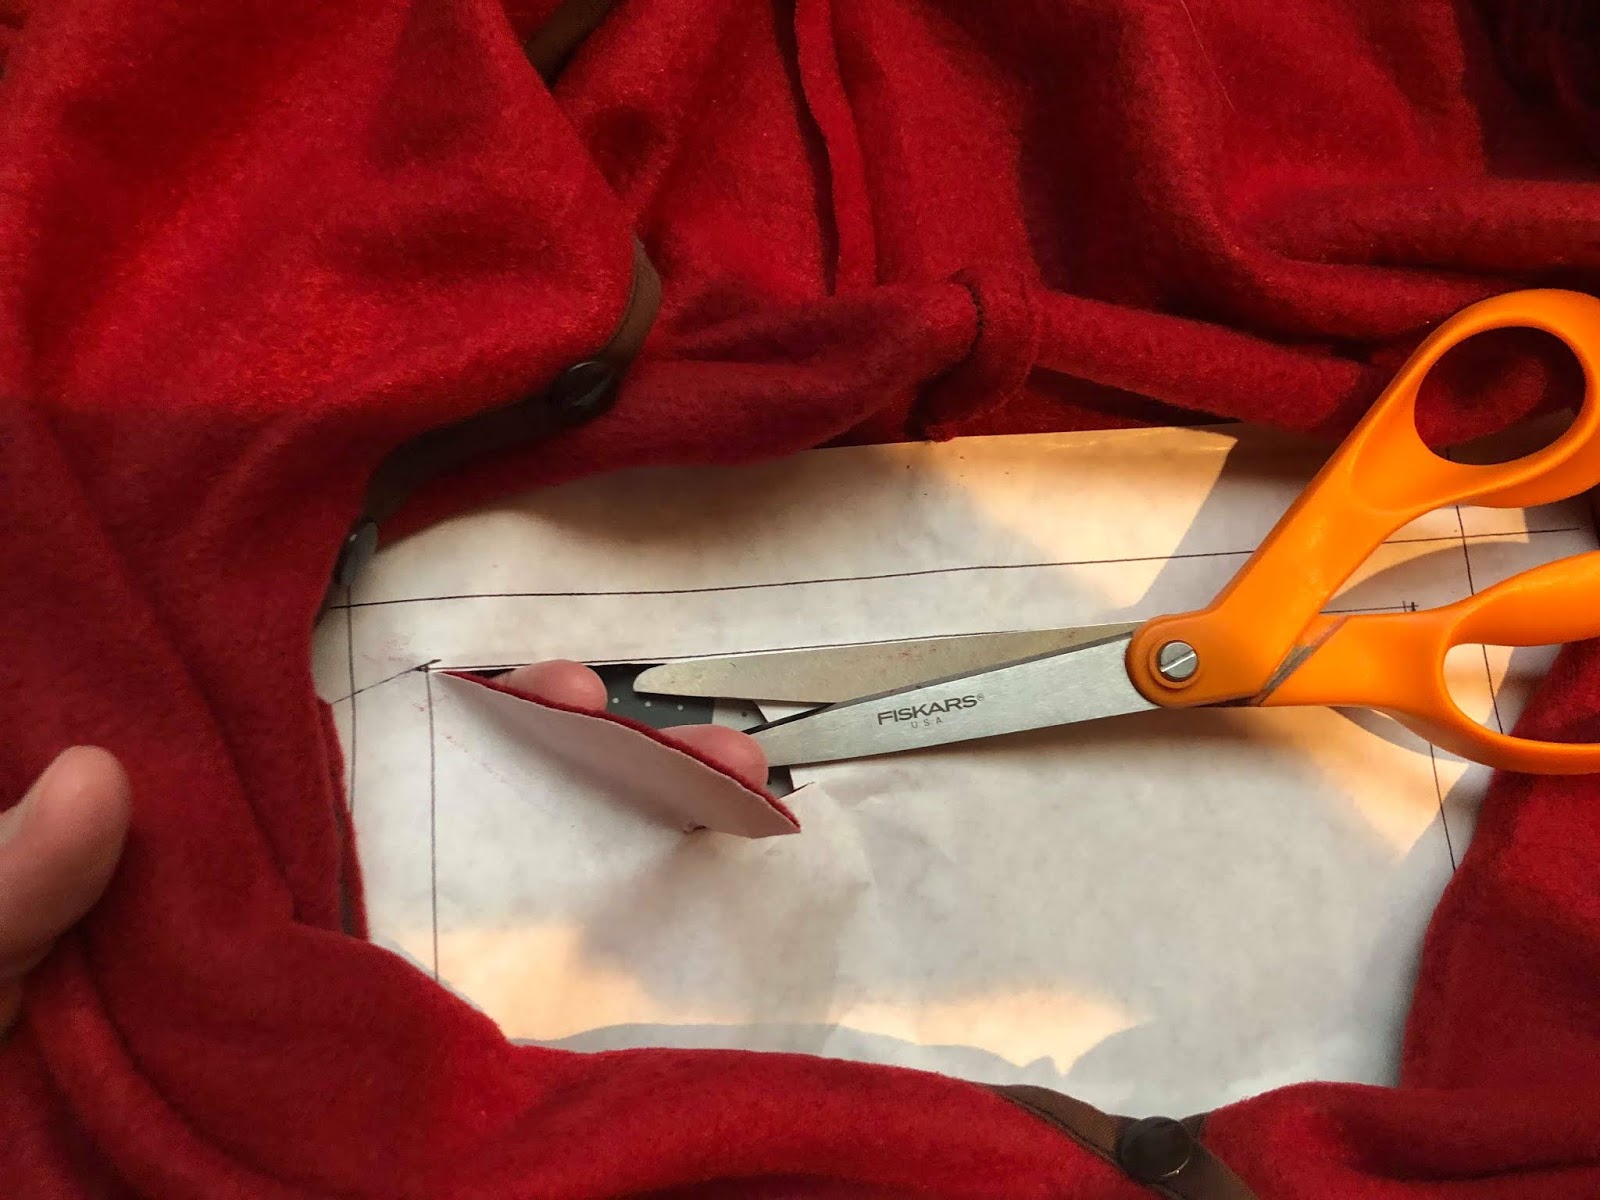
Once the interfacing is secured, check again to make sure the sleeves and back panel are out of the way. The use scissors to cut into the center of the interfacing and fabric, as shown above. Start cutting somewhere in the center and then cut along the innermost lines you drew, cutting out the smallest rectangle. See photos above and below.

When you're done, there should be a rectangle cut out of the interfacing and fabric, as shown above. Do NOT cut along the larger border though!
You can discard the piece you cut out.
On each corner of the hole you just cut, clip a diagonal line that connects the corners of the border lines you drew. Note that it does NOT cut to the very corner of the interfacing. Your closest cut is still 1" from the edge of the interfacing. Do the same in each corner. See photo above.

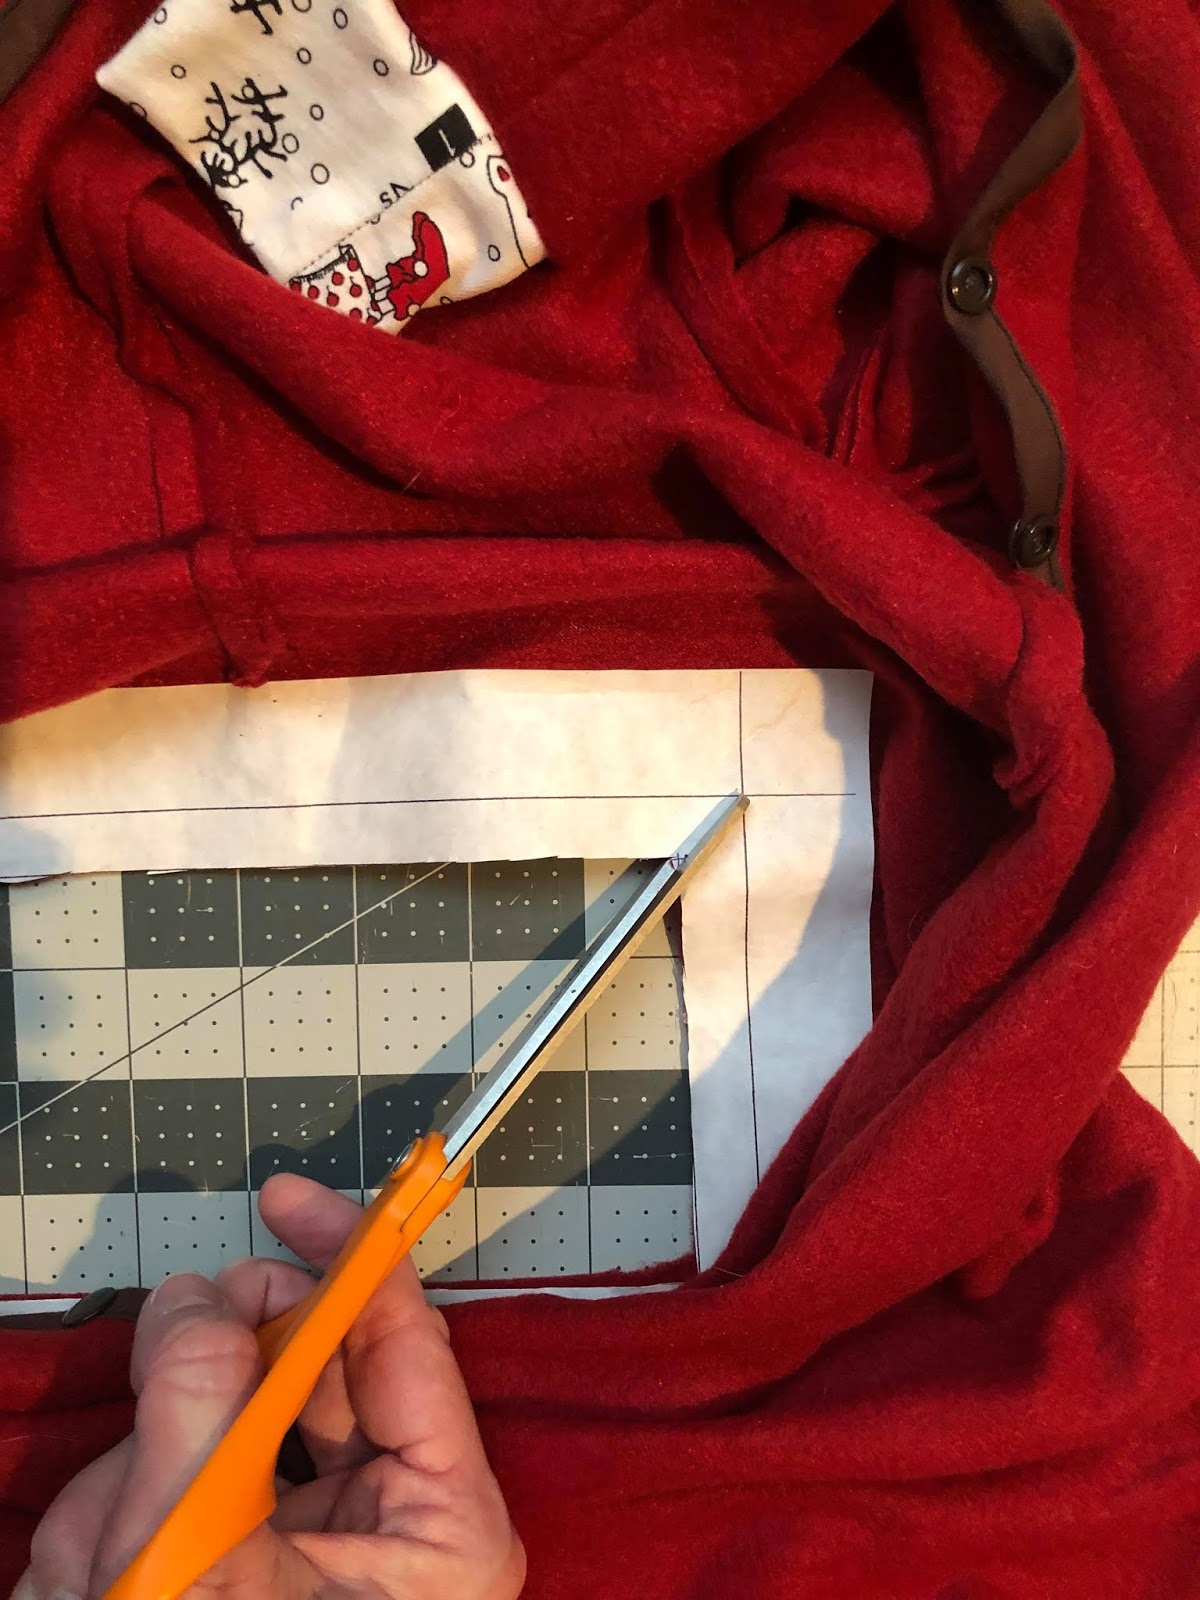
On each of the edges of the opening there should now be 1/2" flaps. Fold each 1/2" flap to the inside of the pajamas and use an iron to make the fold straight and crisp.

Pin all four flaps in place. See photo.

Turn the PJ's over so you're looking at the right side in back. You should see a nice opening with folds at the edges, as shown above.

Topstitch the folds in place by stitching 1/8" o 1/4" from the edges, removing the pins as you go.

When you're done, the stitching should create neat and sturdy corners, with no raw edges on the outside of the PJ's.

Add your buttons and vertical holes (or snaps) if you have not already done so. There should be plenty of room above the opening if you placed your interfacing correctly!

Fasten the drop bottom panel. The opening you just made on the PJ's should be fully covered by the panel.


Now you're all set to make those Christmas memories! Pull out the camera for an impromptu photo shoot with your little ones -- your friends and family will love them!
Let's Create! ~ Kristen