Posted by Kristen on 3rd Jul 2024
Patriotic Flag Pillow
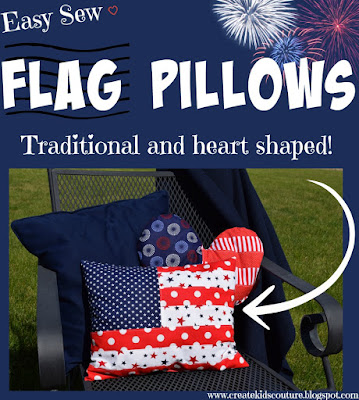
Memorial Day is a big deal in my community (and hopefully yours too) and I love to decorate for the occasion. Many of the families here have been around for generations and we have a lot of veterans to honor. We go around to visit the cemeteries decorated with flags, and I like to make it meaningful for my kids as well. I thought it would be fun to whip up some flag pillows for our house for Memorial Day, and of course these will be perfect for the 4th of July and other occasions too!
Aren't they fun?! You can use solid fabrics or prints, and this is even great as a scrapbuster after making those cute patriotic outfits for your kids. The more you mix up the prints, the more whimsical they will look. I think it would even be cute to sew the seams inside out and make it a rag pillow. I will have to try that on my next one!
With today's free pattern you will learn how to make both the traditional rectangle shape and the heart shape pillow. The steps aren't hard at all and we have saved you the headache of all that measuring. You can just cut and sew!
For this project, you will need 1/2 yard blue fabric, 1/3 yard red fabric, 1/3 yard white fabric, and some kind of stuffing to fill the pillow. When choosing fabrics, don't be afraid to mix up the prints, keeping the base colors red, white, and blue.
The traditional and heart shaped pillows both start with the same base cuts and construction. Here is what you need to cut:
Blue Fabric: (Cut 1) 13" x 16"
(Cut 1) 7.75" x 7.75"
Red Fabric: (Cut 2) 2.5" x 9"
(Cut 2) 2.5" x 16"
White Fabric: (Cut 2) 2.5" x 9"
(Cut 1) 2.5" x 16"
When you are done cutting your pieces, your pile should look something like the photo above.
Now you're ready to sew! We will be using a 3/8" seam allowance for all steps.
Take your four smaller strips and place them in the order above, starting with red at the top.
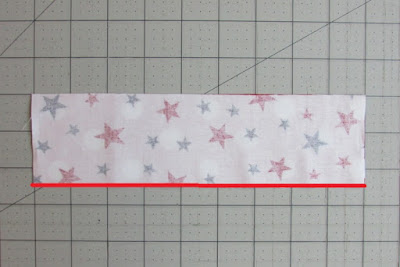
Take the top two strips and match them with right sides together, lining up the bottom of the red strip with the top of the white strip. Sew them together along that edge using a 3/8" seam allowance.
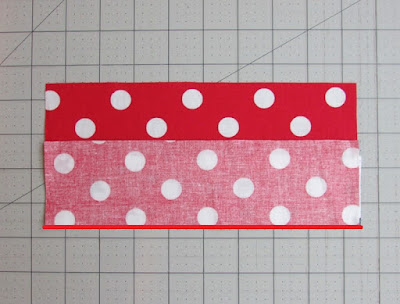
Open them up with the red again at the top. Topstitch the seam toward the white strip by sewing 1/8" below the seam.
Now take the third strip and match its top with the bottom of the white, with right sides together. Sew them together along that edge, as shown in red above.
Open them up and topstitch the seam downward again. This time the topstitching will be on the red piece.
Take the fourth piece and do the same, sewing it to the bottom of the third and then topstitching downward.
Your four short strips should now look something like this.
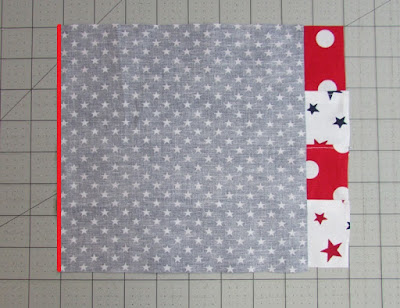
Take the smaller blue square and match it up with the left side of your sewn strips, with right sides together. Check to make sure you still have a red strip at the top and a white strip at the bottom! Sew the pieces together along the side edge, as shown in red above.
Open it up and topstitch the seam toward the strips by sewing 1/8" from the seam.
Set this part aside for now.
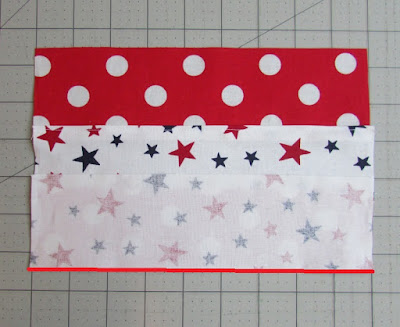
Take the three longer strips now and arrange them with the red on top and bottom, with white in the middle.
Sew the three long strips together as you did the short ones earlier. Be sure to topstitch each seam downward.
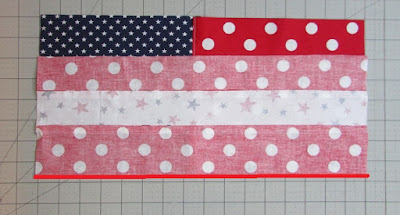
Now you're ready to put the top part together with the long strips. Lay them out as shown above.
Match up the corresponding edges with right sides together, as shown above. You may want to pin the edges together in this step. Sew the pieces together using a 3/8" seam allowance.
Flip it open and topstitch the new seam downward. You should now have a great-looking flag front pieced together!
**If you are making the rectangle pillow, you can skip past the next two photos. If you are making the heart shaped pillow, please continue below.**
To make the heart shaped pillow, you will need to print the heart template.
Tape the printed pieces together by overlapping the page lines, and then cut out the paper heart.
Lay the template on the fabric and use either a rotary cutter and mat, or scissors and pins, to cut around the template.
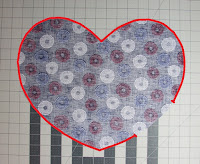
When you are done cutting, your front pillow should now look like this.
Use the template to cut a heart out of your remaining large blue rectangle too, creating the back of the pillow.
**Both versions will now continue on with the same steps.**
Take the large blue back piece and lay it on the front with right sides together. Pin in place all around the edges.
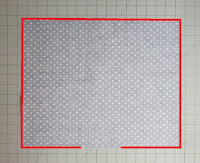
Sew around all the sides of the pillow using a 3/8" seam, being sure to leave a 4" opening at the place shown in red above.
After sewing, clip the corners and points close to the stitching to reduce bulk. On the heart pillow, clip the seam allowances all around the curves. If you need extra help knowing how to clip corners and curves, you can see this blog post.
Using the opening, turn the pillow right side out. Use a creaser tool and iron to make all the edges and corners nice and crisp. In the area of the opening, iron the seam allowances under so no raw edges are out. It should be looking pretty fabulous at this point!
Fill your pillow with the stuffing. It helps to add small amounts to the corners first and then work toward the center. On the bottom edge, be sure to fill the pillow enough and then use pins or fabric clips to hold the opening shut.
Sew the opening shut along the bottom. You can either sew by hand or you can use your machine to sew 1/8" from the edge. Keep it a tidy stitch so it doesn't throw off the final look of your pillow!
And that's it! Your pillow is done! I absolutely LOVE how these turned out. And quite honestly, the photos don't do them justice. I can't wait until you see how fun they are in person. My kids can't keep their hands off them and I think the flag pillows might have become a permanent part of our living room decor.
You could make these as super fun and cozy outdoor pillows too, if you make them with weatherproof fabrics. Doesn't this look perfect for a bonfire?!
When you get your pillows made, please come share photos with us in our FB patterns group! Also, be sure to sign up for our newsletter so you can see all of our upcoming free projects and sewing tutorials. Happy Memorial Day Weekend coming up!
Let's Create! ~ Kristen
