
Posted by Meg Hess on 24th Feb 2022
Make Annelaine's Coat with a Quilt and Bias Tape
Have you seen the trend all over social media where people are upcycling quilts to make outerwear? We at CKC are obsessed with this idea! How cool is it to take something old and make it new again, or take something boring and turn it into something gorgeous?
When Annelaine's Warmest Winter Coat went into testing, a few of us became obsessed with hopping onto this trend. Annelaine's felt perfect for trying to upcycle a quilt. I ran to three Goodwill's, determined to find the perfect quilt to upcycle. And I found one... and I can't show it to you because my son is currently asleep under it! It was too hard for me to cut up someone's hard work! One by one, we all succumbed to the same problem. We liked handmade quilts too much to use them. Then, we all had an idea! We all found inexpensive mass-produced quilts or quilted fabric, and the game was back on! And look how cute these kids are!!!
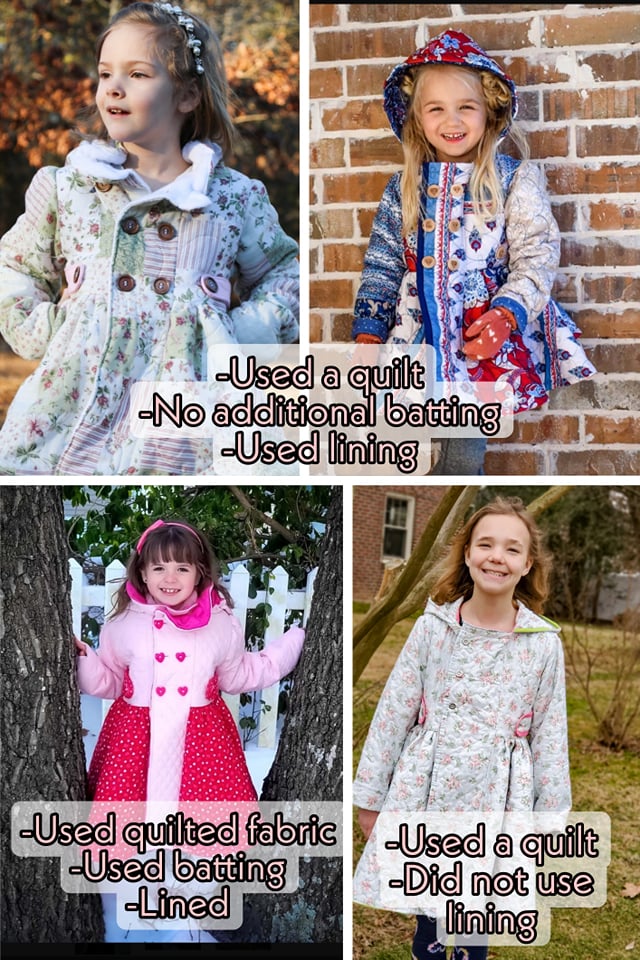
With spring on the way, the other thing I wanted in my daughter's Annelaine was a coat that could transition into spring. Easter can still be pretty cold where I live, so I loved the idea of a gorgeous spring jacket that would look pretty with an Easter dress. The designer of Annelaine, Lindsey, felt the exact same way, and we both worked on versions of Annelaine that wouldn't feel quite as heavy! Although our ideas were different, I absolutely love the results!
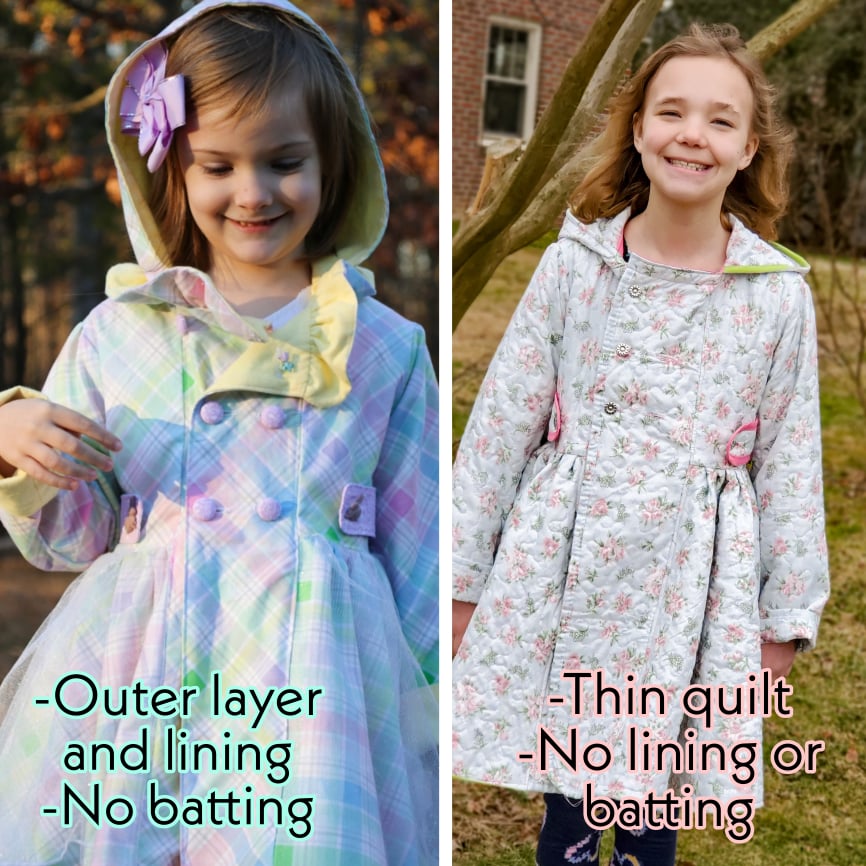
Lindsey's thinner jacket can be made using the instructions in the Annelaine pattern, leaving out the batting. And its darling!
I.... went a little off-book! I used a thin quilted coverlet as my "fabric" and then encased my seams and hems in bias tape! This saved me some time with cutting and created a really unique look! So I thought I would share some tips today so you could so the same!
What you will need:
-A thin quilt or quilted fabric (heavy weight fabric may also work!)
-Double-folded 1/2 inch wide bias tape (for a size 10/12, I needed 3 packs of 3 yards)
-Single folded 1/2 inch wide bias tape (for a size 10/12, I needed about 3 packs of 4 yards)
To begin, I want to operationally define what I mean by a "Hem" and a "Seam."
A seam, for the purpose of this tutorial, is when 2 pieces of fabric are joined together or one piece of fabric is sewn to itself to create a part to the coat. The hood is attached to the coat by a seam. The sleeve is created but folding the sleeve fabric in half and sewing down the seam to make a tube.
A hem, for the purpose of this tutorial, is created to hiding the raw edge of a piece of fabric, normally by turning it under. The bottom of the skirt will need to be hemmed to hide the raw seam. The ends of the sleeves are also hemmed.
Cutting fabric:
I used a quilt for this jacket, but you could also used quilted fabric or even heavy-weight fabric. When cutting out your pattern, you only need to cut out the "outer" fabric (do not cut a lining).
Tip: If you are using a quilt, use the finished edges to your advantage! I cut my sleeves and my placket so that the outer edge was already hemmed!
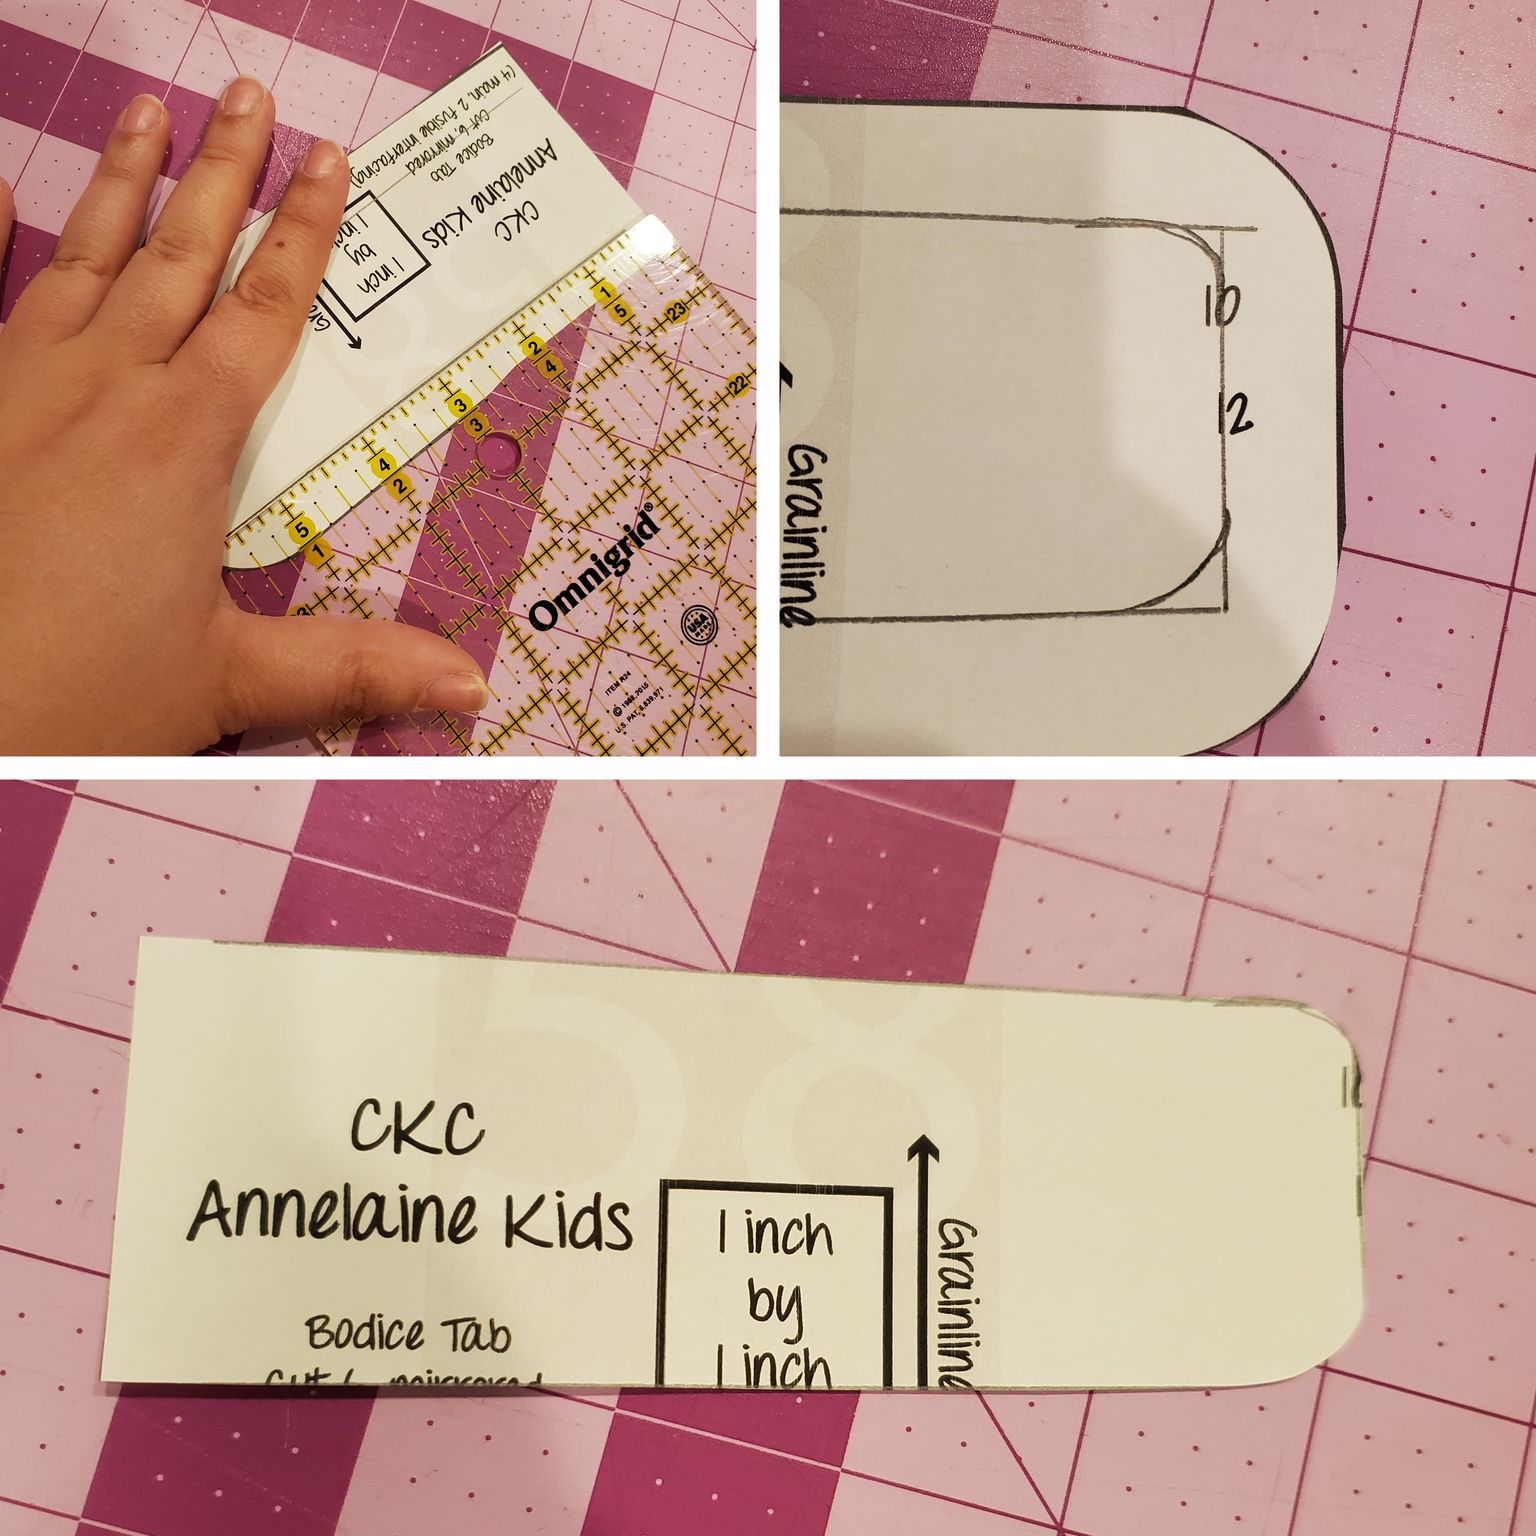
Altering the side tabs:
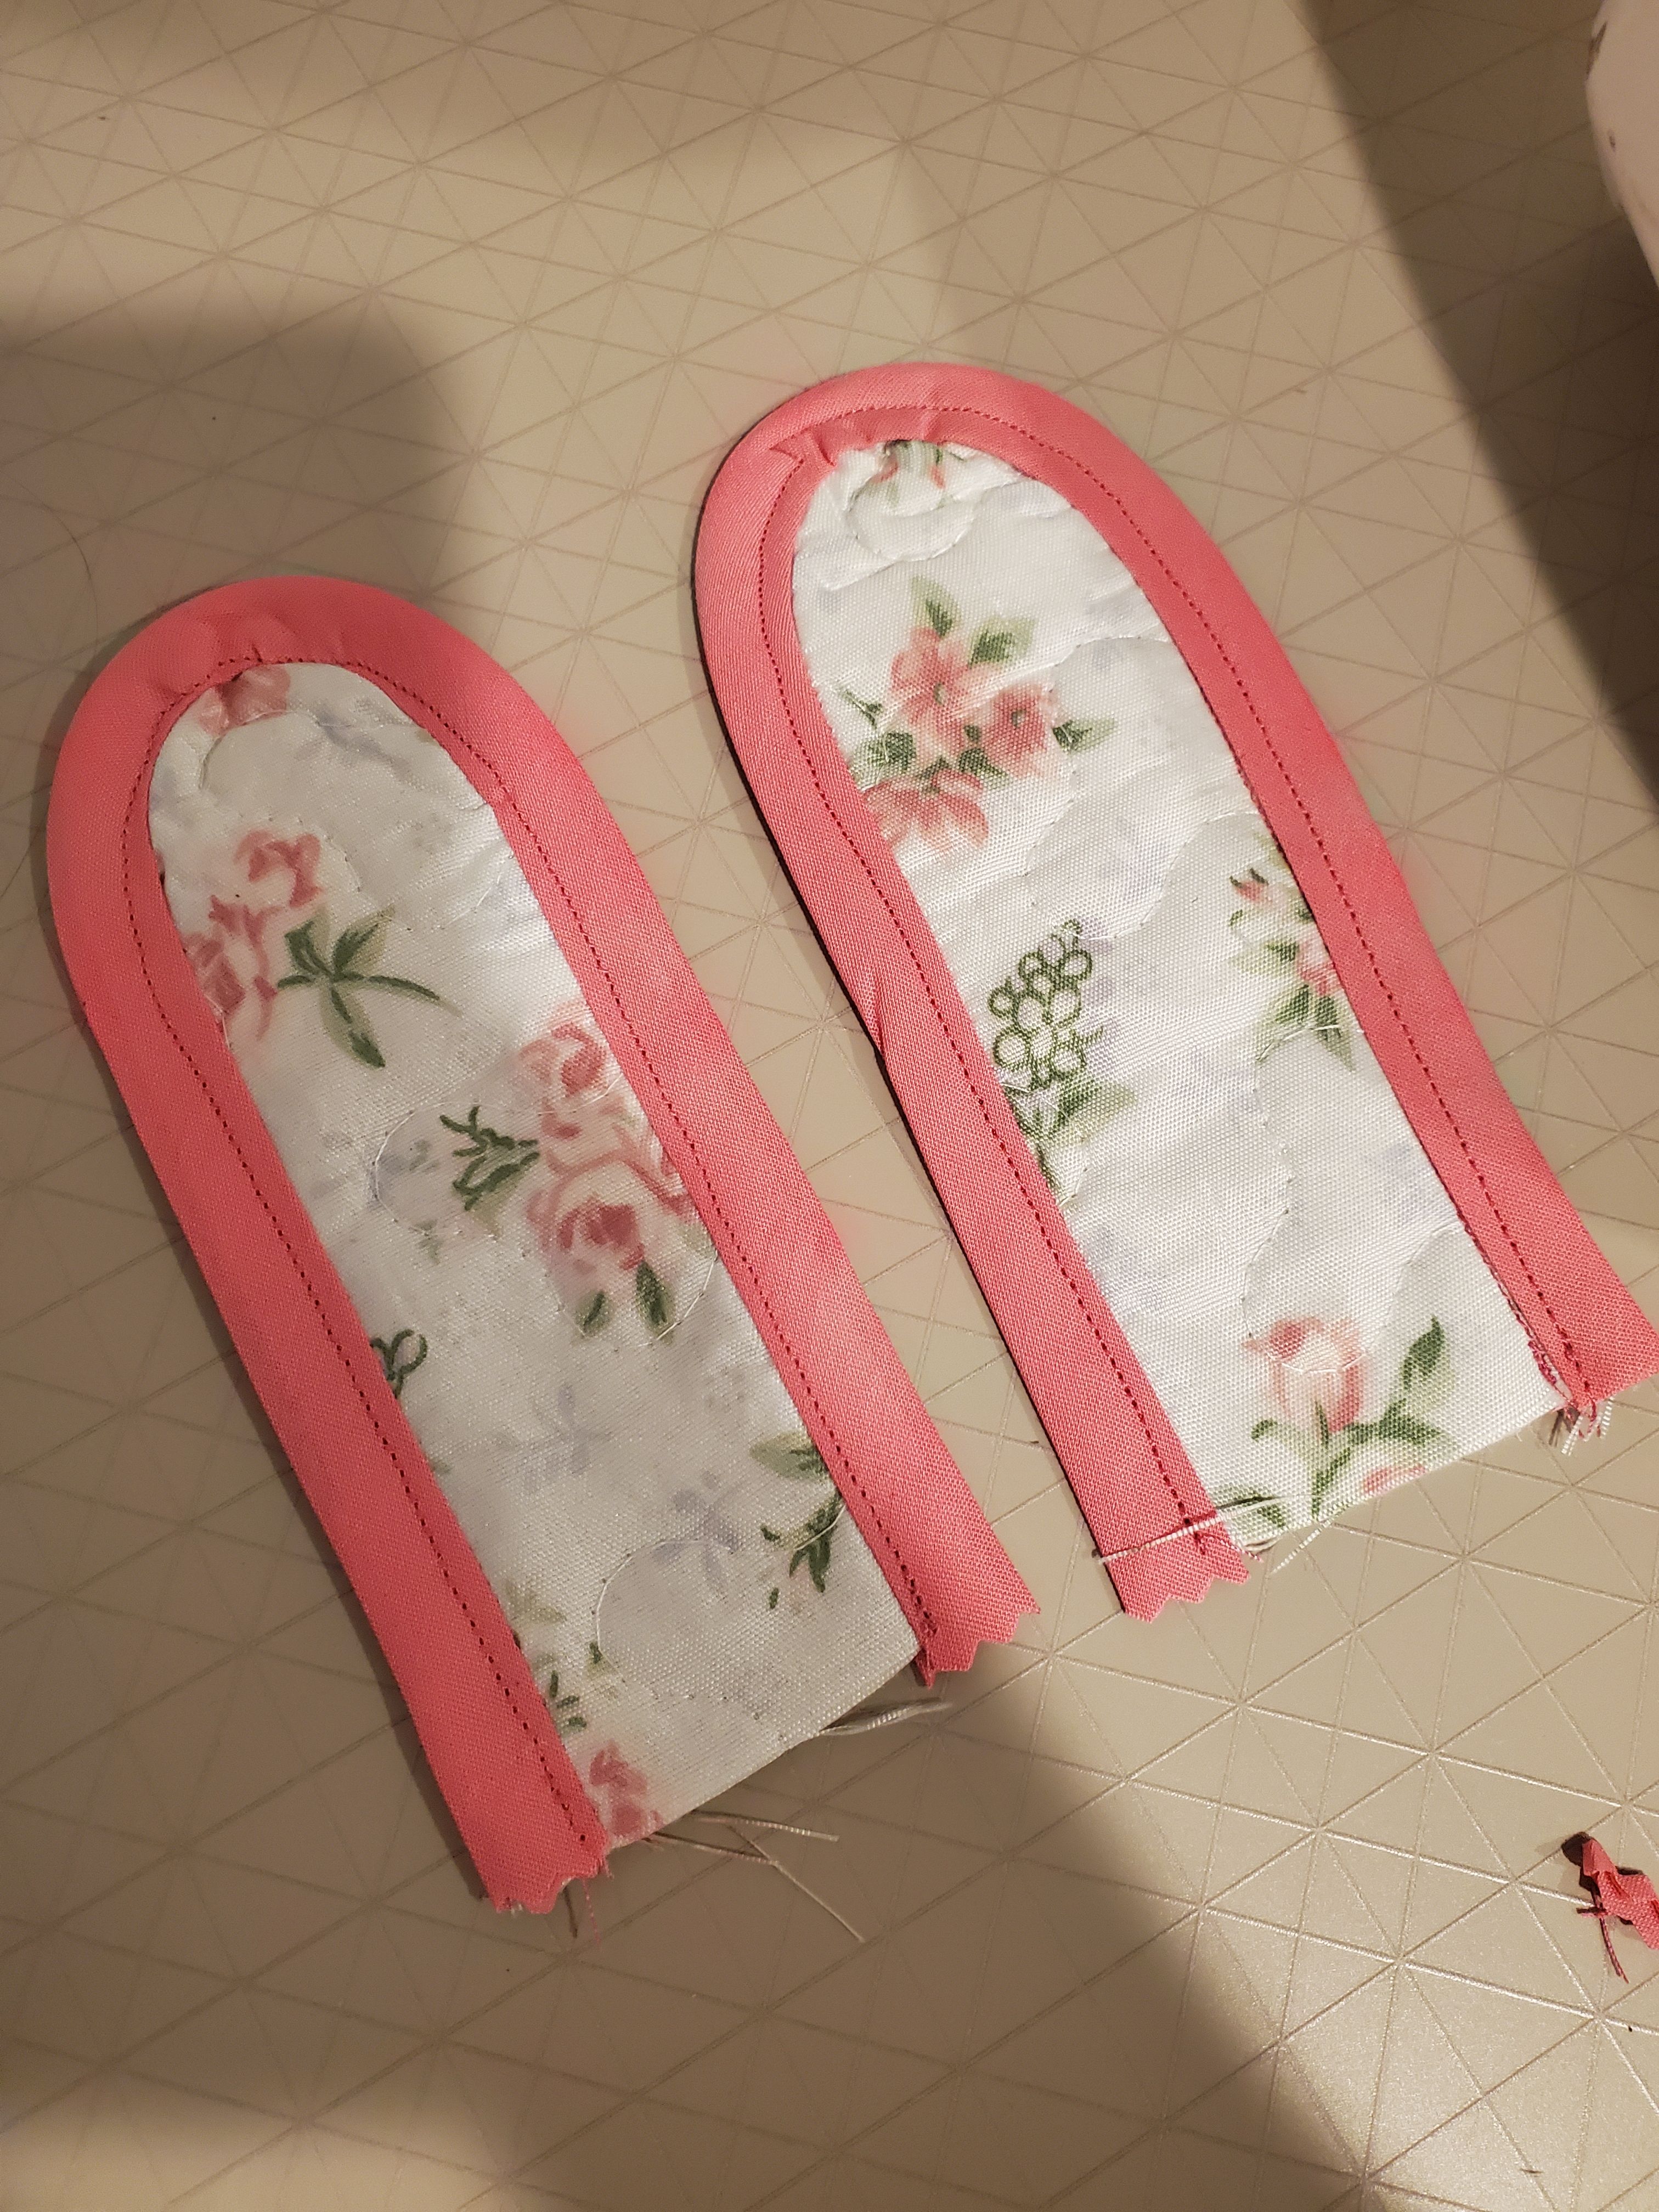
The only pattern piece I needed to modify was the side tab. The side tab under normal circumstances sewn and turned, but since we are using bias tape, we do not need the added seam allowance. To fix this, I measured in from the edges by 1/2" and drew a line. Then I rounded the corners and cut the new tabs.
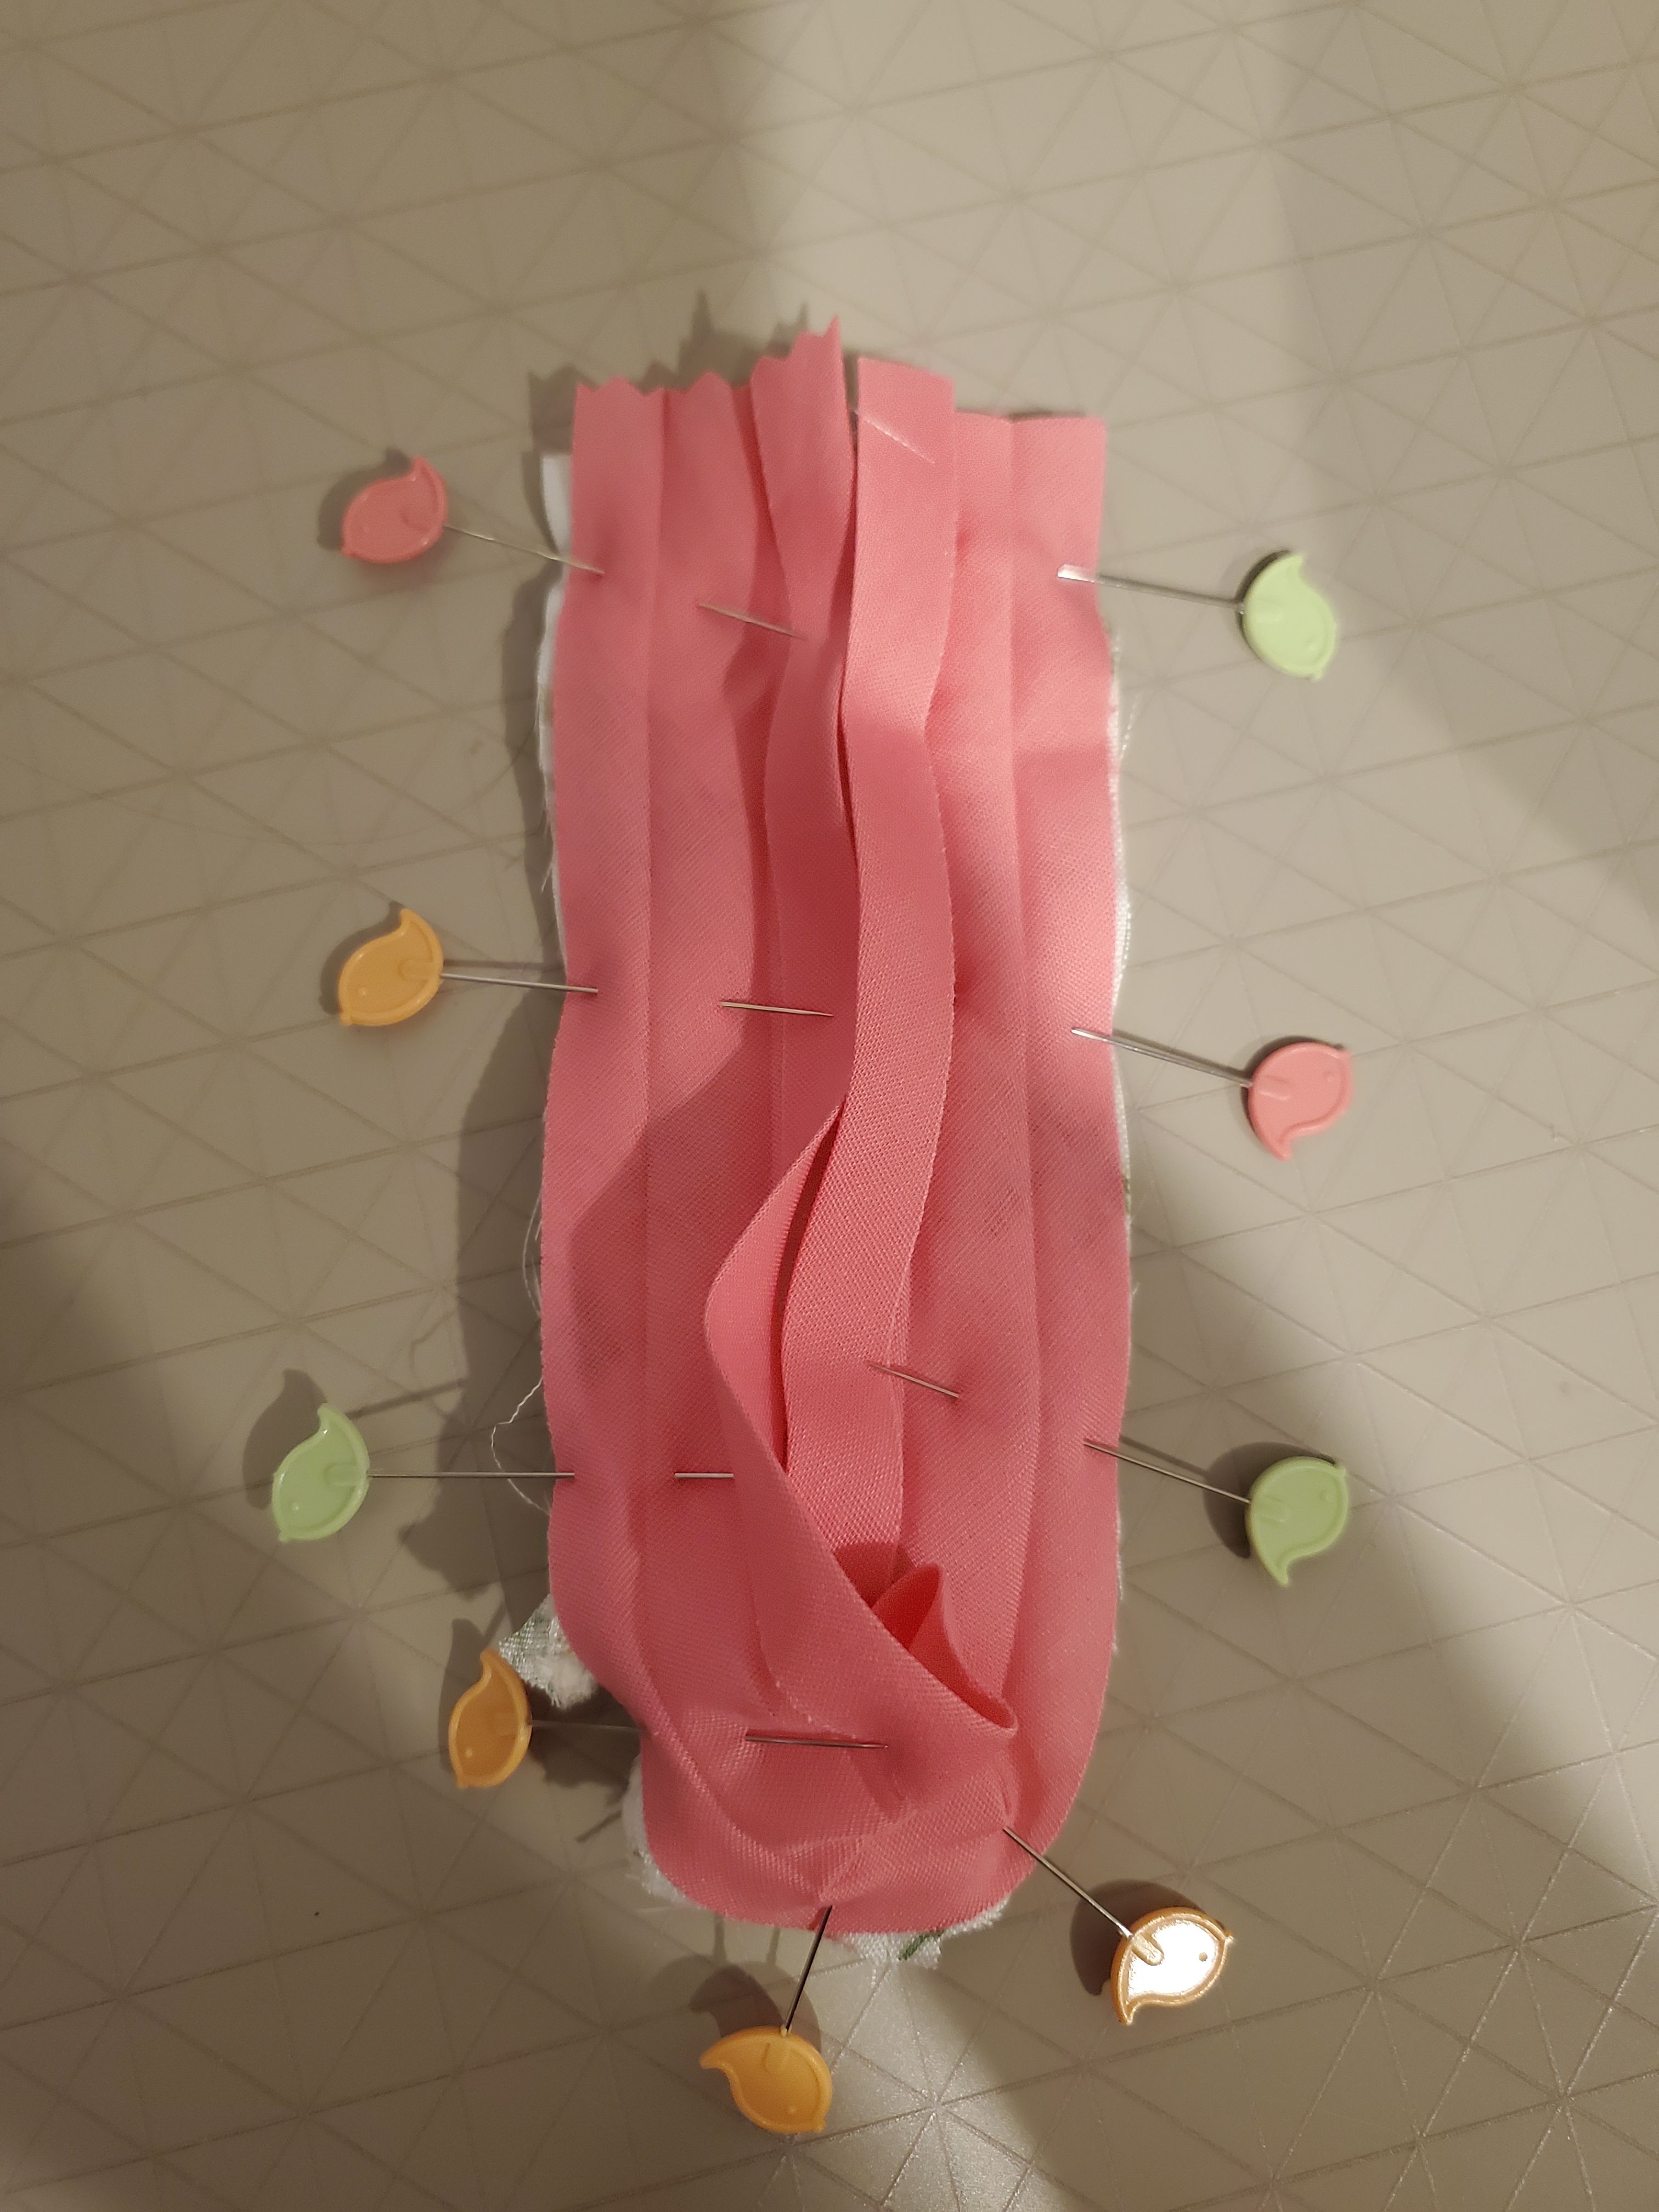
Using double-folded bias tape, we can now finish the edges around our tabs. Open the bias tape up completely and match raw edge of one side of the tape to the raw edge of one of the tabs you cut. Pin the bias tape all the way around the tab.
Sew the bias tape to the tab, stitching in the fold of the bias tape closest to the edge.
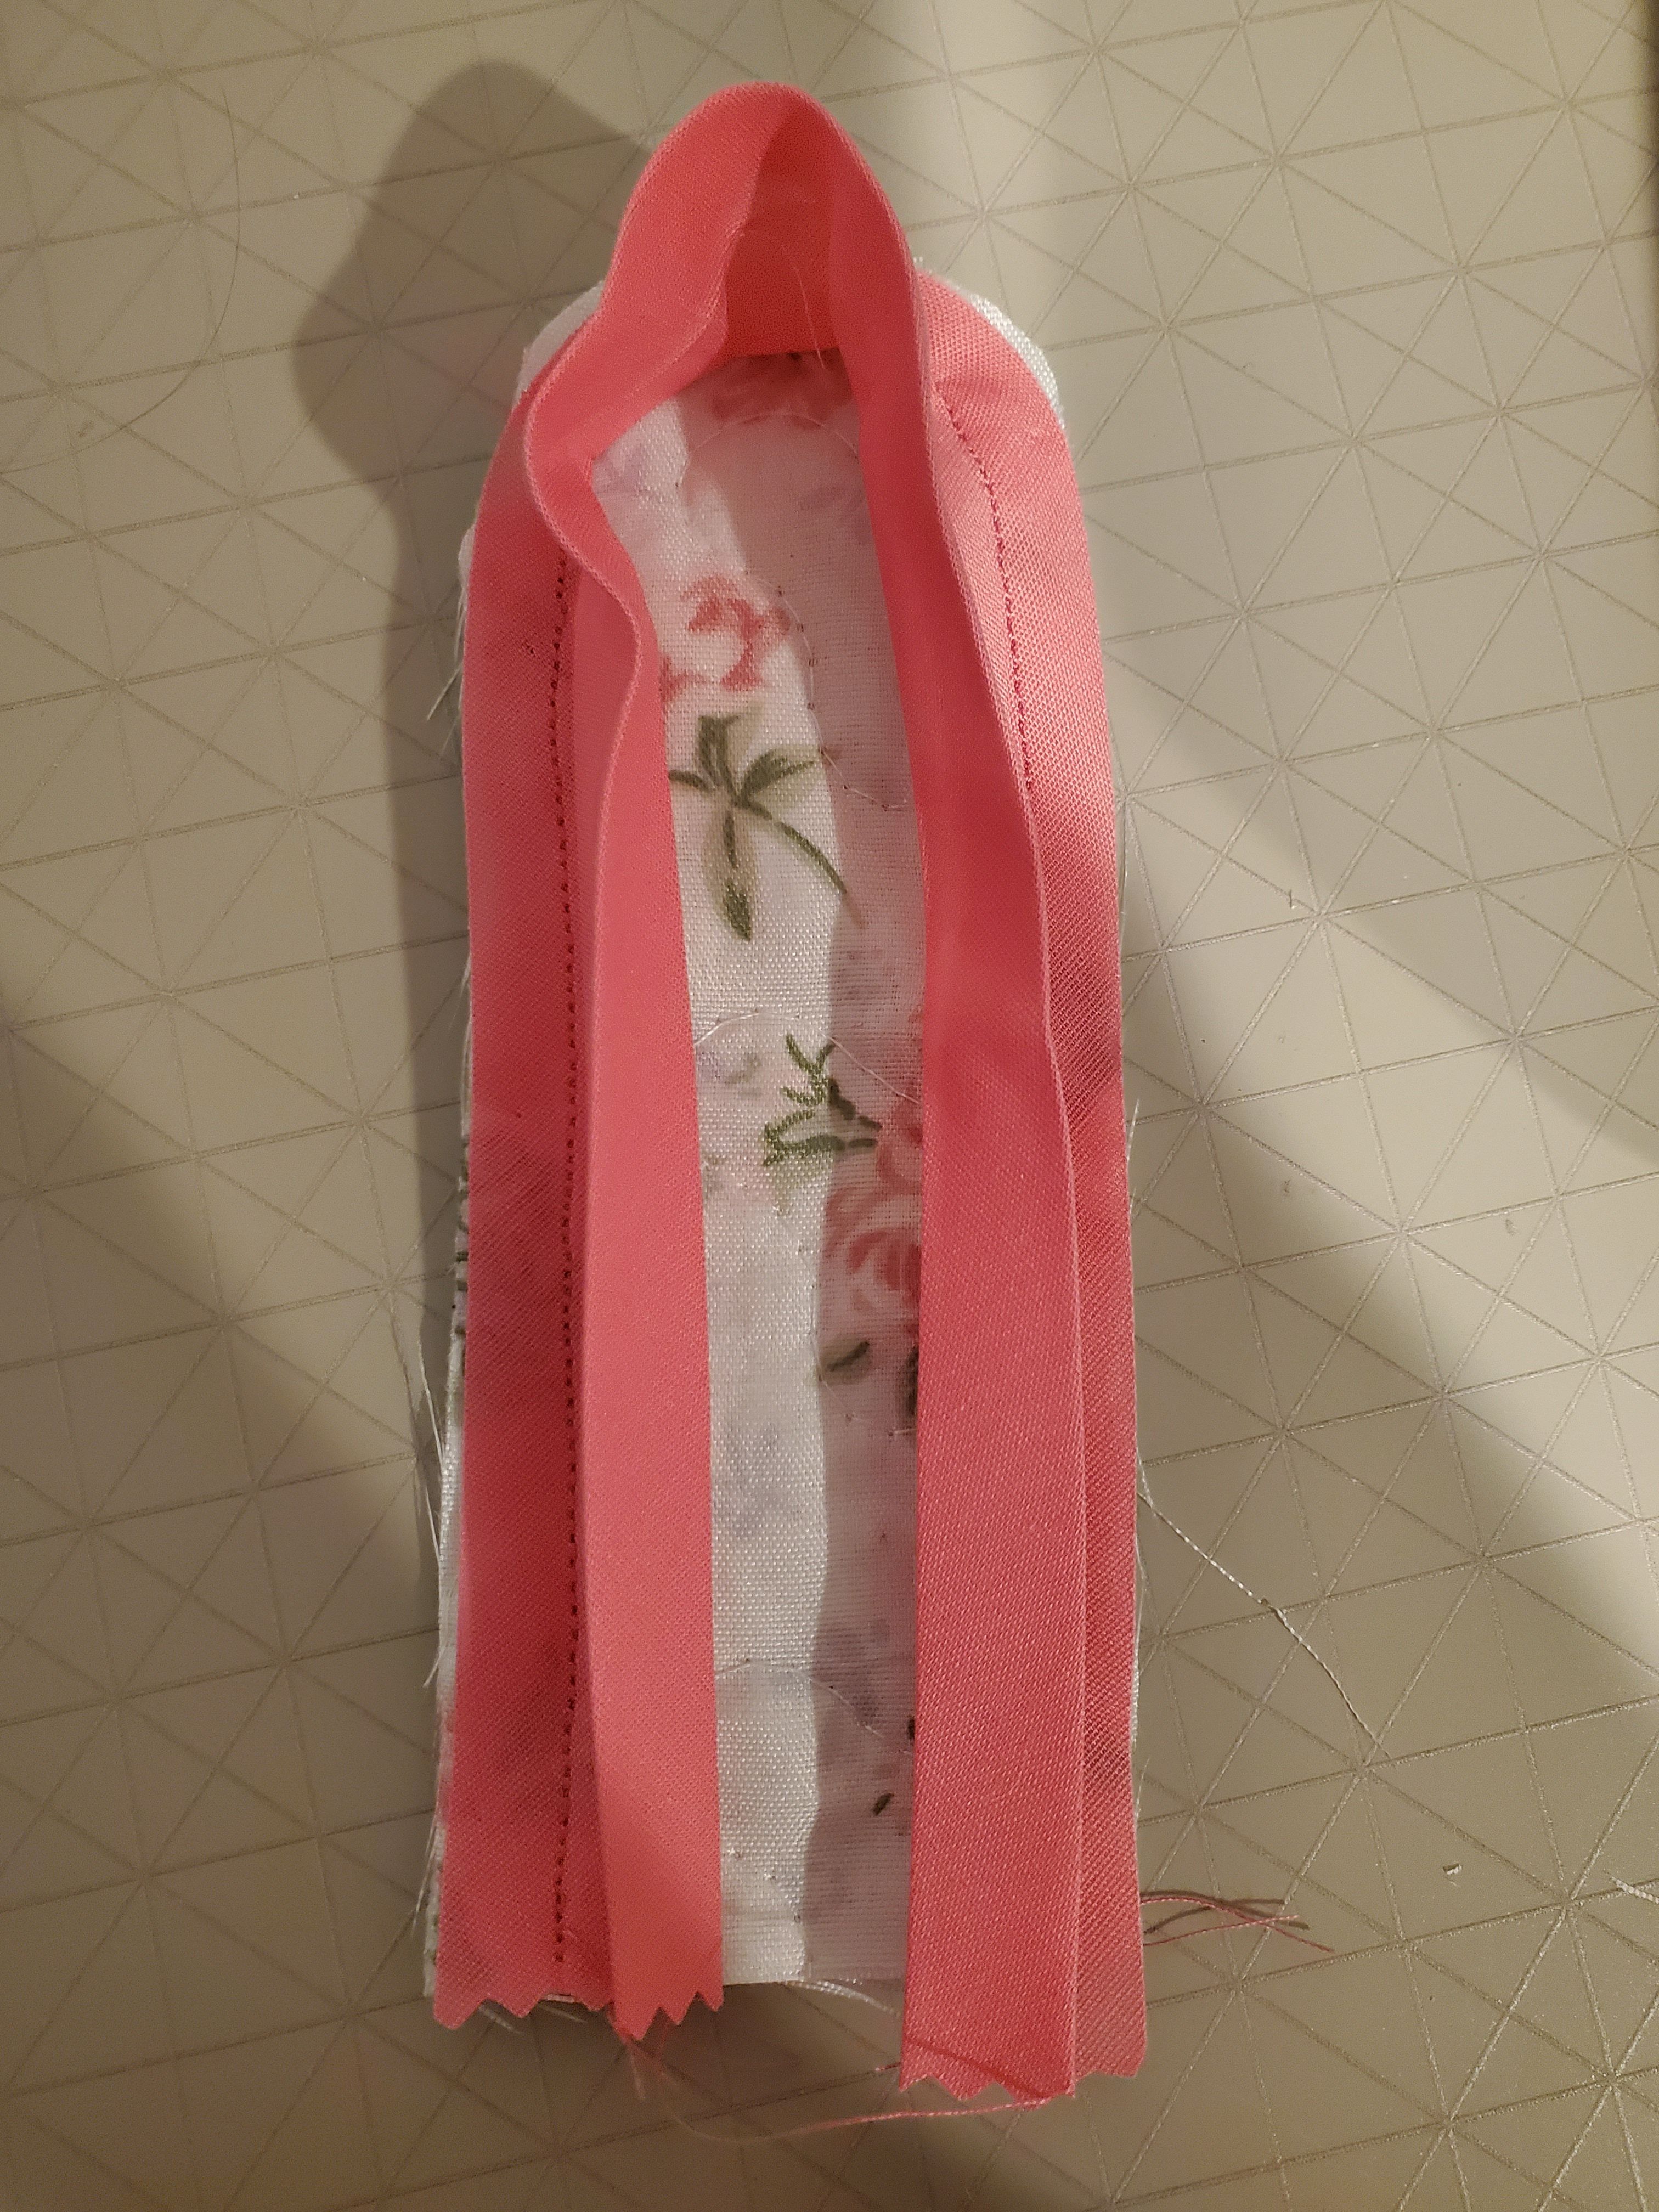
Now fold the bias tape around the tab, encasing the raw edge of the fabric in the fold of the bias tape. Sew 1/8 inch from the fold of the bias tape, all the way around. You may need to press the tabs once done to get them to lay flat. You can now use the tabs as instructed in the pattern.
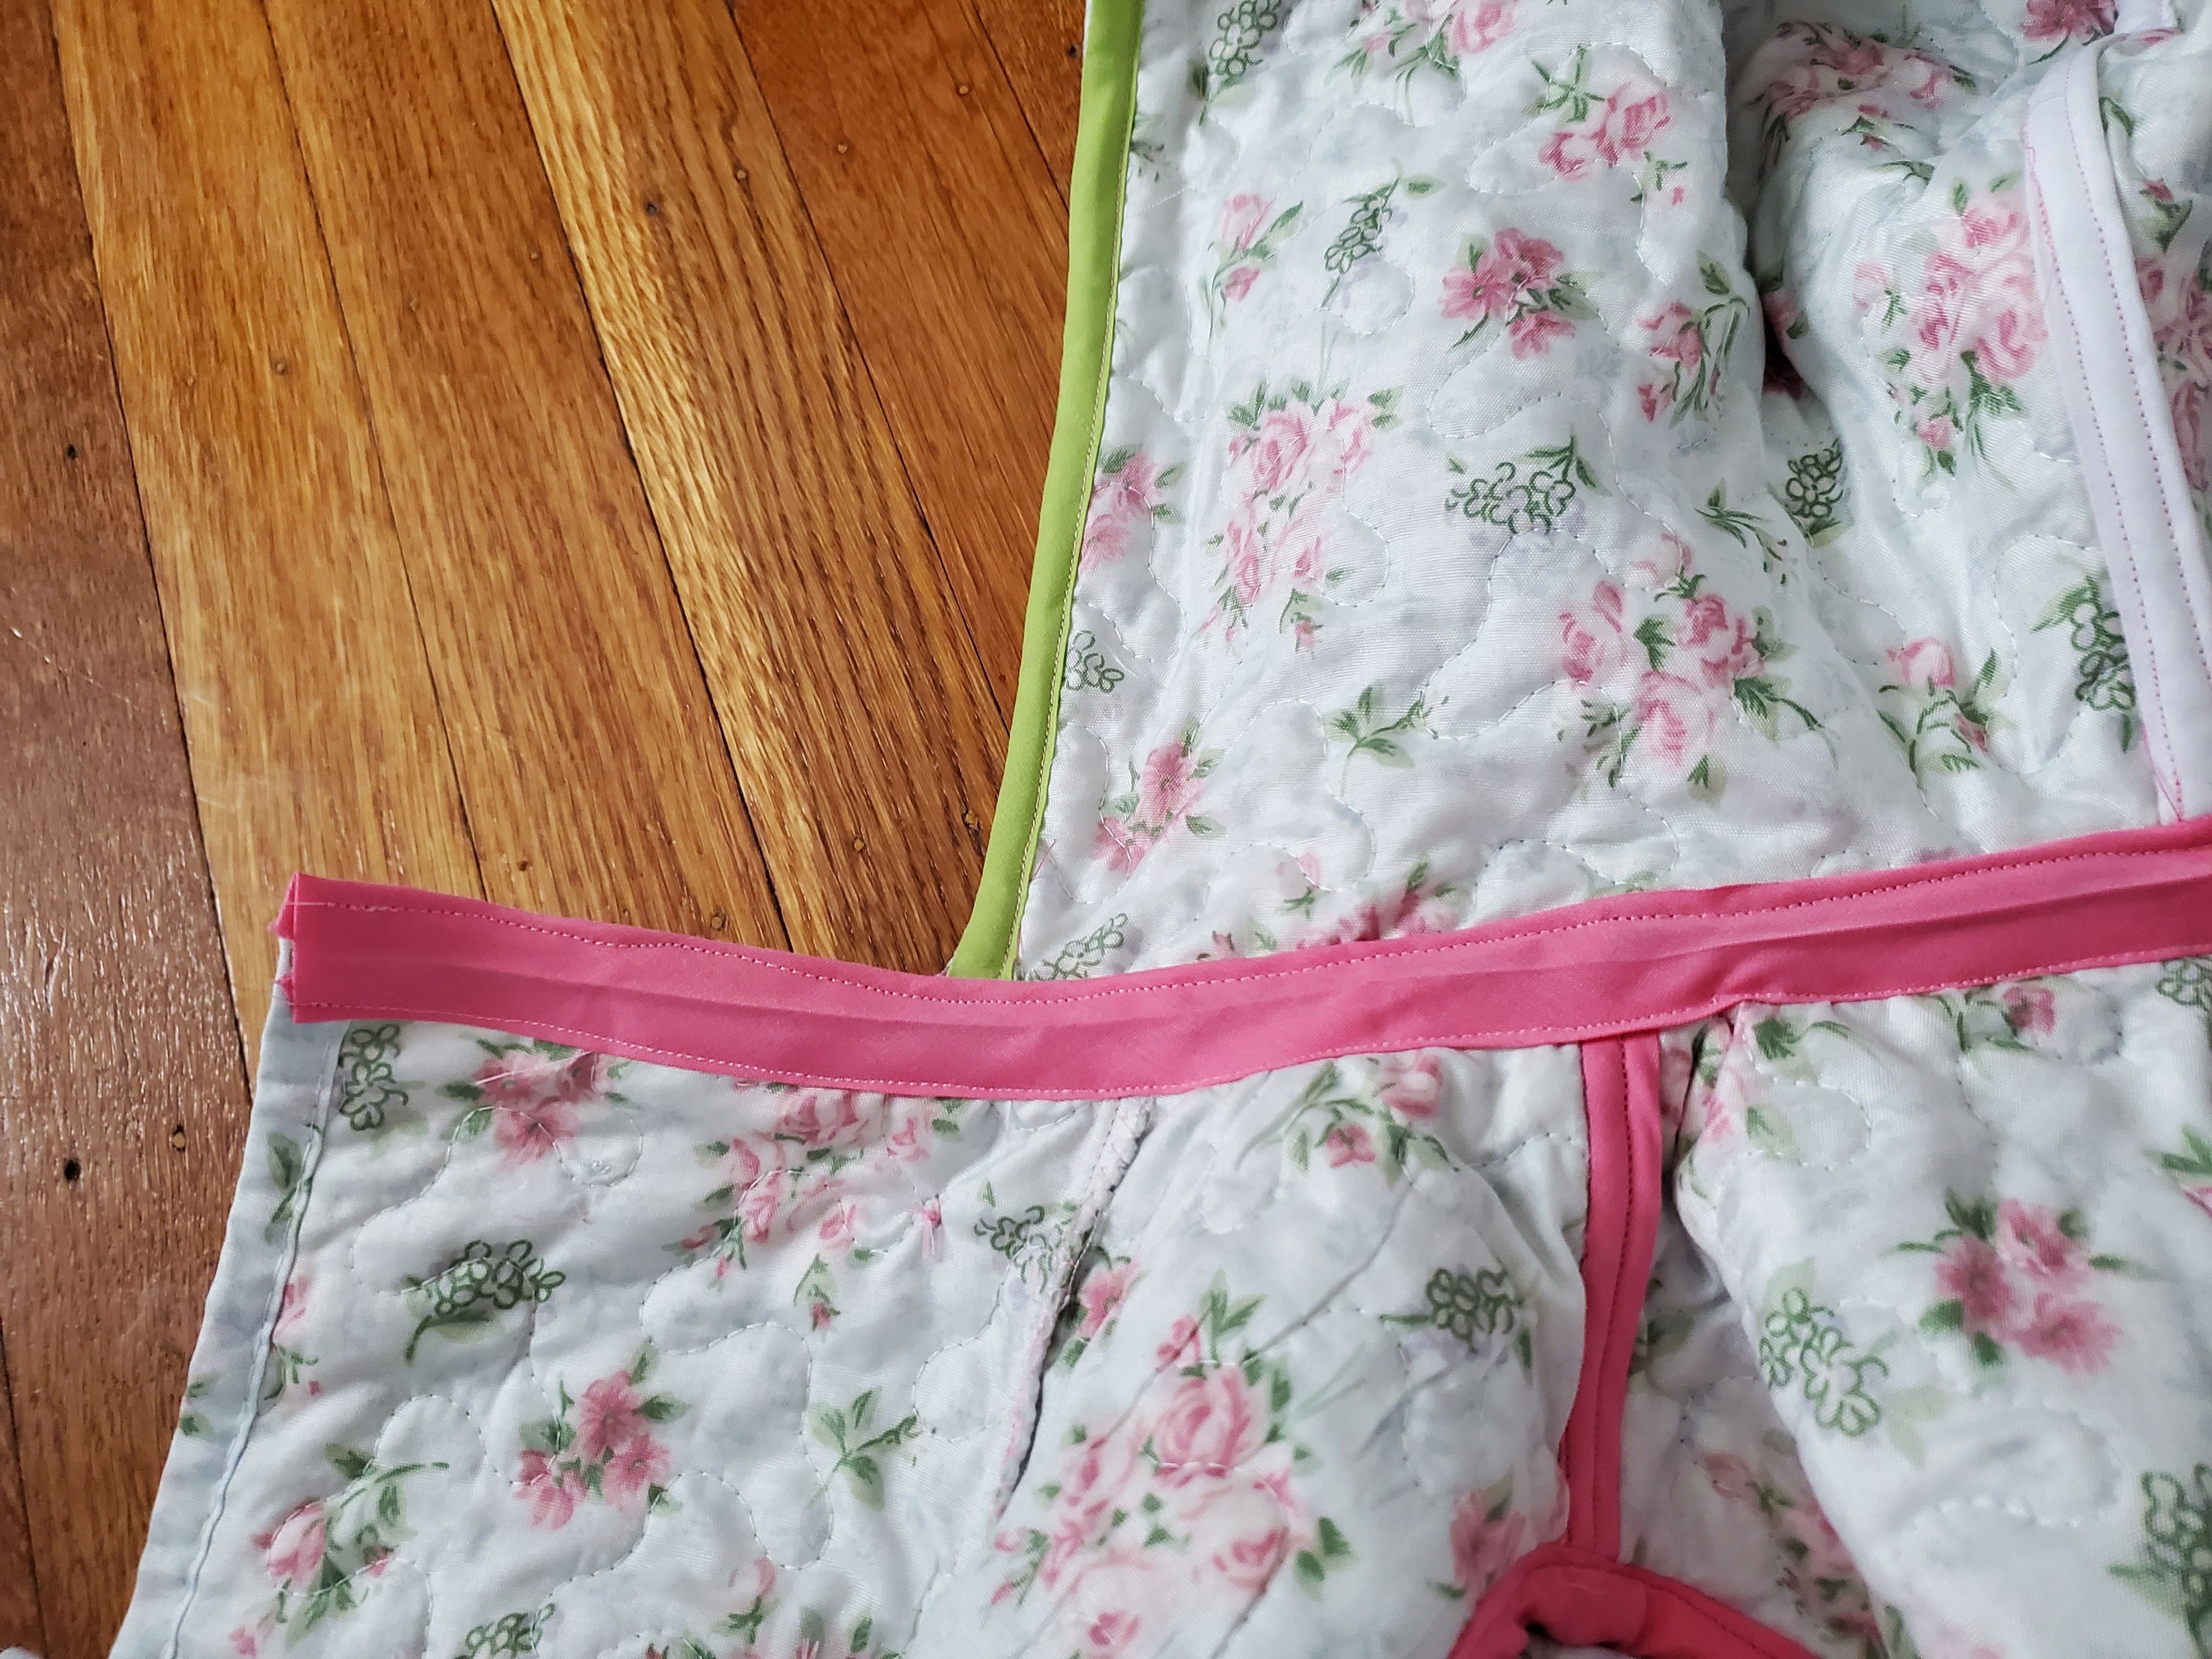
Constructing a seam with bias tape (The Seam Method):
When sewing a seam, place the fabric right-sides together, as shown in the pattern. Before sewing, however, we will add a piece of double-folded bias tape the length of the seam. Open the bias tape up completely and match the raw edge along the raw edge of the seam (in this case, the shoulder). Pin.
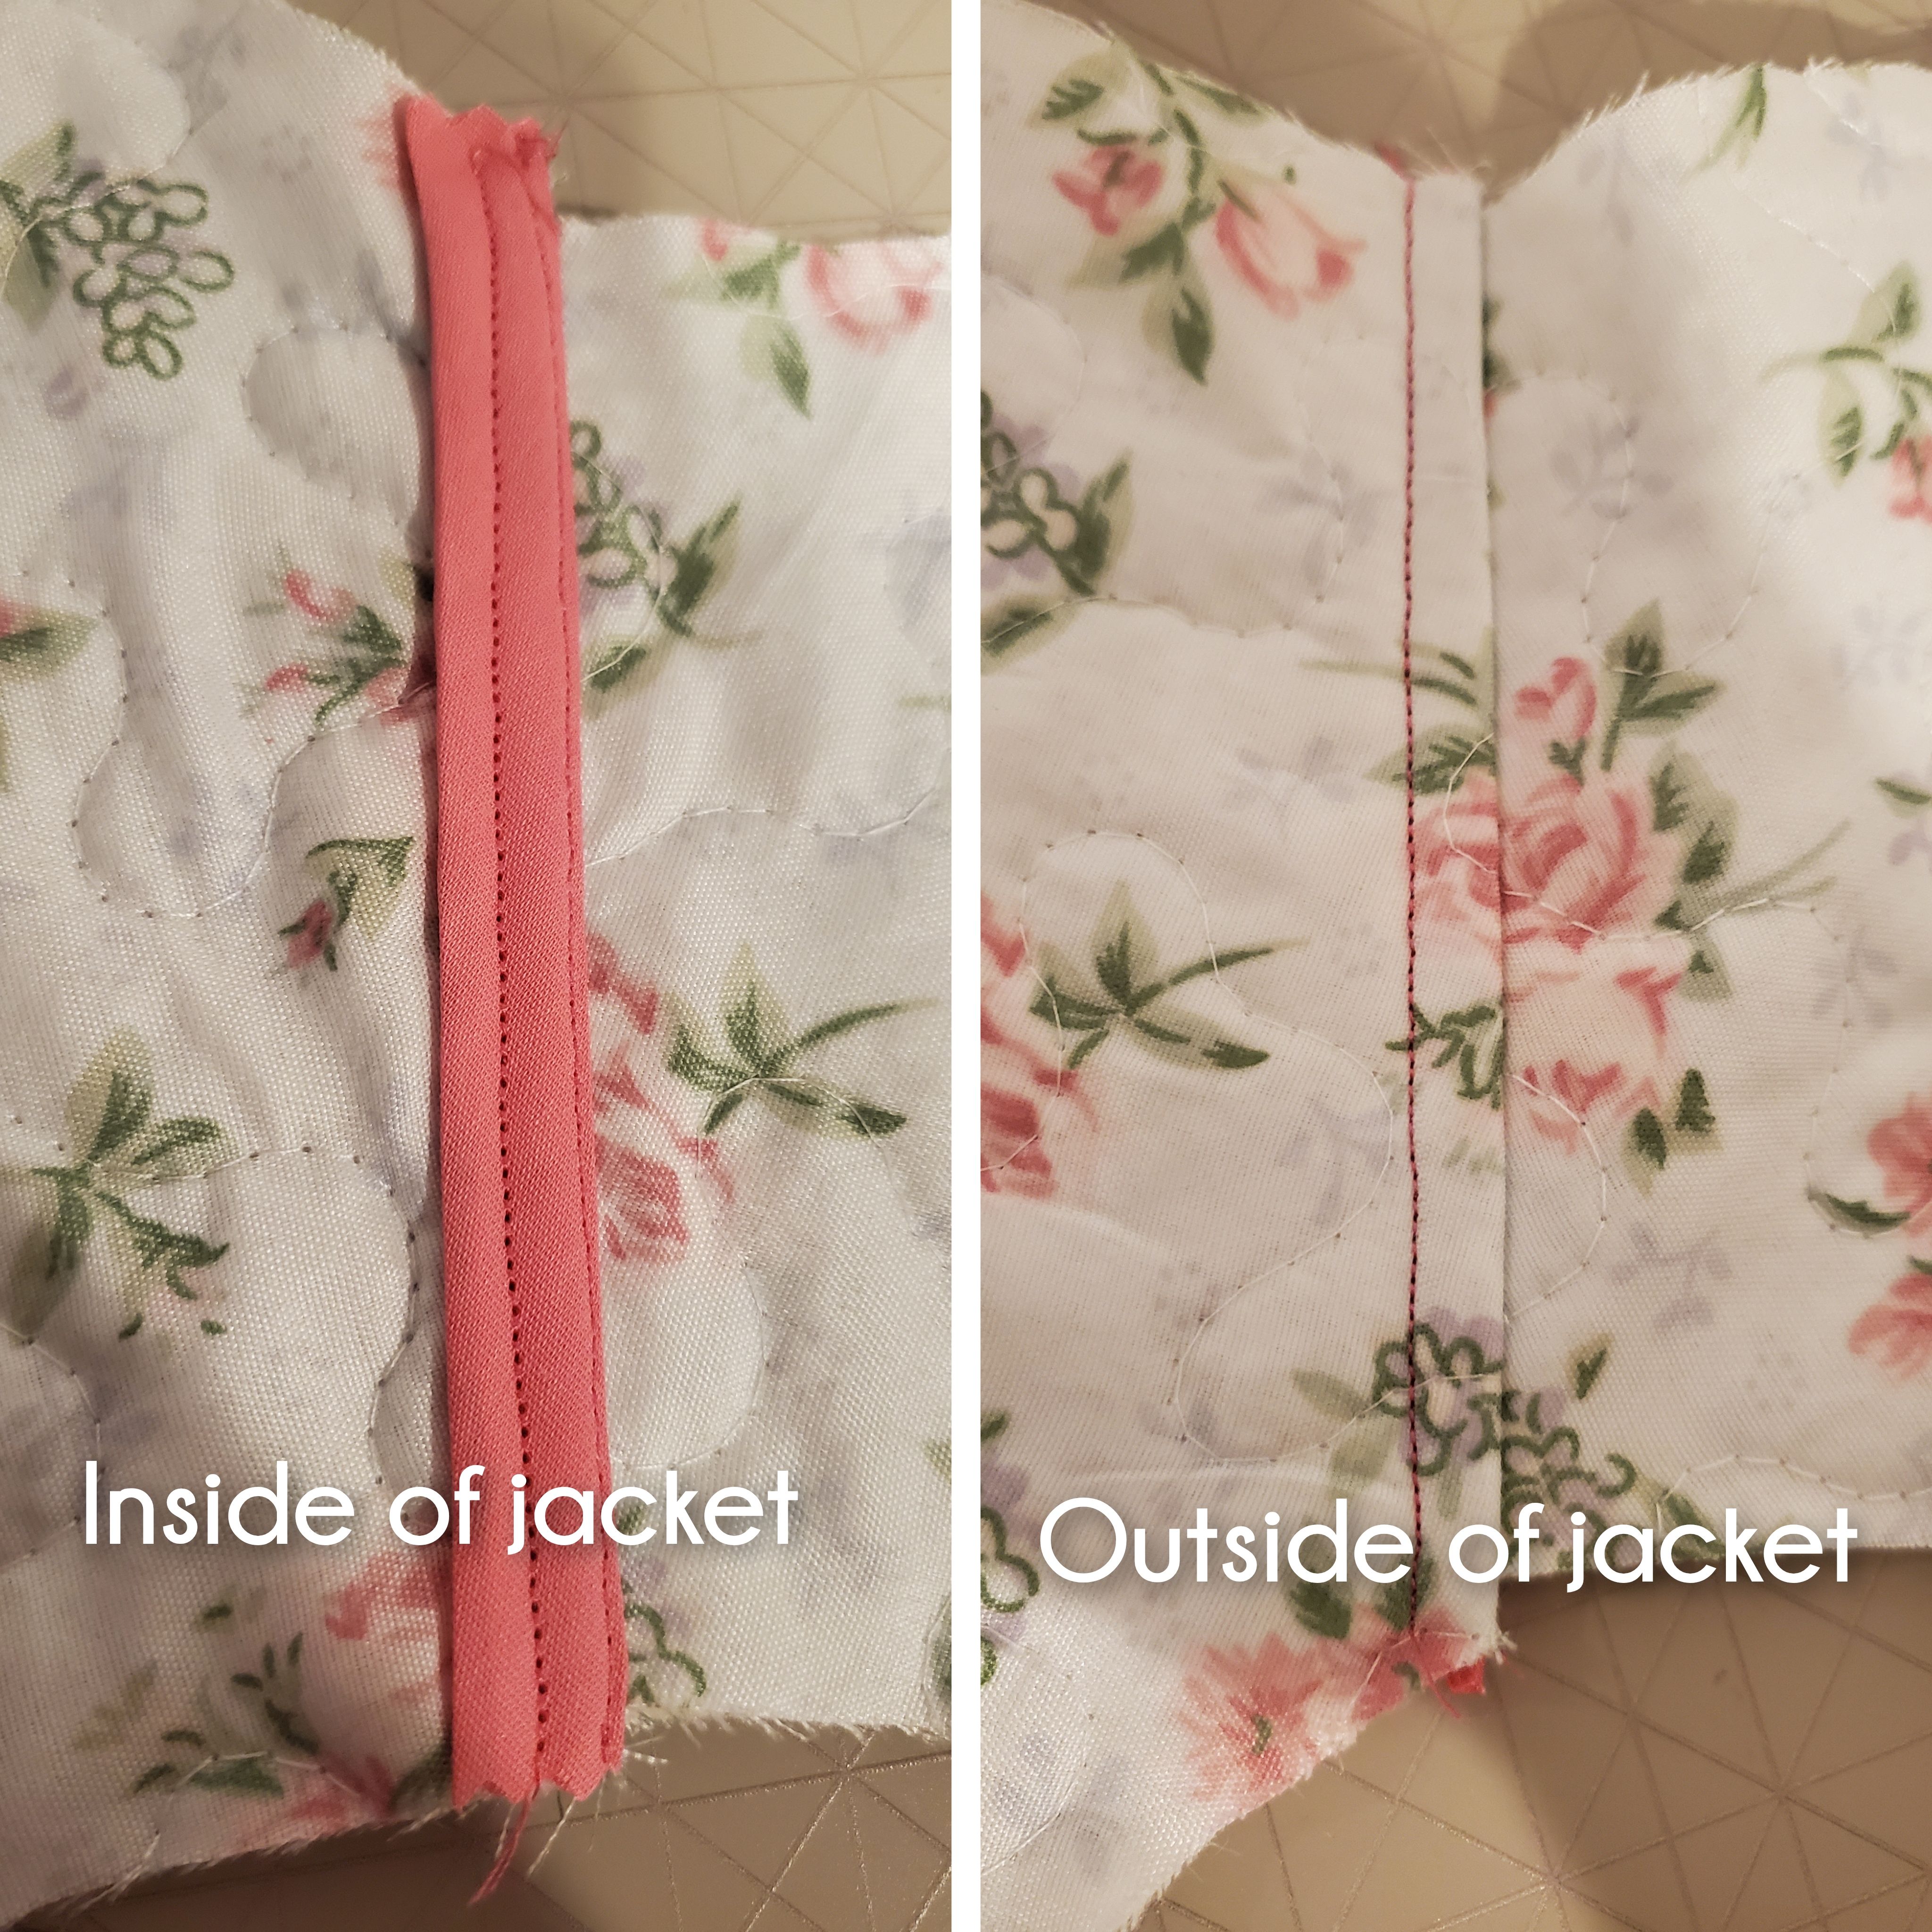
Sew the seam, stitching in the fold of the bias tape.

Fold the bias tape around the seam, encasing the raw edge of the fabric in the fold of the bias tape. Sew 1/8 inch from the fold of the bias tape.
When possible, you may desire to sew the encased seam to the outer jacket. For the shoulders, I sewed the seam to the back of the jacket. This will not always be possible (particularly for the sleeves). I was able to sew the seams down for the skirt, hood, placket, and bodice.
Constructing a hem with bias tape (The Hem Method):
When sewing a hem with bias tape, I liked using single-fold bias tape. I used a technique I learned from CKC's Dorothy pattern, which has become a favorite for me!
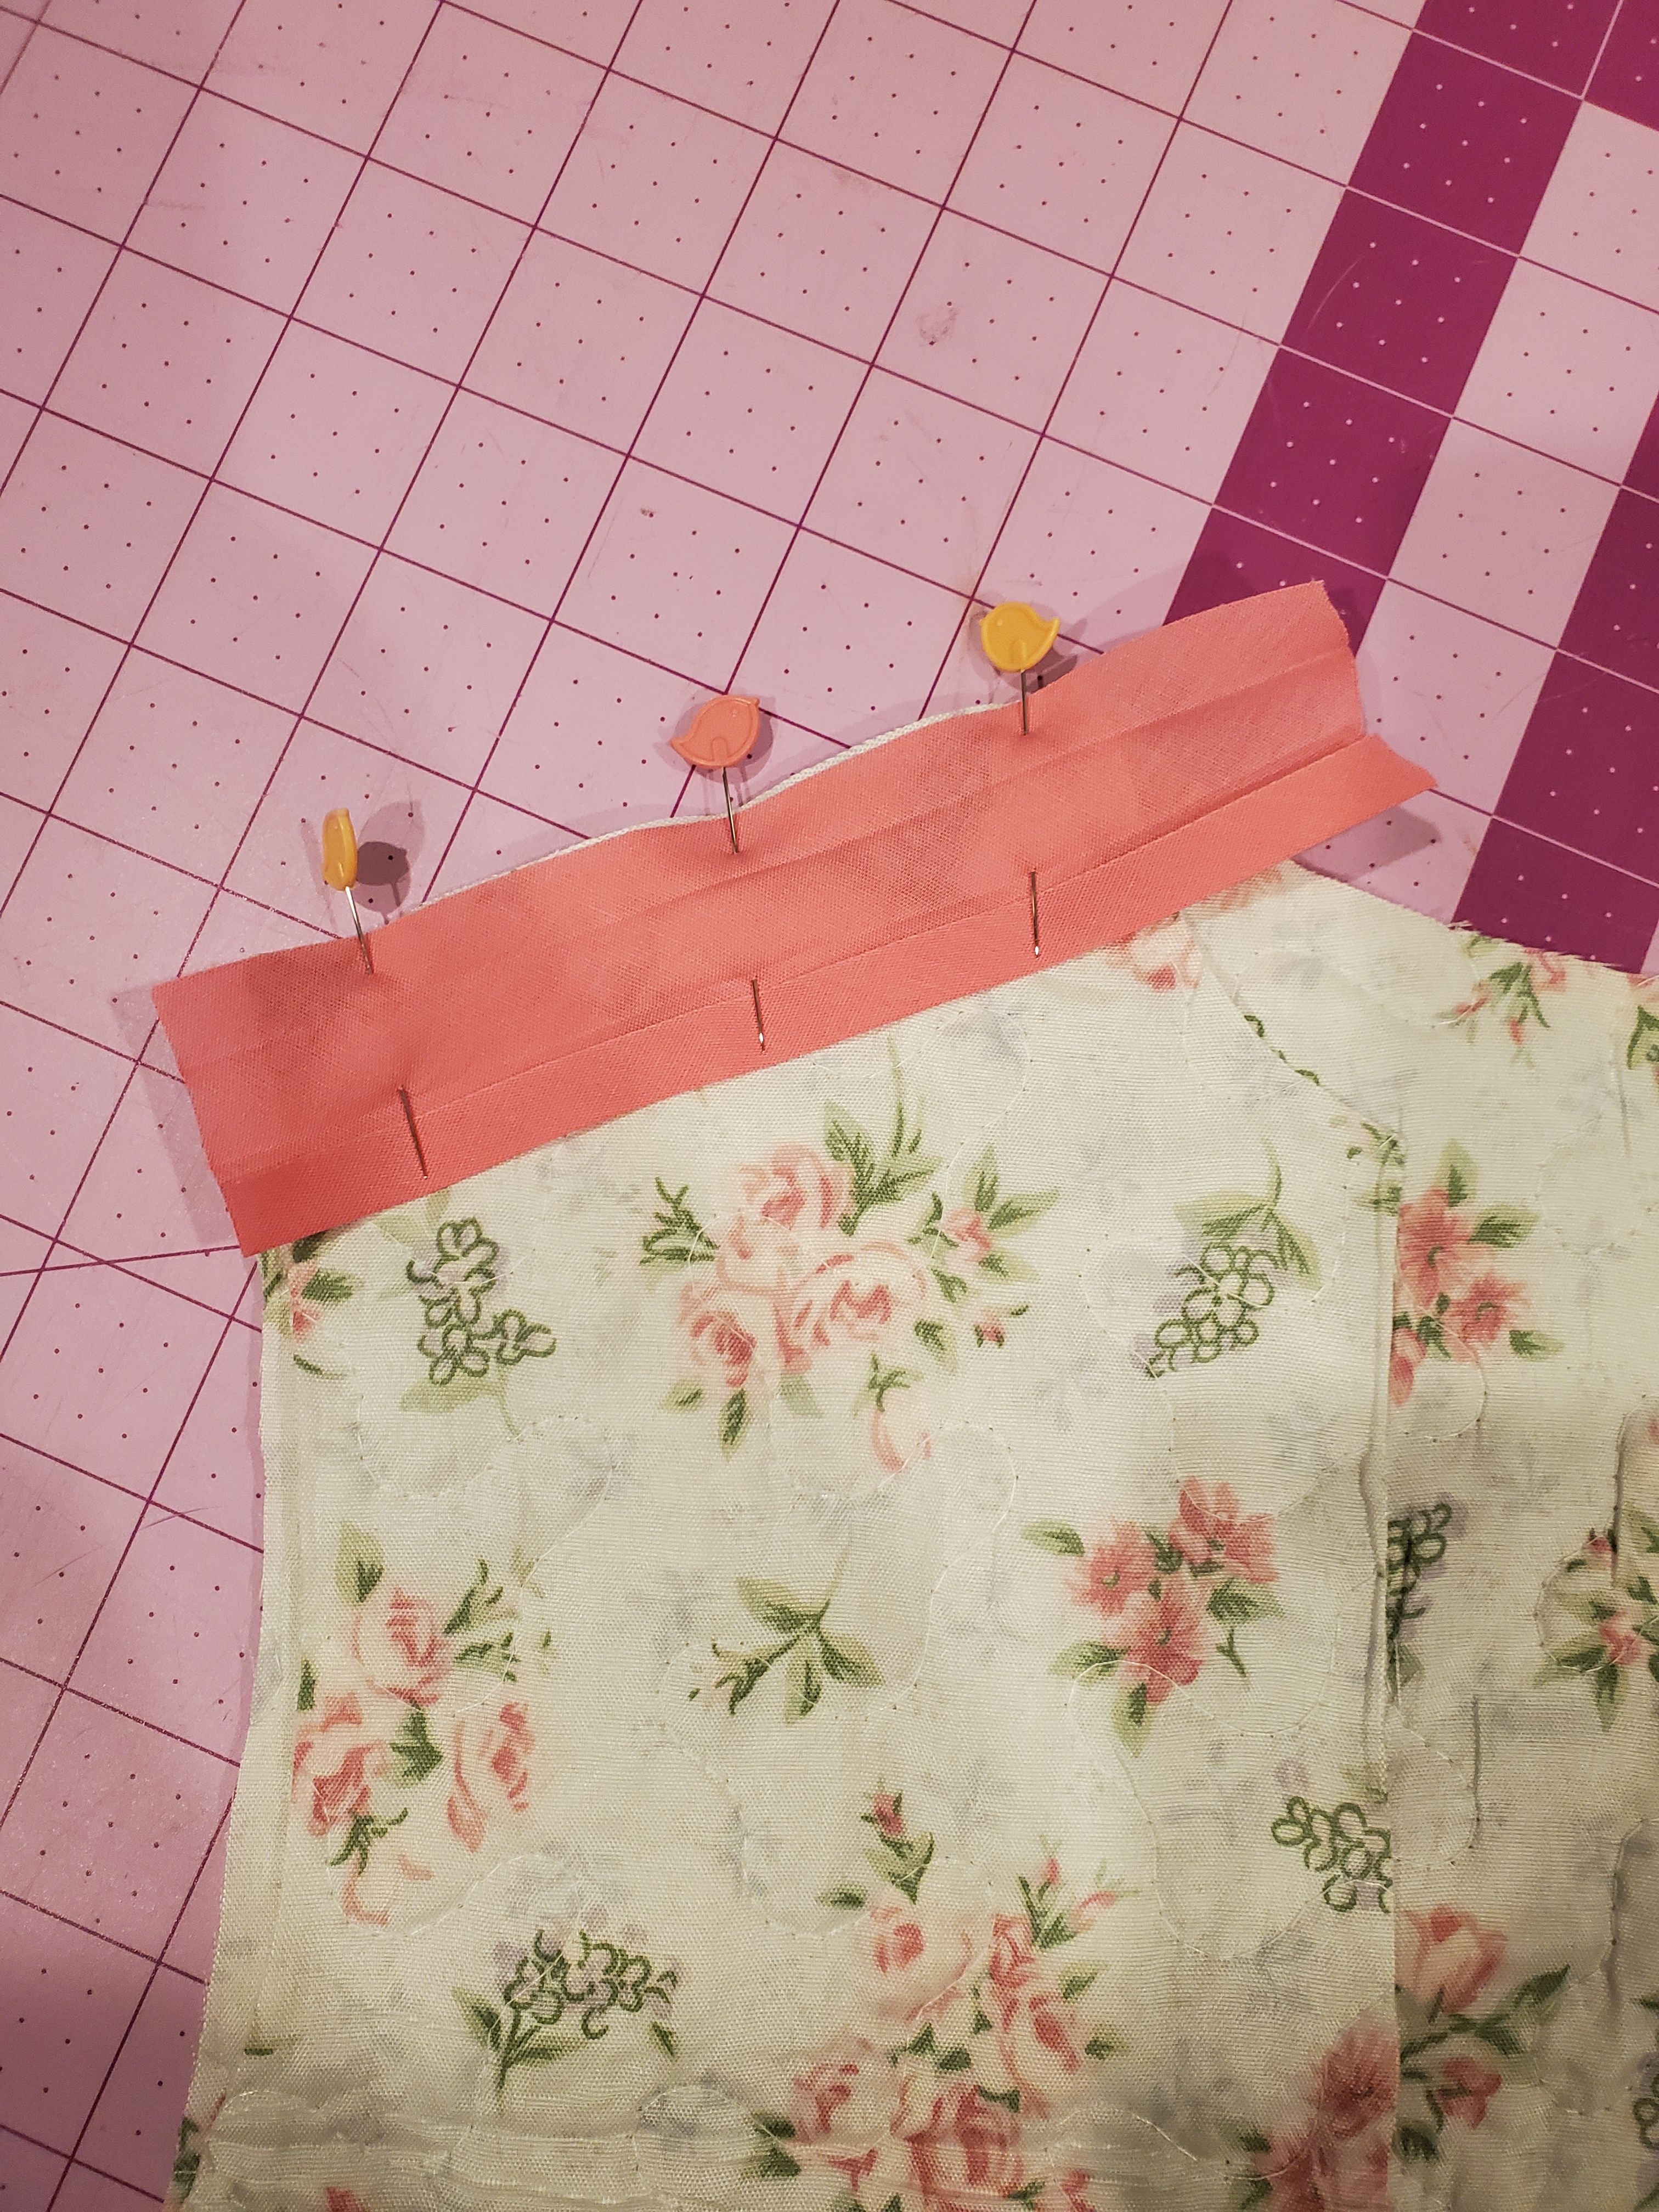
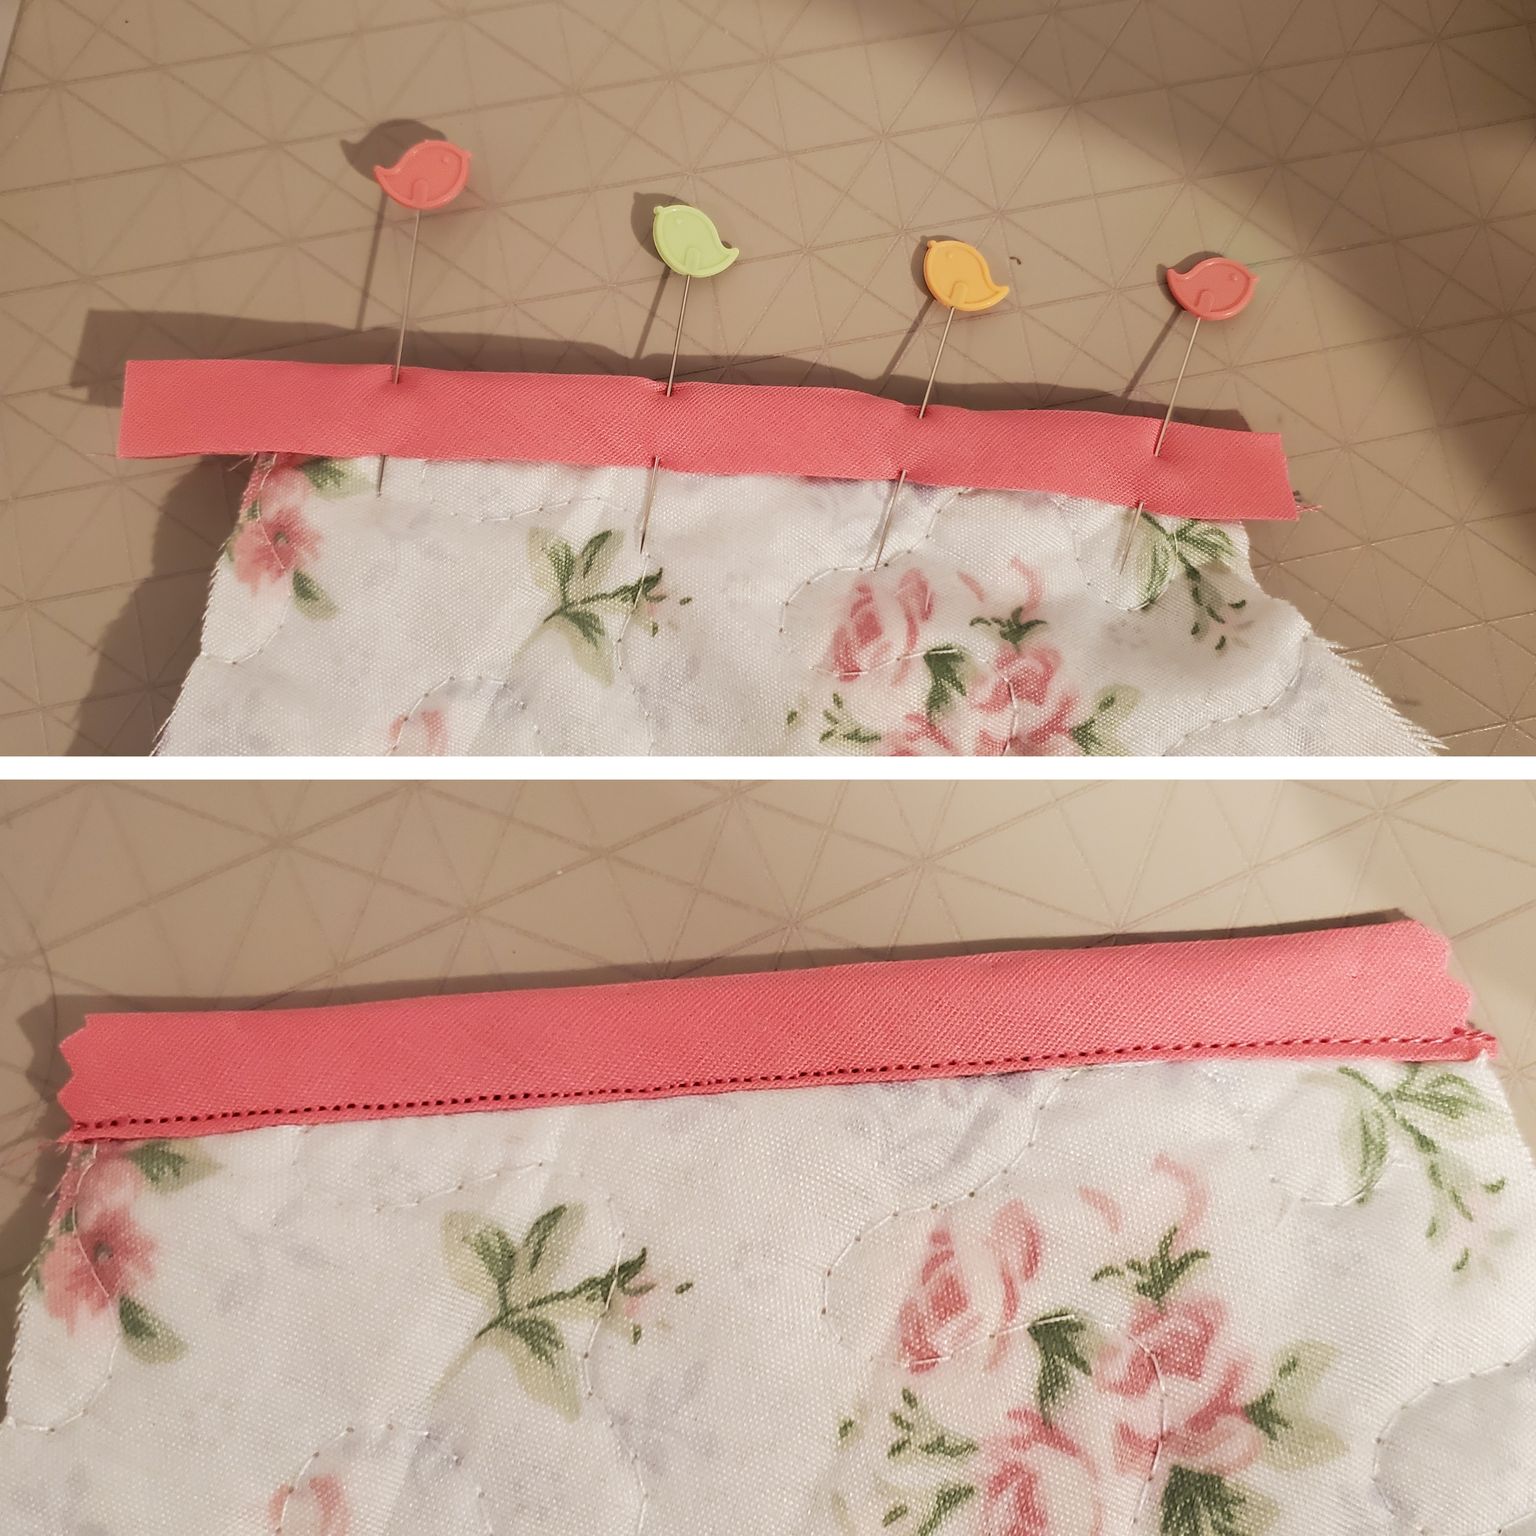
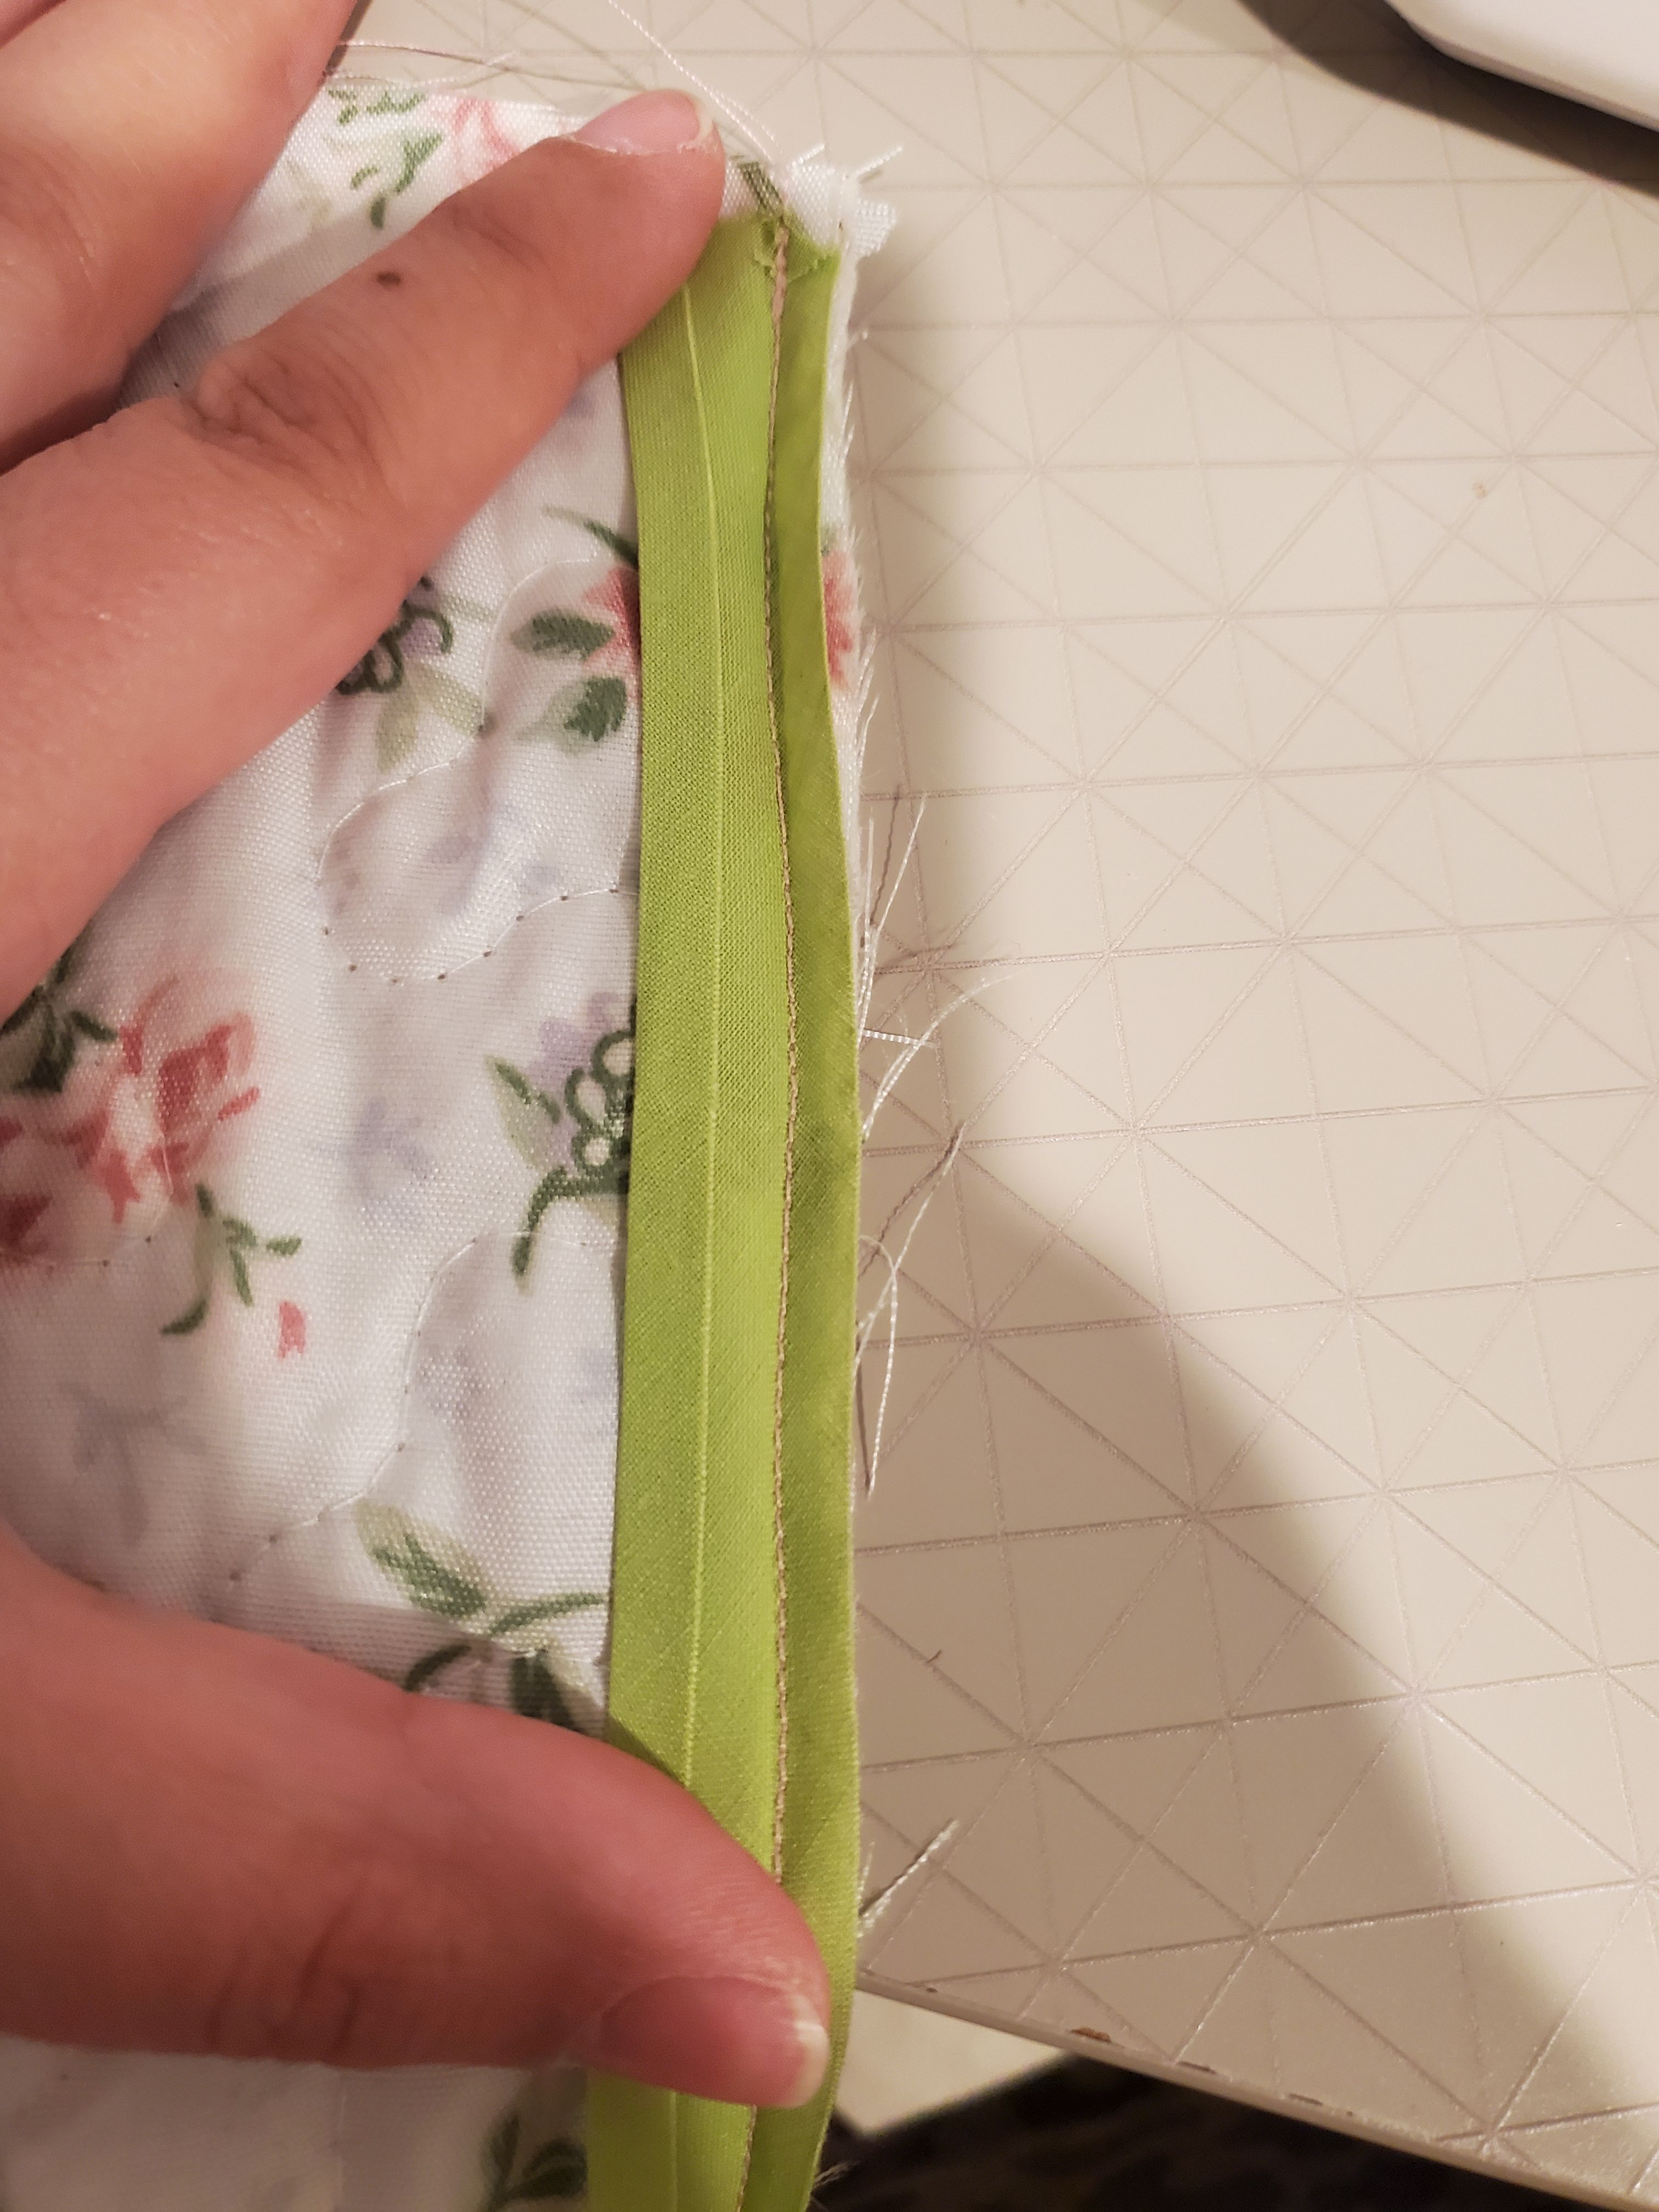
Open the bias tape completely and align the raw edges of the bias tape and the fabric. Pin.
Sew the bias tape to the hem, right-sides together, stitching in the fold of the bias tape.
Now we will fold the fabric over, so the bias tape stays smooth along "wrong side" of the fabric and is not visible from the right side.
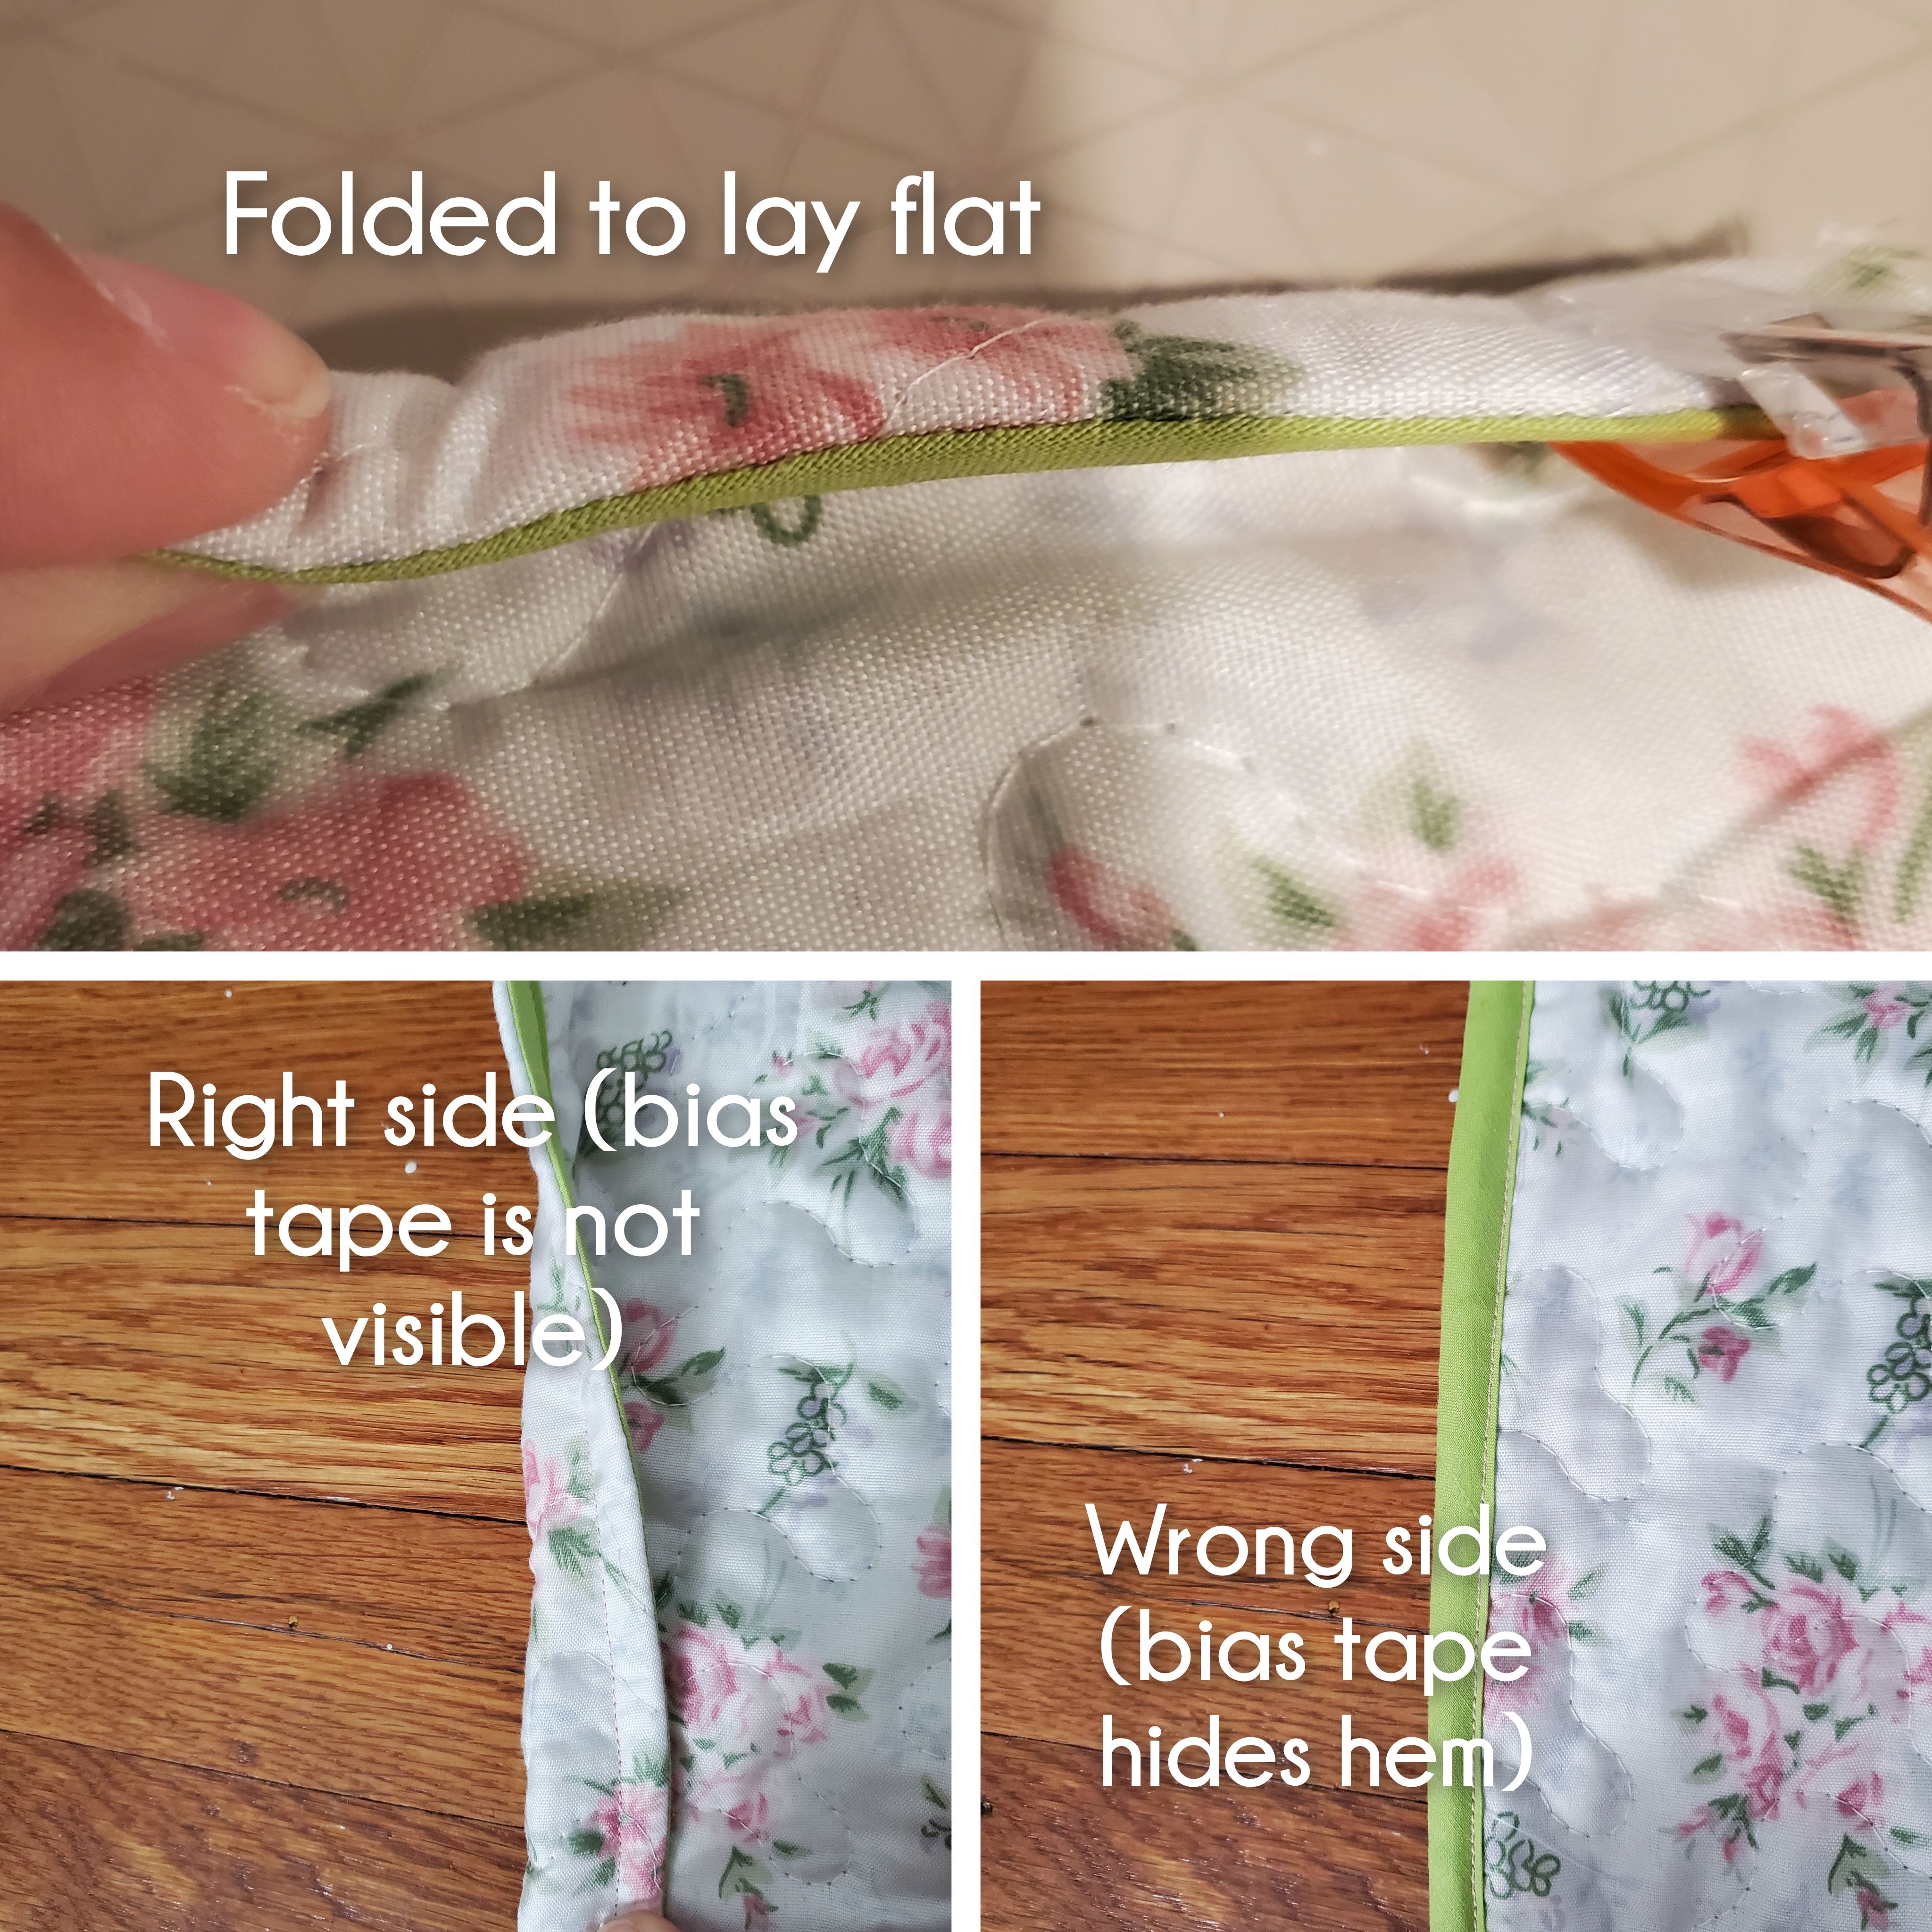
Stitch an 1/8 inch from the fold of the bias tape, all the way around, encasing the seam.
Special considerations:
My placket and sleeve cuffs were created from the existing edge of the quilt I used. If you have raw edges here, you will finish them using the hem method above. I would advise hemming the sleeves before sewing them into a tube. This will be easier and look cleaner.
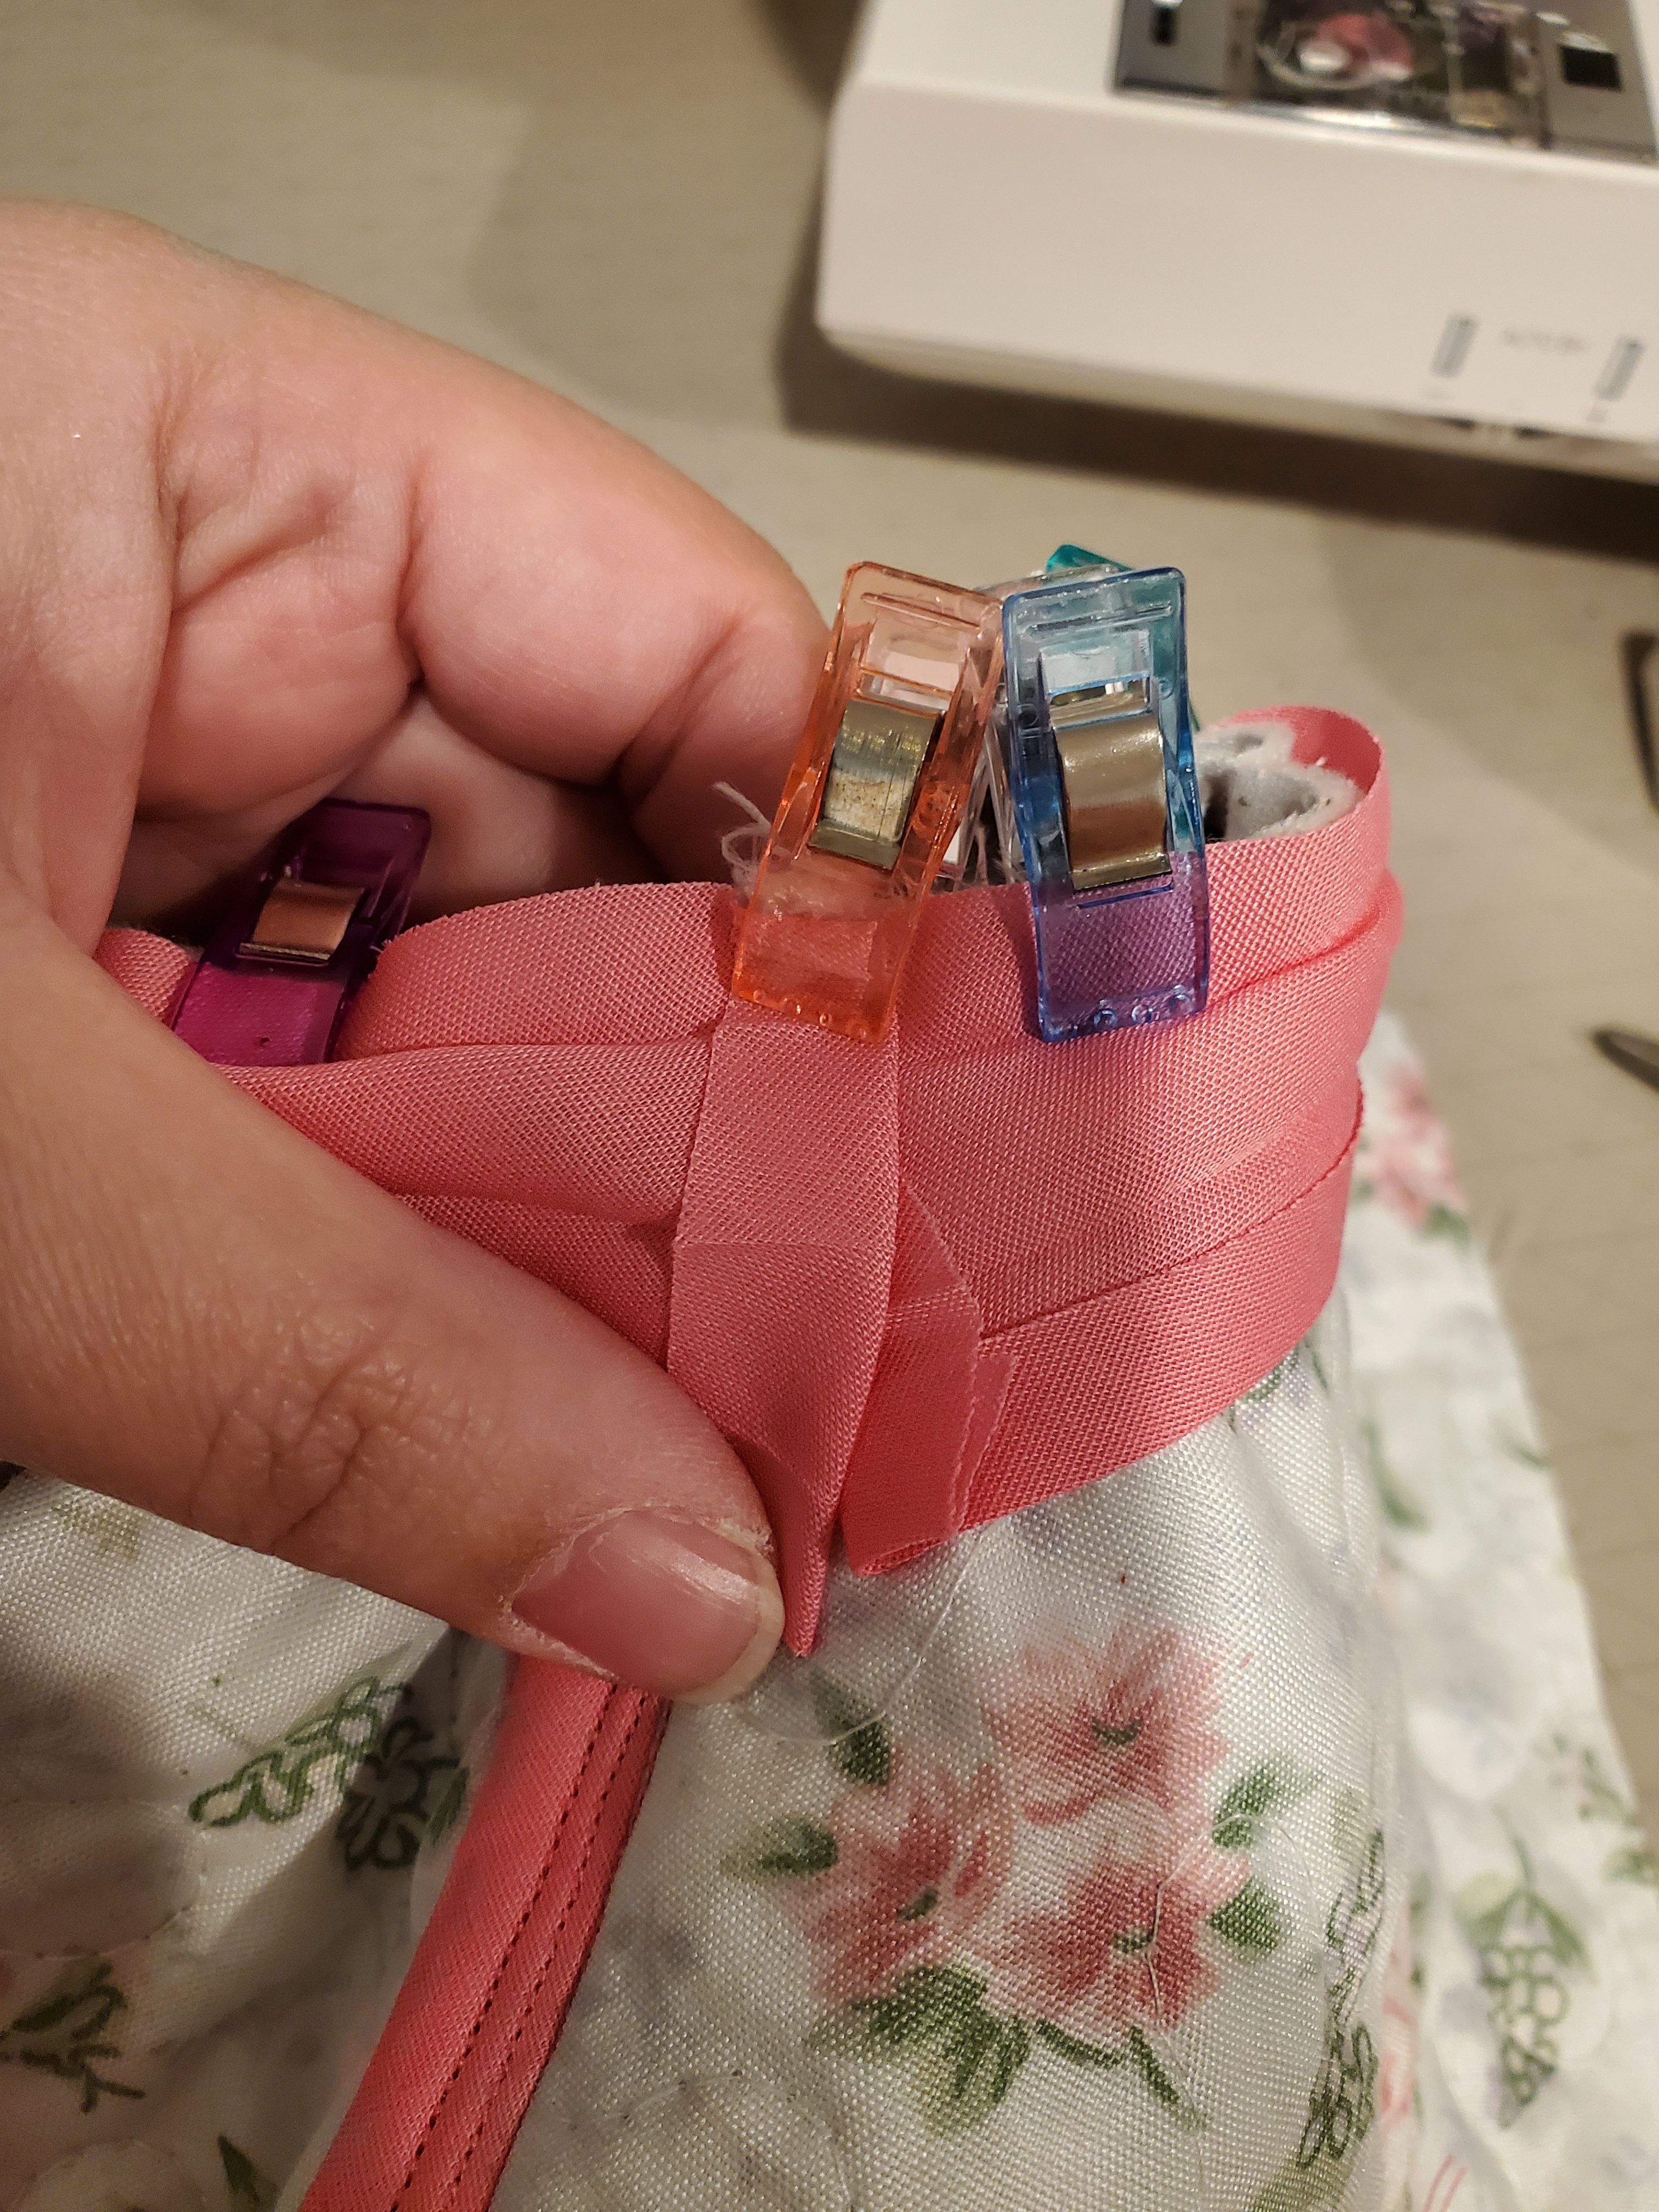
There are many tutorials out there for how to join bias tape when it meets. My goal was to make the inside of the my coat look clean and not be technically challenging. For the bias tape the met at the armpit-armscye, I simply folded each end under about 1/4" and sewed. While not technically perfect, it looks very clean.
When attaching the hood to the jacket, the placket piece will have an exposed edge that will need to be hemmed as well. I encased the seam of the hood and jacket, as well as finished the raw edge of the placket, using double-folded bias tape, but using the hem method. I also folded the ends of the bias tape in 1/4, so there was no raw edge near the placket.
So what do you think? I love the clean look of the bias tape and I loved using a quilt!
However you make Annelaine, we cannot WAIT to see what you create!
Meg