
Posted by Meg Hess on 22nd Oct 2022
Sewing Days and Spooky Nights 2022: Jack's Pumpkin King Light Up

Want an activity sure to make your front-door shine? Jack's Pumpkin King Light-Up is sure to glow in your house! All you need to create this happy guy is felt, an LED fairy light set, and a sewing machine!
Materials:
The PDF pattern piece for Jack's (this is optional, but gives you a good pumpkin shape)
1/3 yard of orange and black felt
12-18" long dowel for hanging
Ribbon for hanging
Sewing machine and scissors
Optional: LED fairy light strand with battery pack, flowers for decorating
.
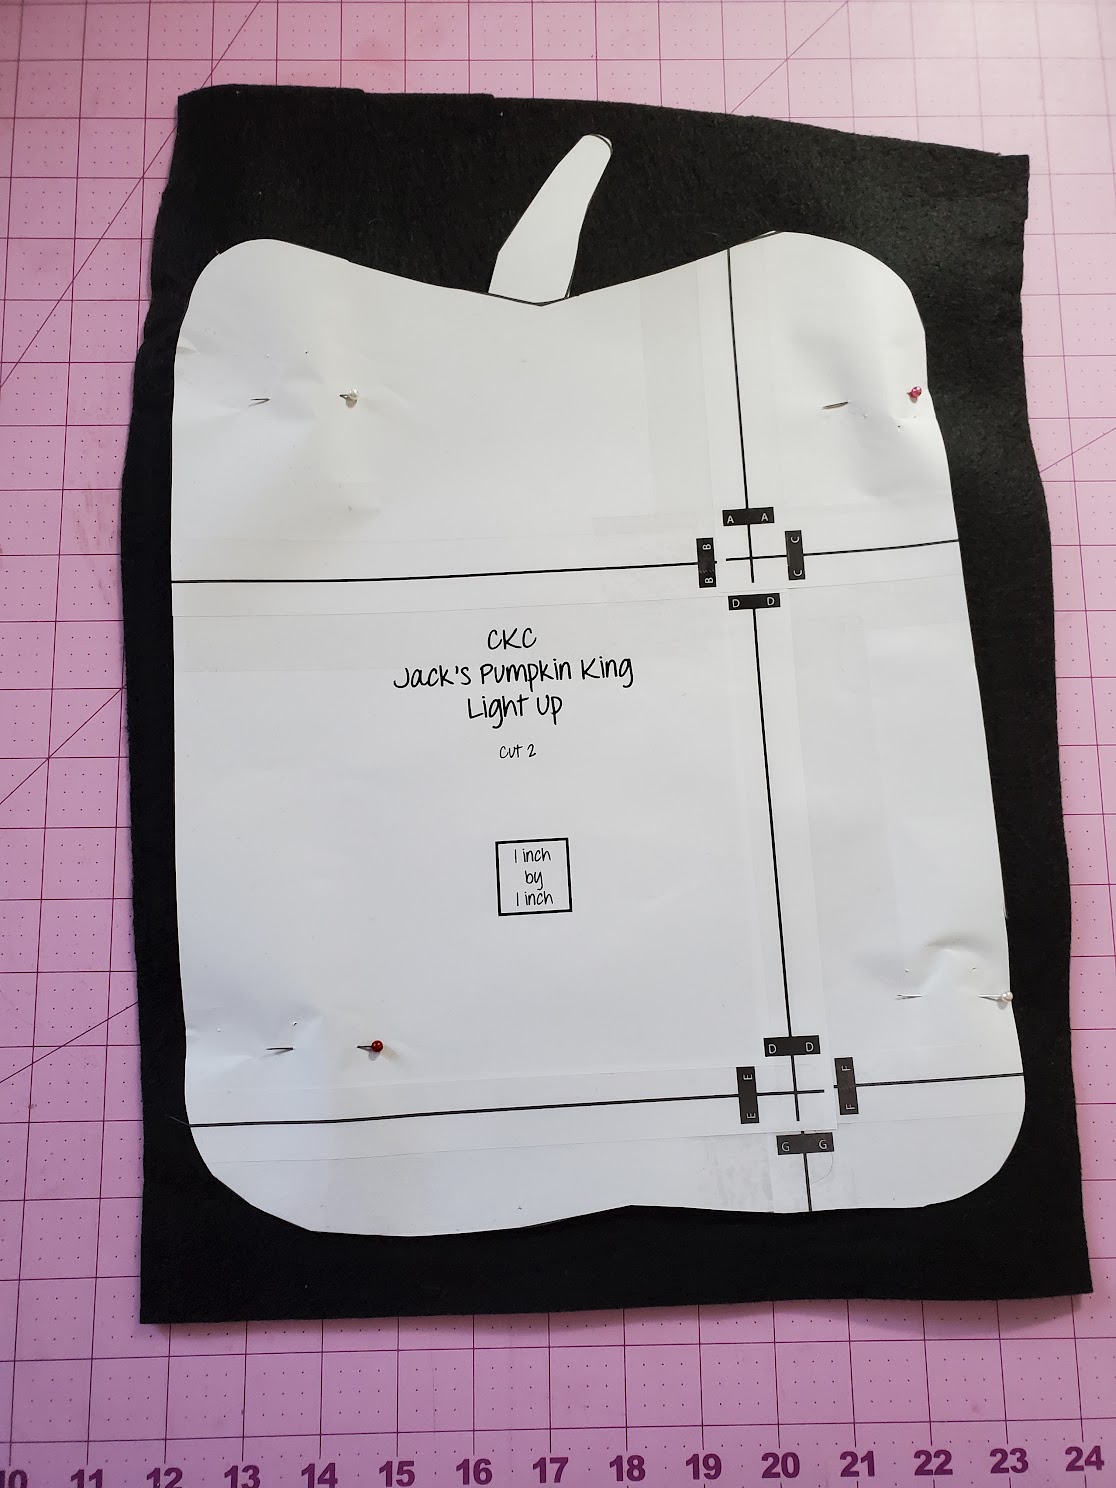
Step 1: Begin by assembling your pattern piece and cutting out the entire pattern on black felt.
.
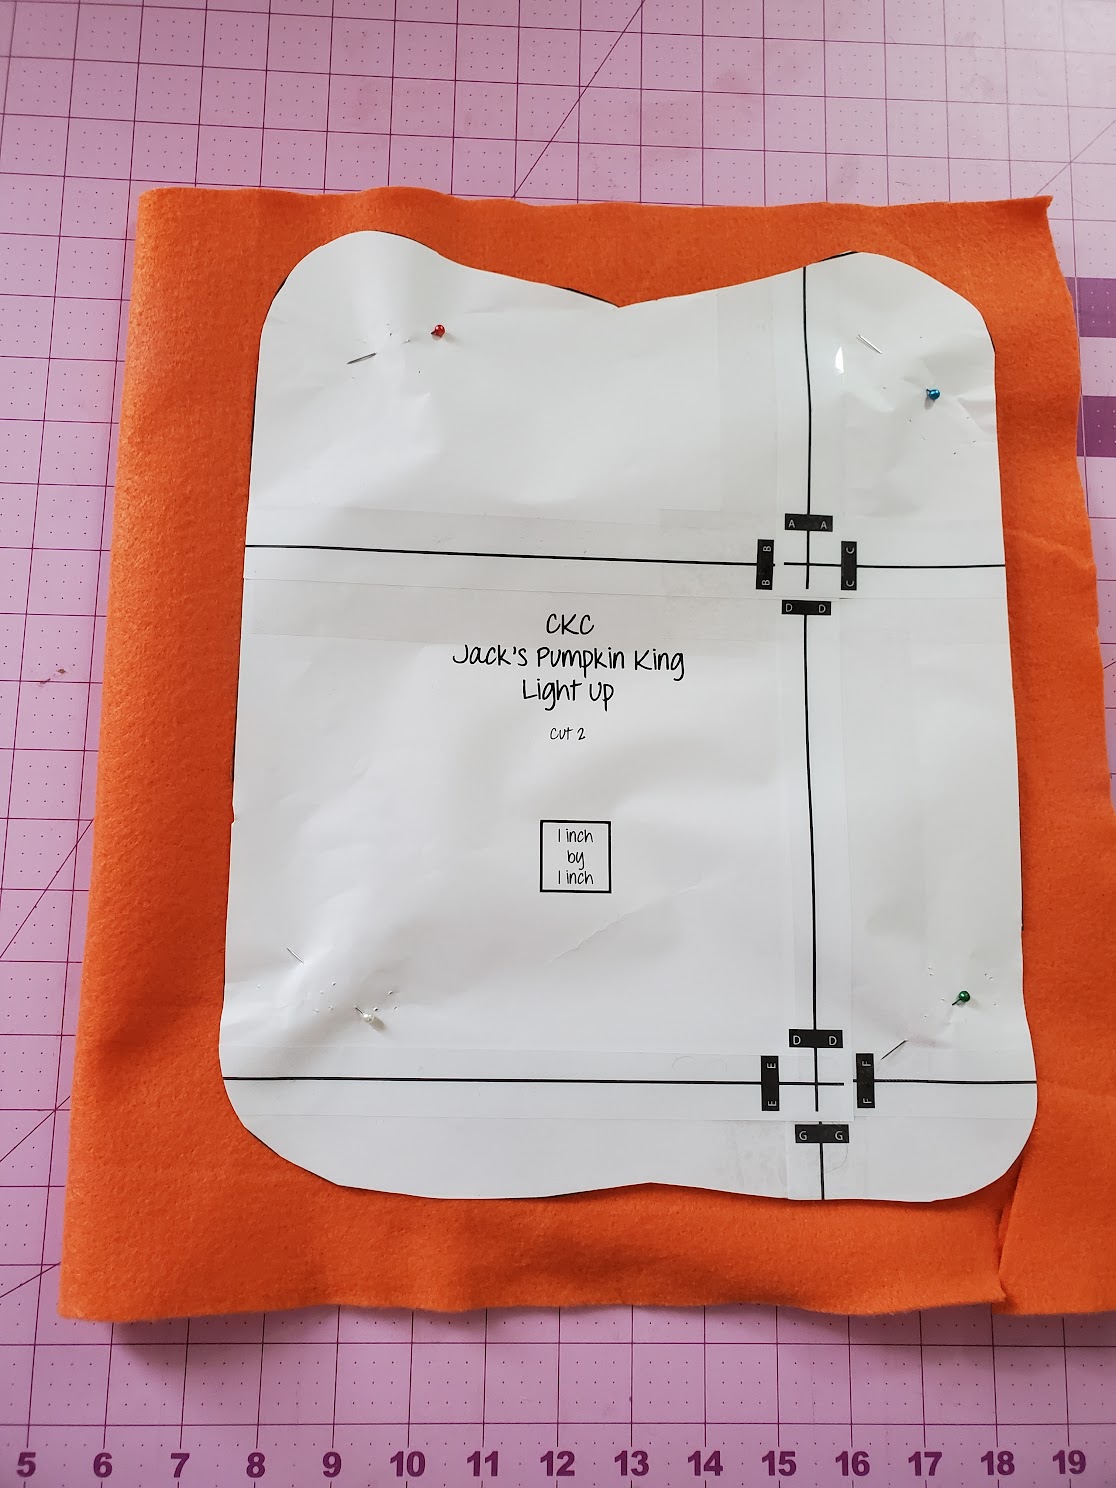
Step 2: Now remove the stem and cut out the pattern piece on orange. Set the orange aside for now.
.
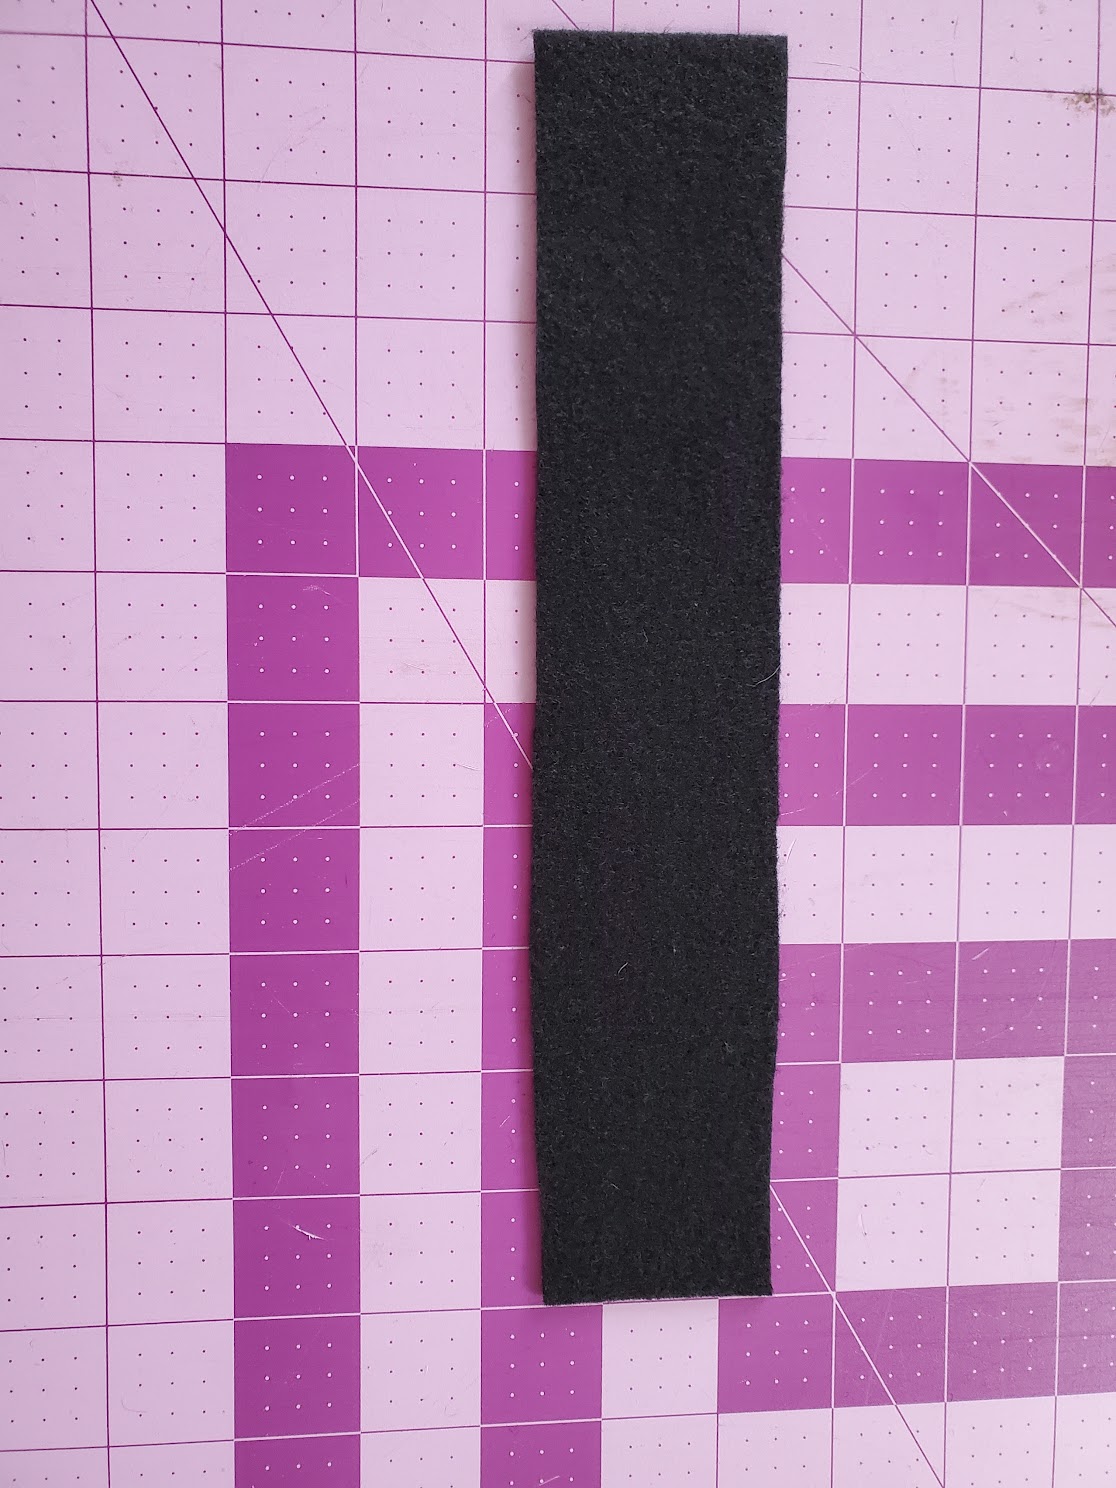
Step 3: You will now cut a sleeve for your dowel in order to hang your pumpkin. If using the pattern, cut a 2" by 10" sleeve out of black felt. If using your own shape, measure across the top of your pumpkin and then subtract an inch. Then cut a piece that is this length by 2" wide.
.
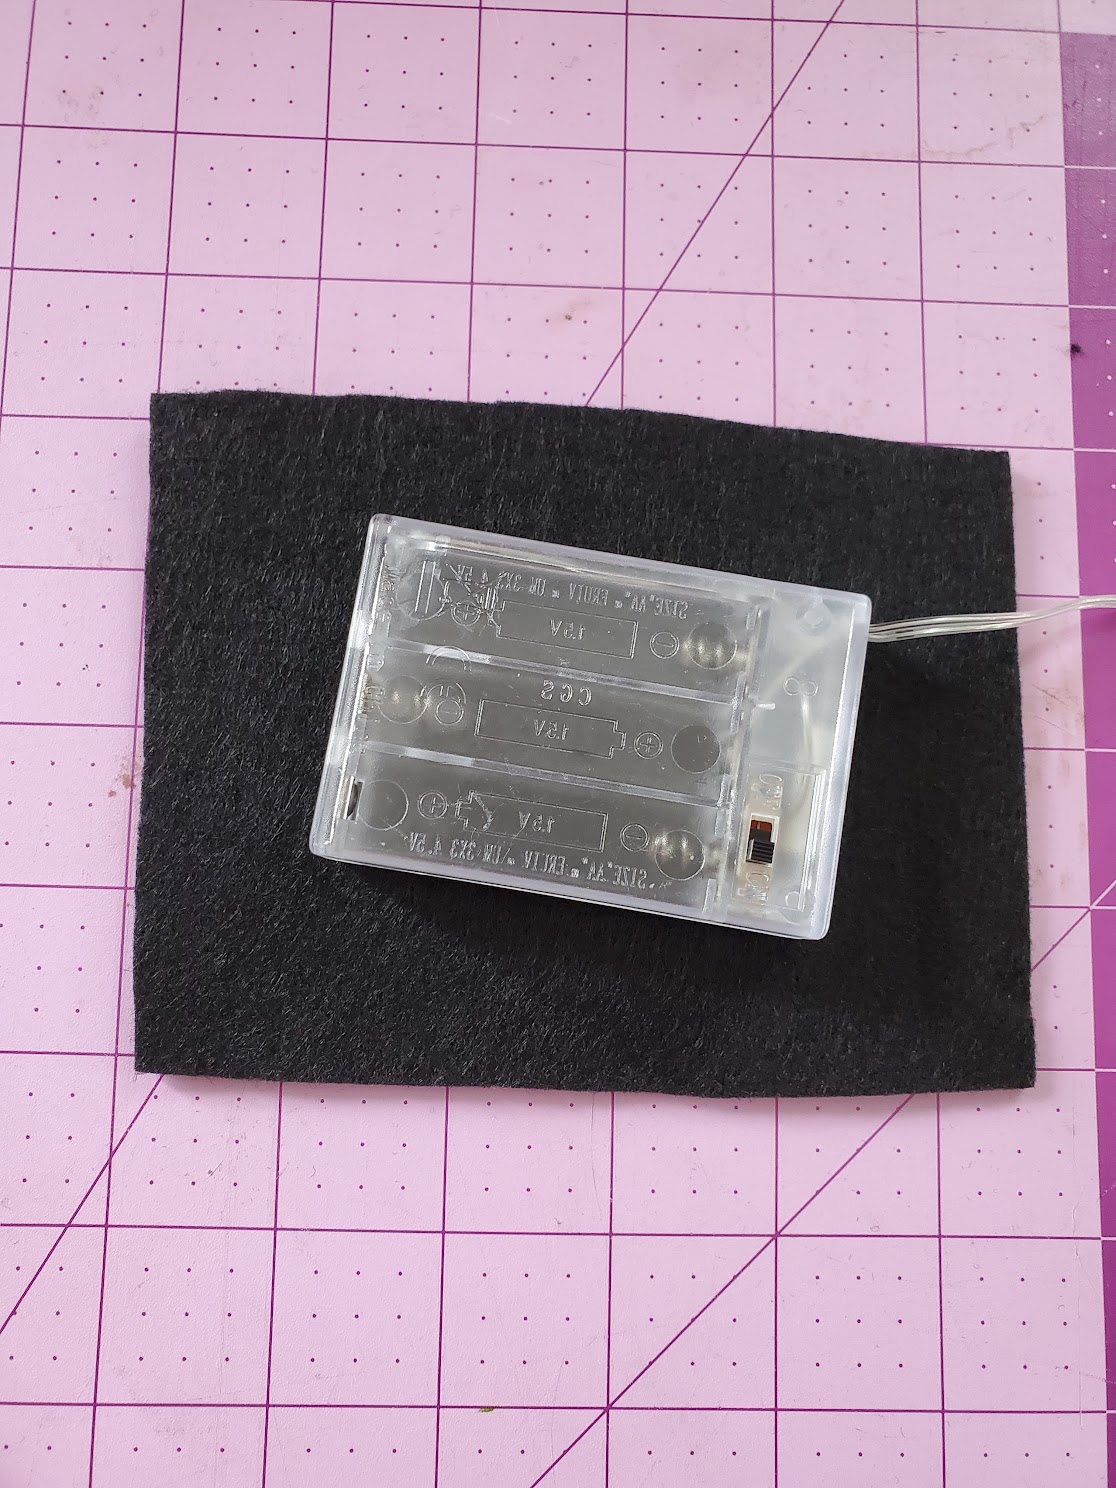
Step 4: If you are making a lighted version of your pumpkin, take the battery back and measure the length and width of your pack. Add an inch to the measurement on each every side of your pack and cut a felt rectangle.
.
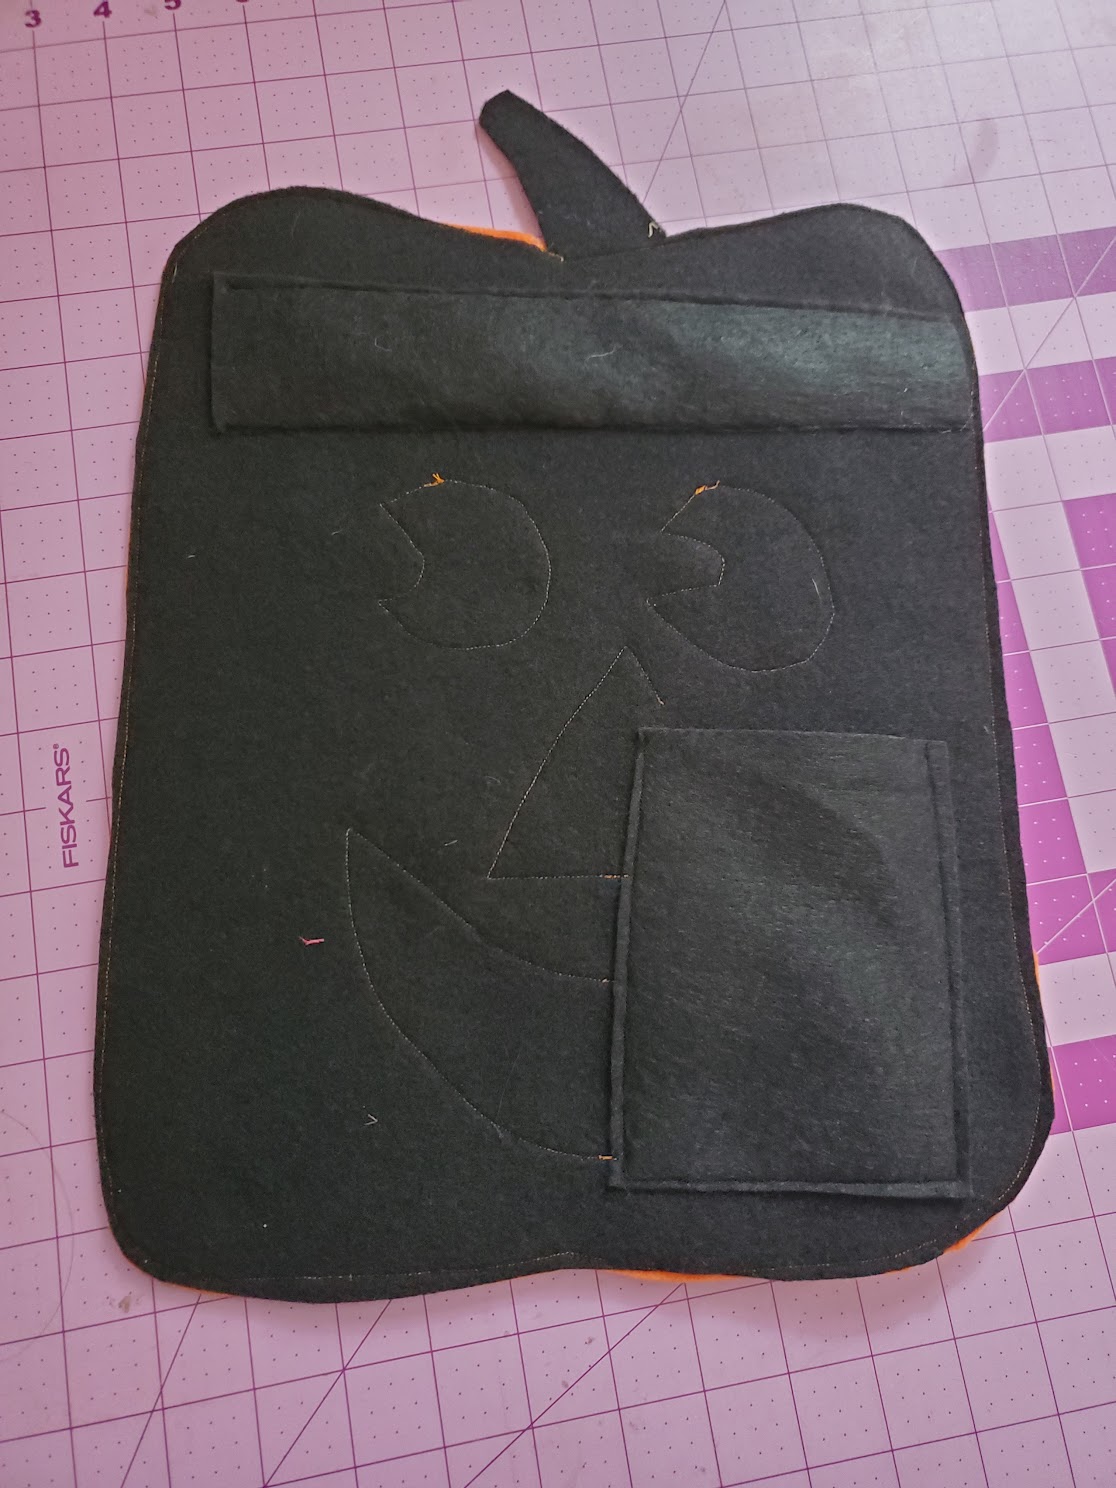
Step 5: Take out your black piece ONLY. Place the dowel sleeve about half an inch from the top of the pumpkin and about half an inch from the sides. Pin in place. Place the battery pack rectangle in the right corner using the same rule (half an inch from the bottom, half an inch from the side. Pin in place.
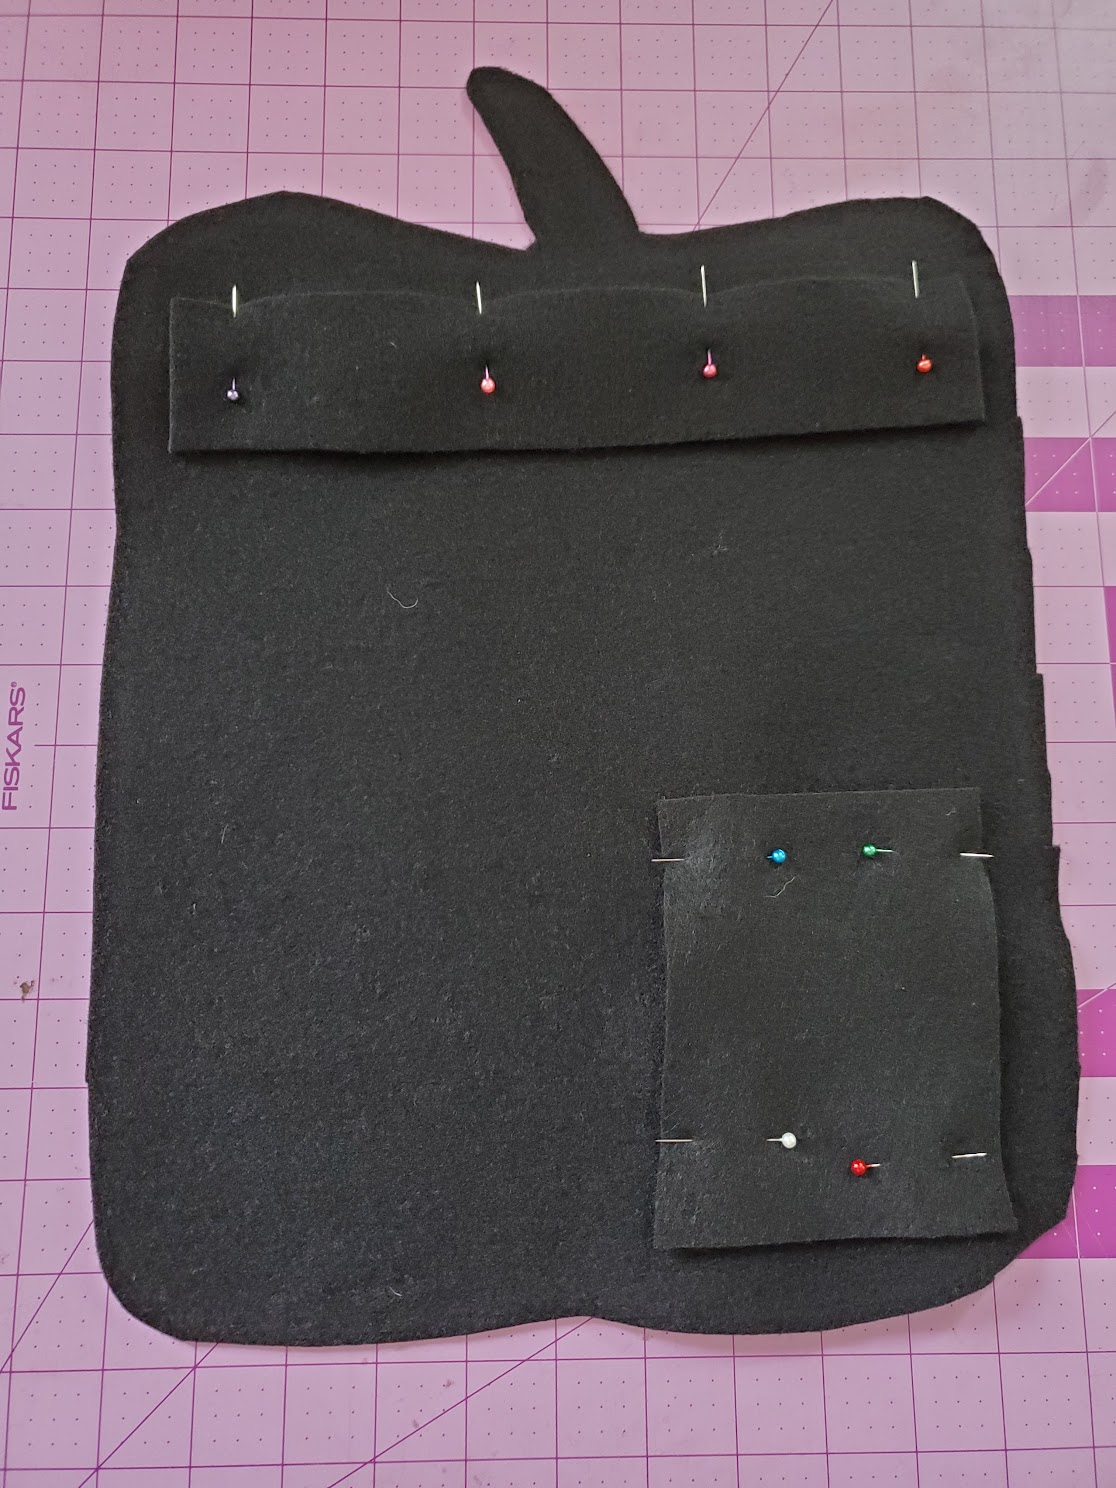
.
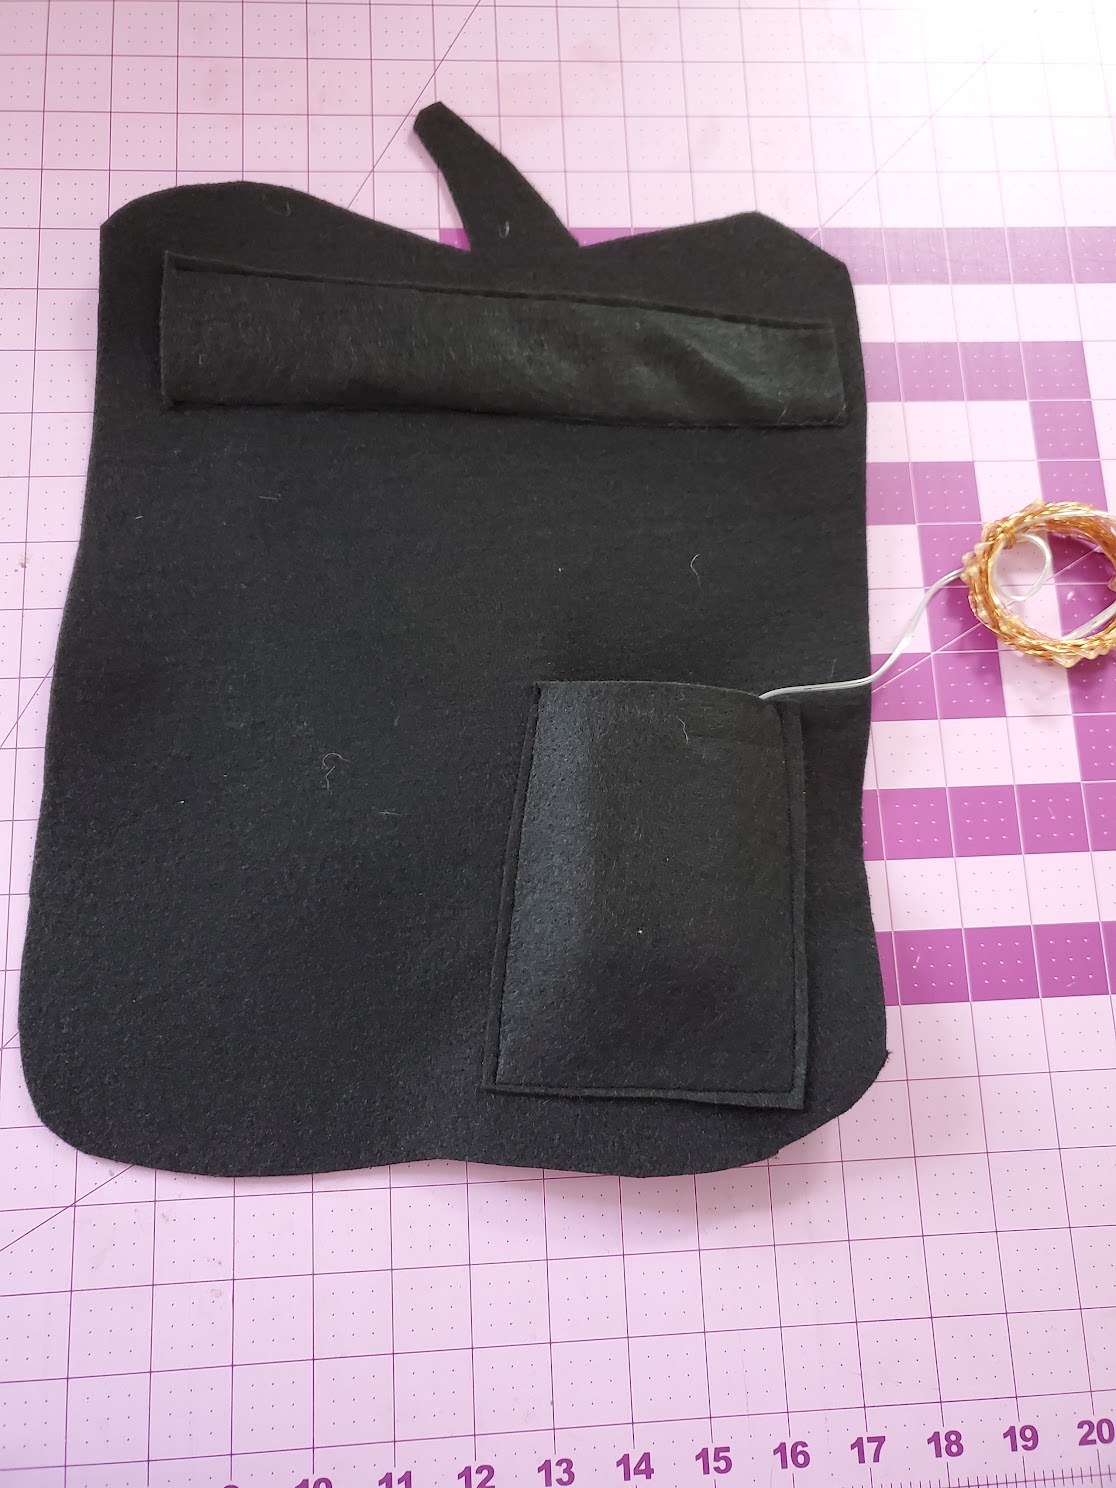
Step 6: Sew around the top and bottom edges (the long edges of the sleeve), leaving the side (short) edges open. Sew around the side and bottom of the battery pocket, leaving the top open. Double check to make sure the battery pack fits inside your pocket. Set aside for now.
.
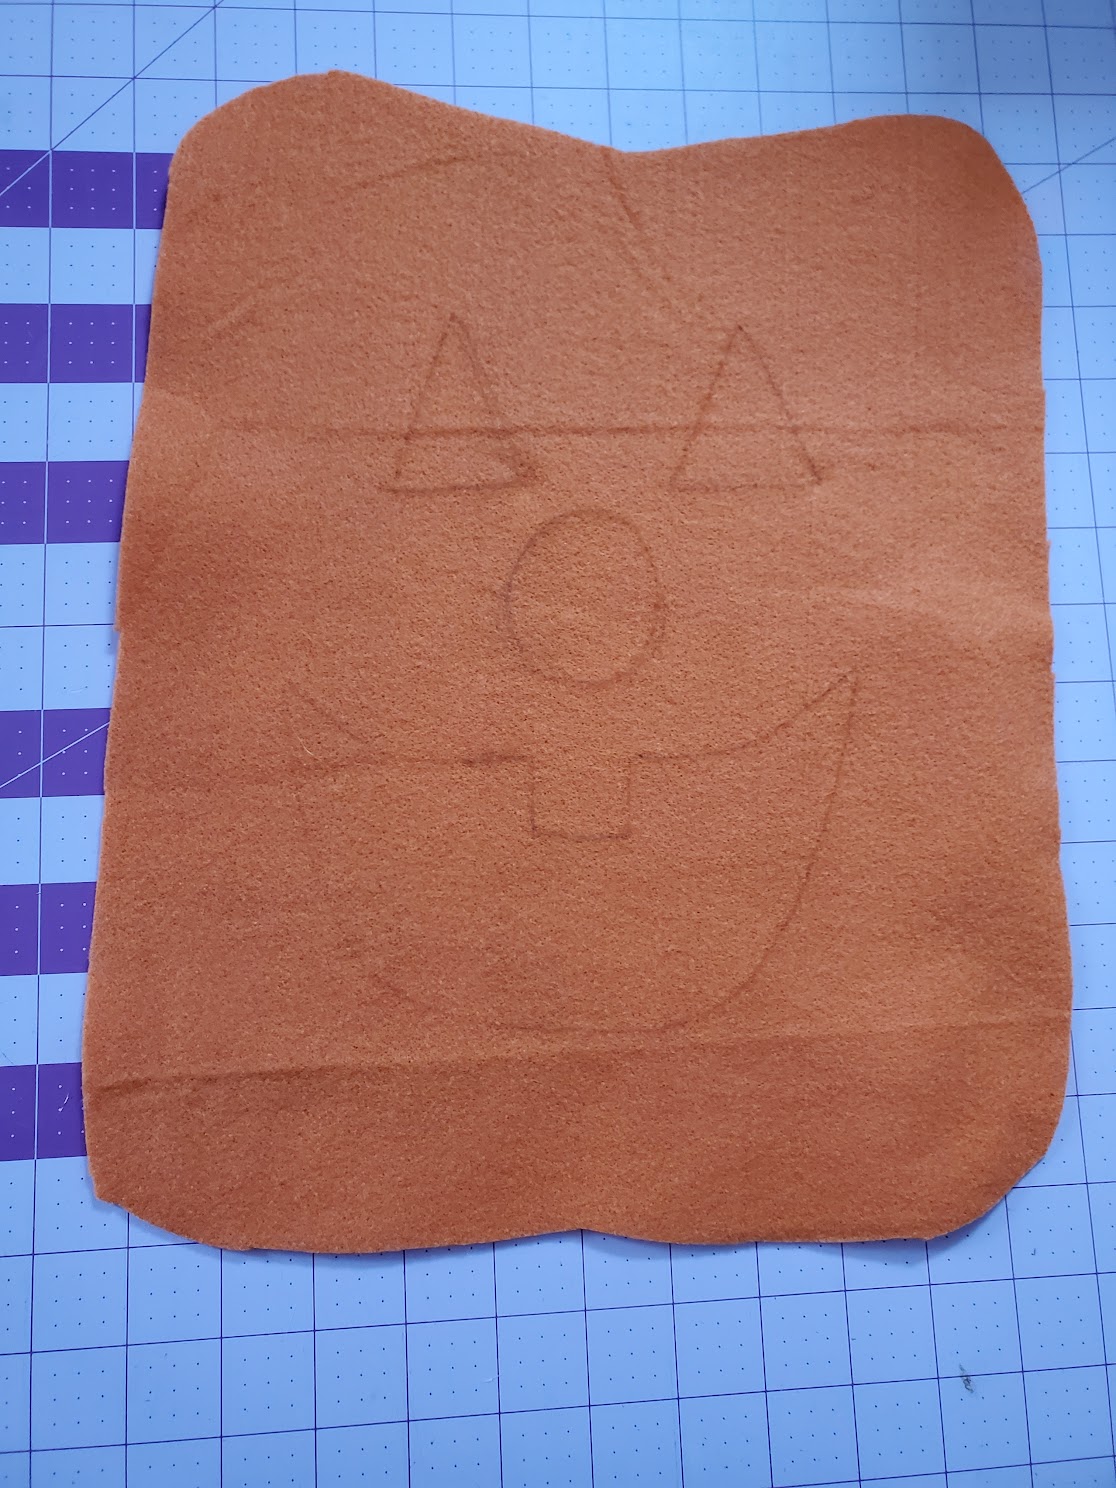
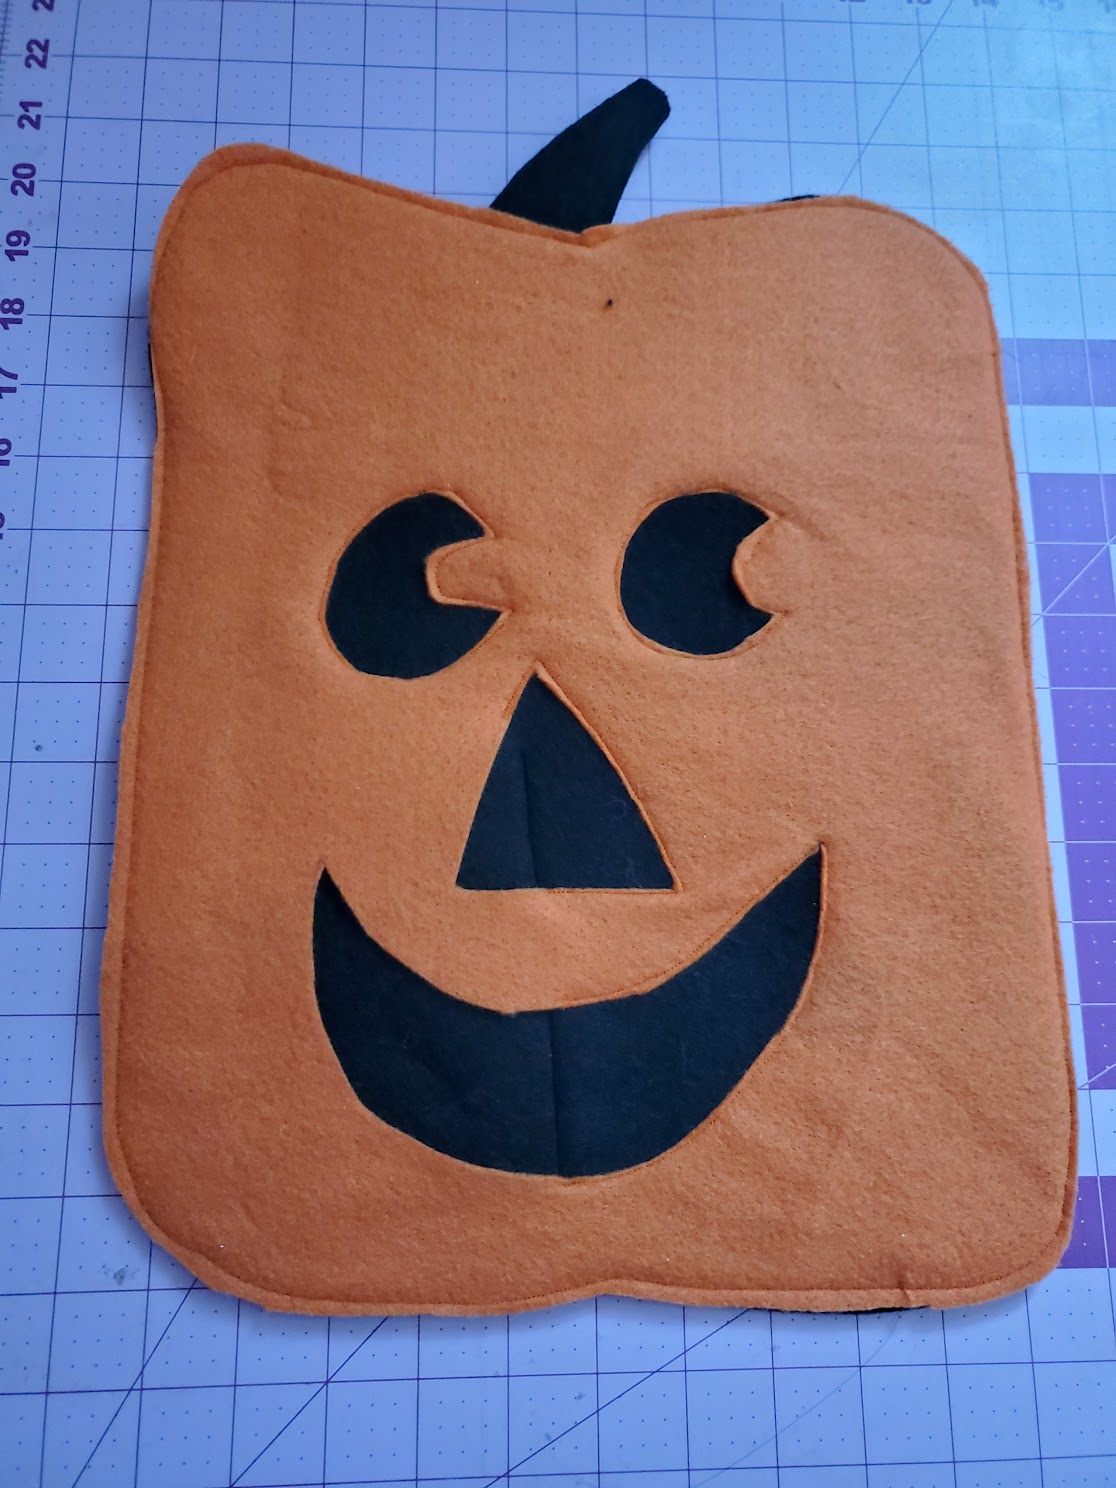
Step 7: We will now be using the orange pumpkin piece. Begin by drawing your desired face. I made up my own face here, but you could use the pumpkin face vinyl downloads as inspiration!
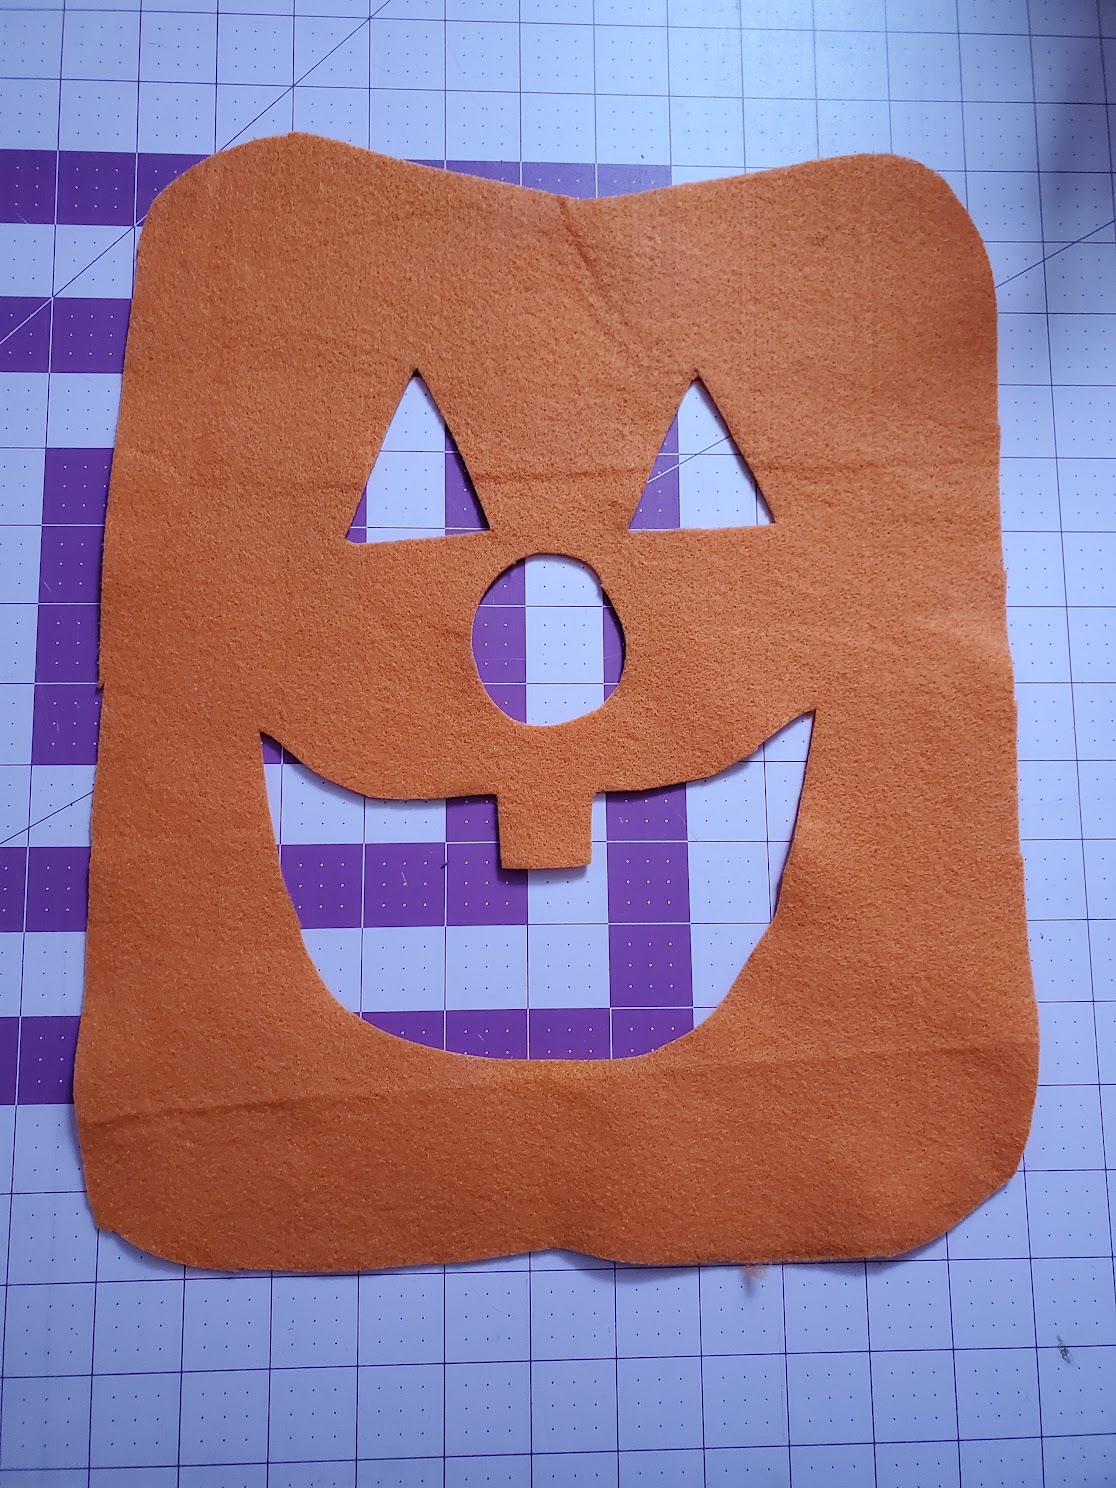
Step 8: Carefully cut out your pumpkin face.
.
Step 9: You will now lay your orange pumpkin on top of your black pumpkin. The black pumpkin will have the side without the battery pack and dowel sleeve face UP. Pin in place as desired (you don't need to spend a ton of time on pinning, as felt will naturally stick to felt and not much shifting will occur).
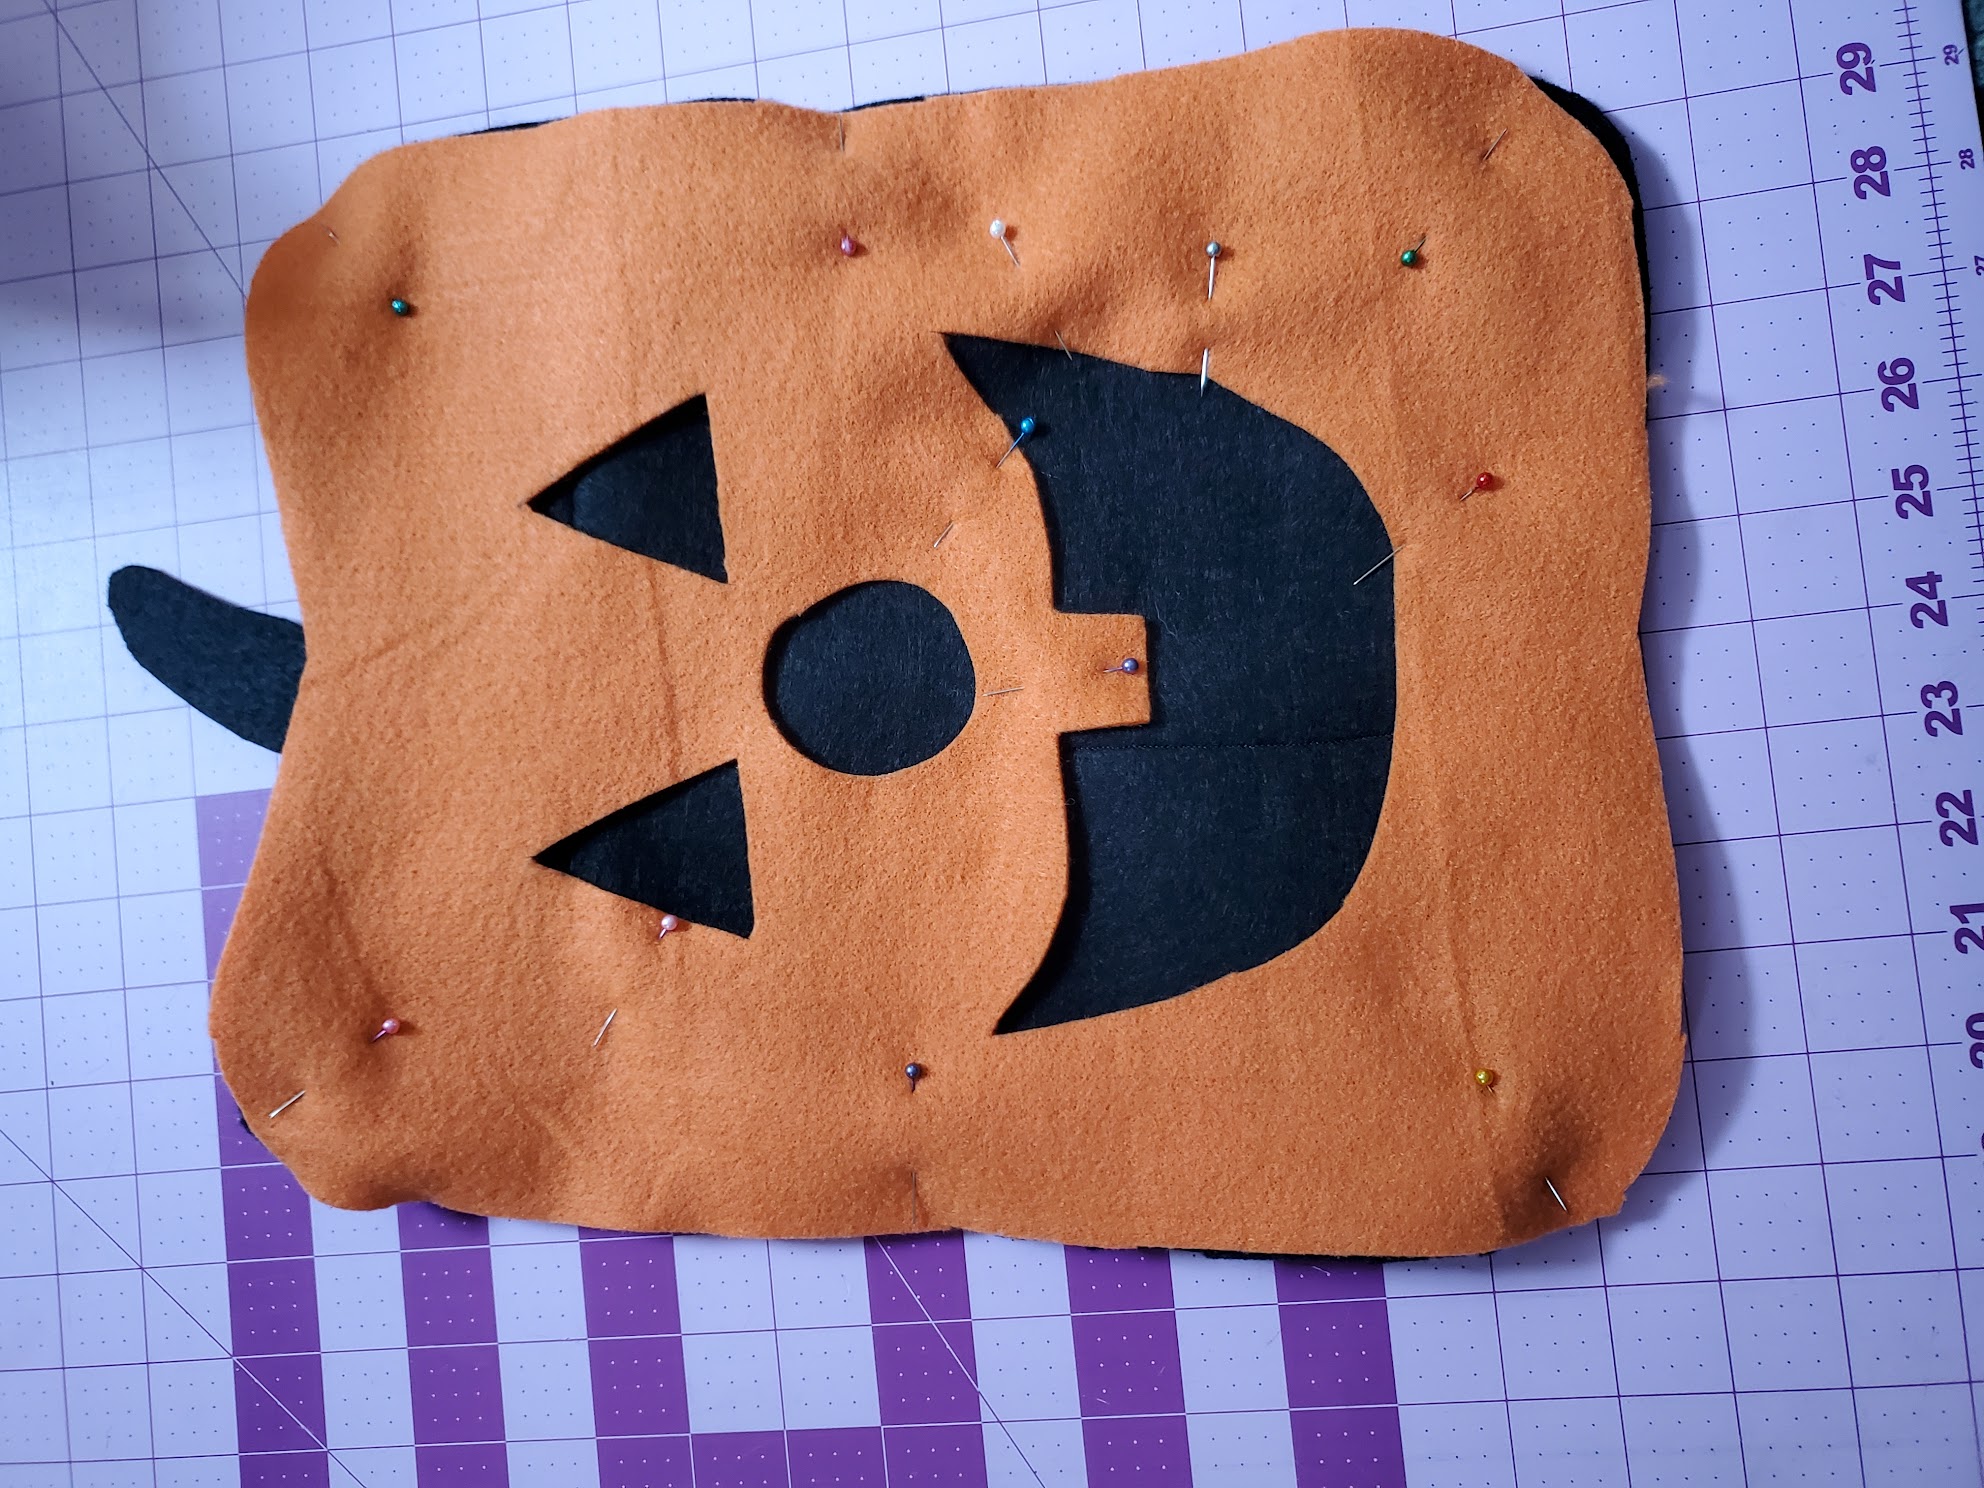
.
Step 10: You will now sew all the way around the outside of the pumpkin, roughly 1/8" from the edge. After this step, you can sew around the cut outs. If you are making this pumpkin light up, you will need to be careful NOT to sew through the battery pack. It is okay if portions of the cut outs are not sewn to avoid the battery pack and the dowel sleeve. You won't notice once it is done! See the picture which shows the back of the pumpkin to see that I avoided the battery pack.
 . .
. .
.
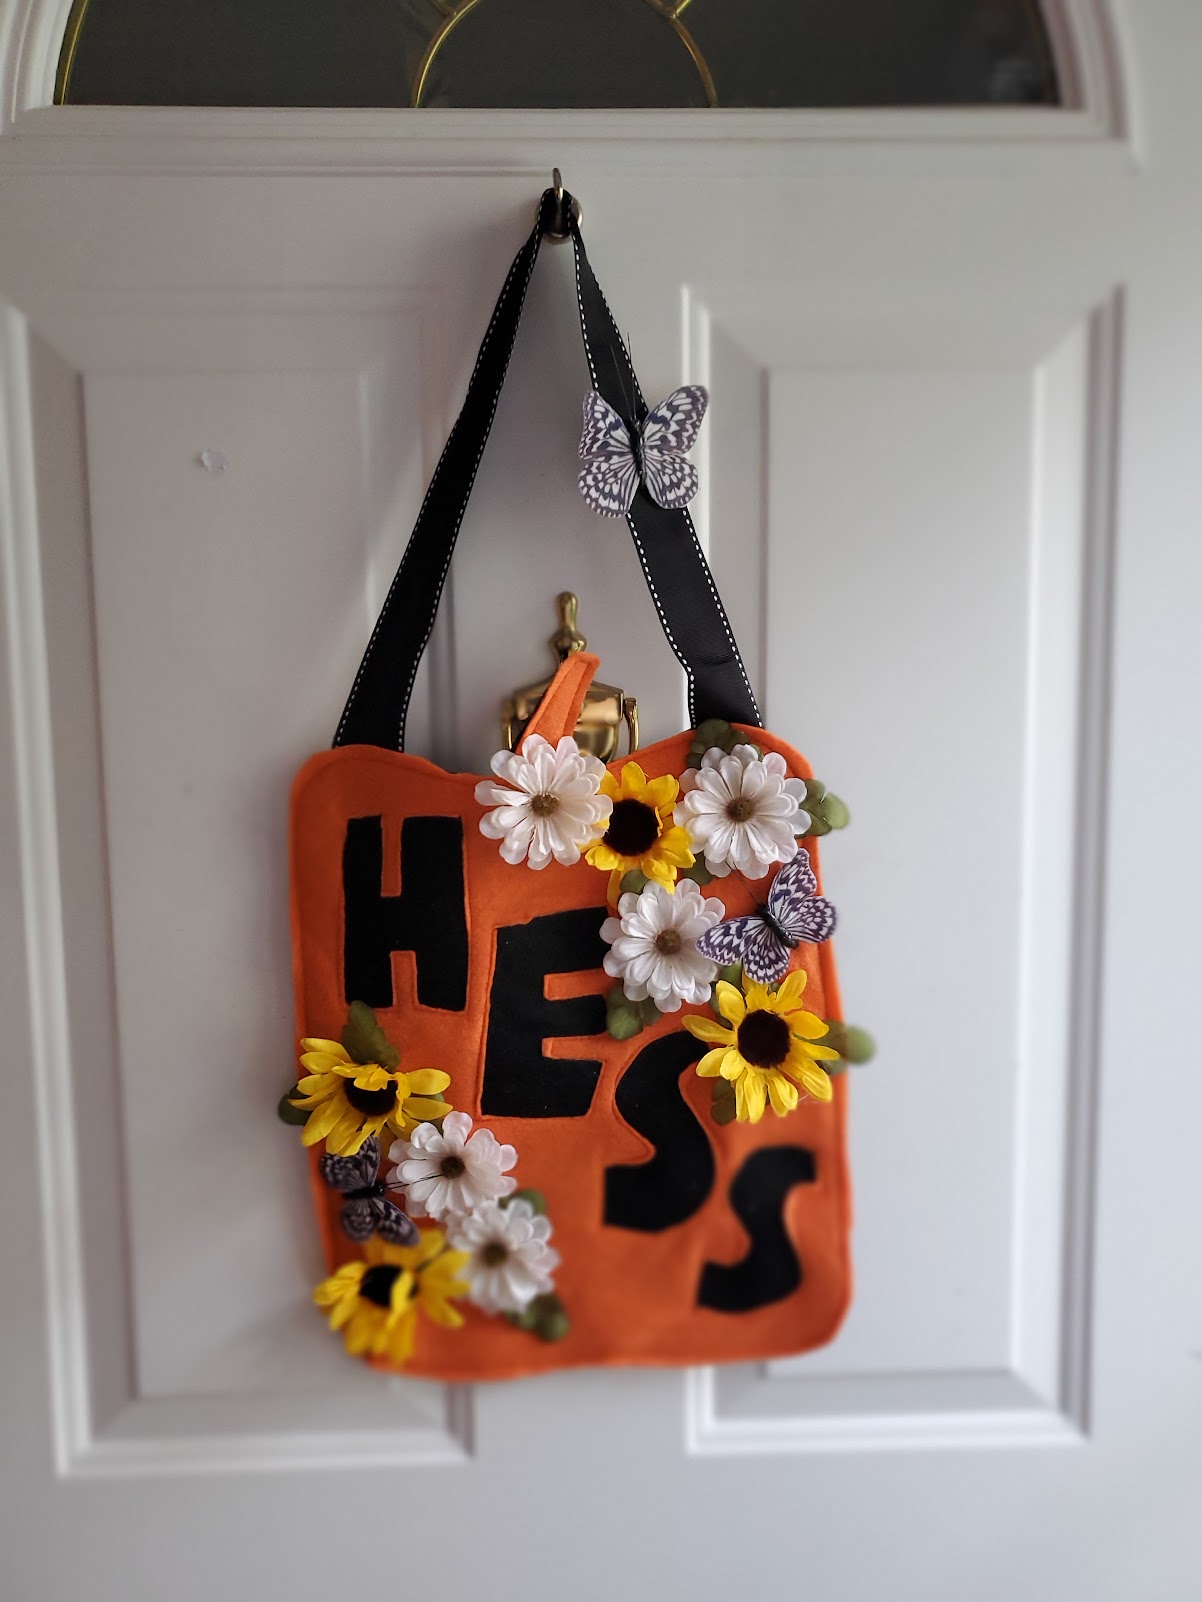
If you are not inserting lights, then you are all done! You can insert a dowel into the dowel sleeve, add a ribbon to either end and hang it up! I used flowers and butterflies to make this pumpkin (below) fall themed and can now hang it up through Thanksgiving!
.
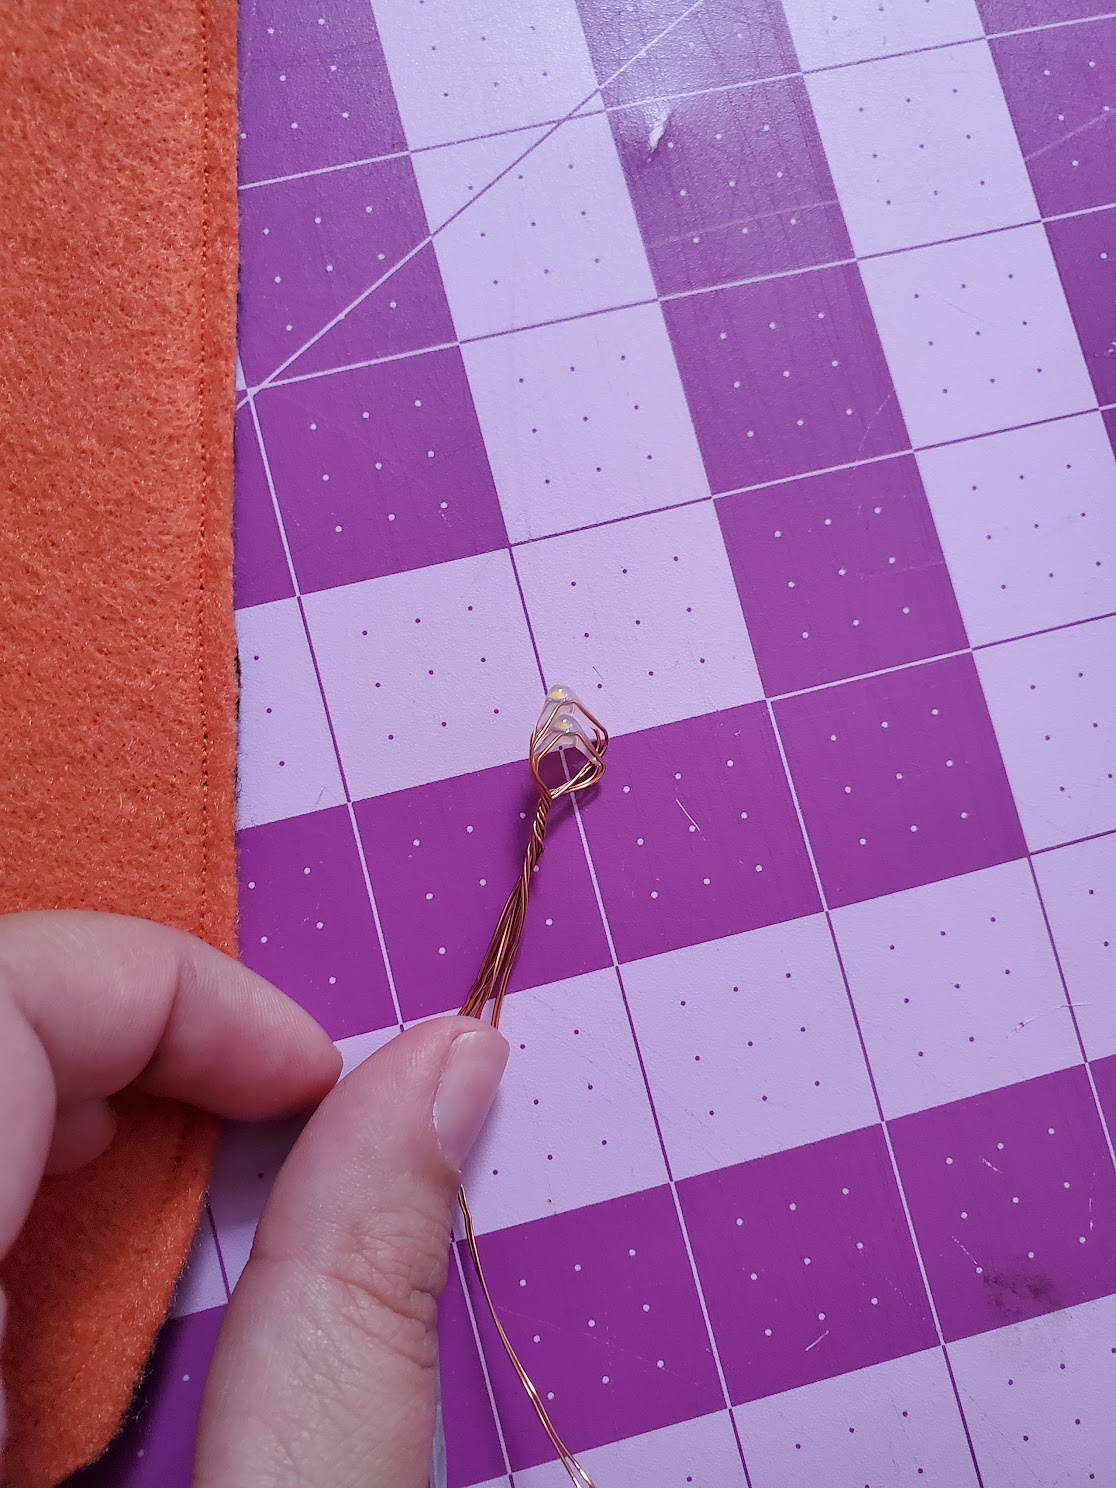
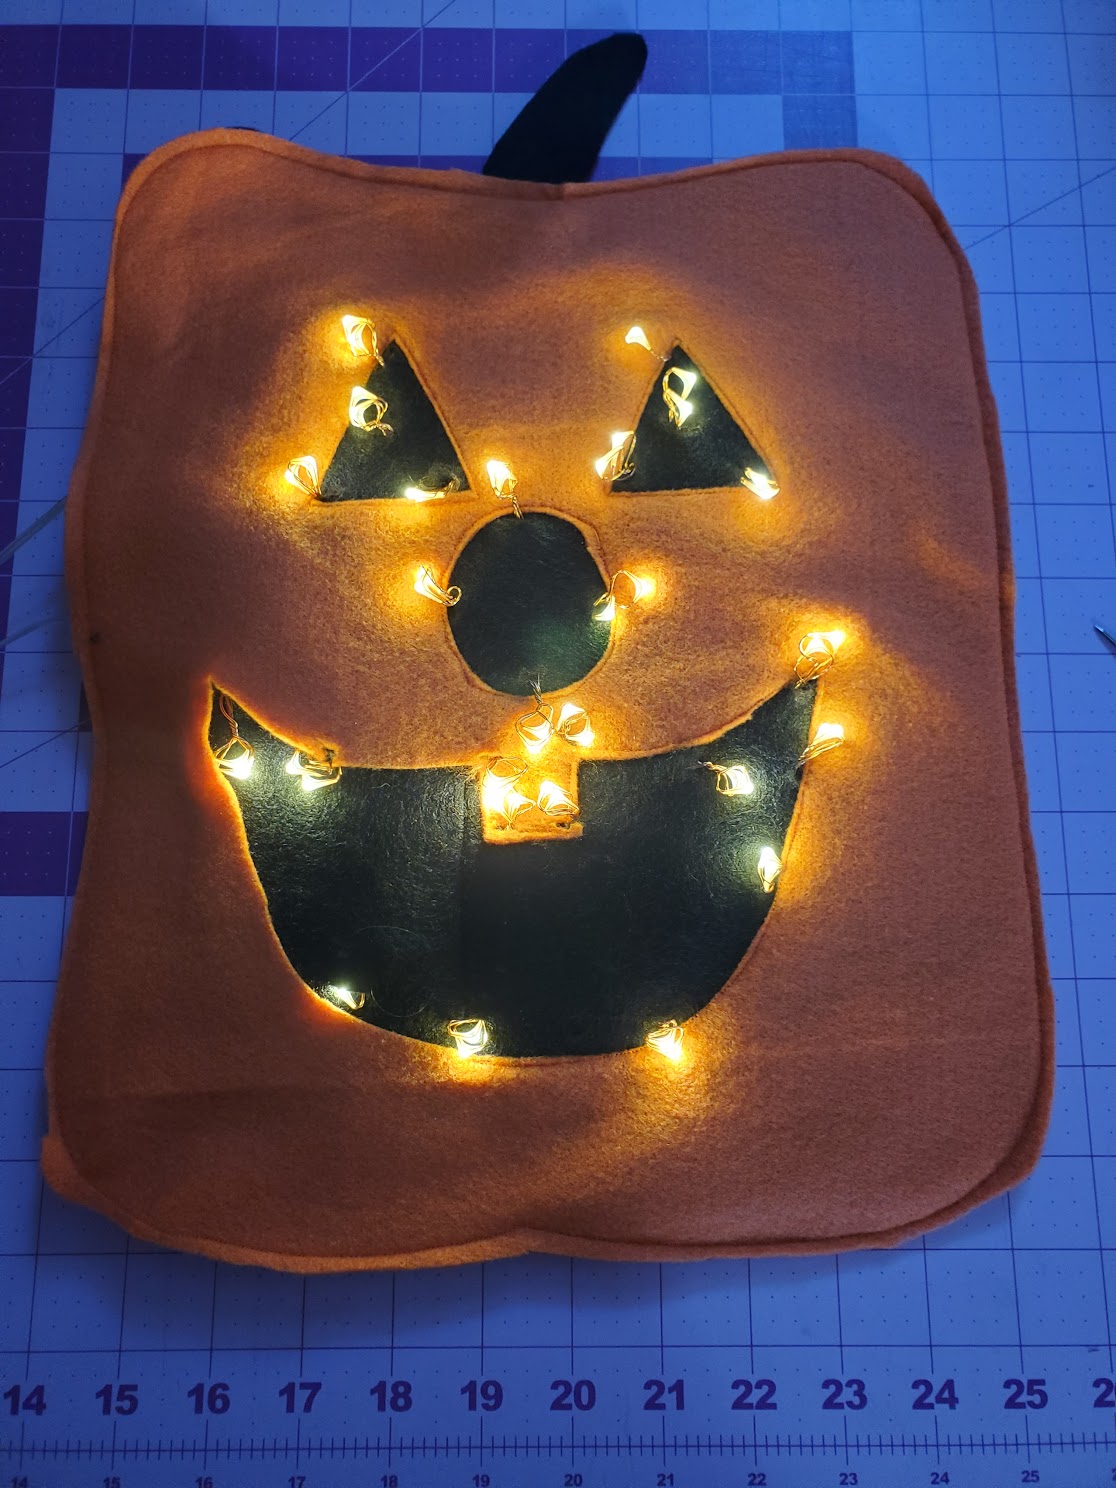
Step 11: We will now begin installing our lights. You will set your pumpkin aside for now. Begin by taking 2 lights that are next to one another and twisting them together. Repeat until your entire strand has been halved and all lights are doubled up.
.
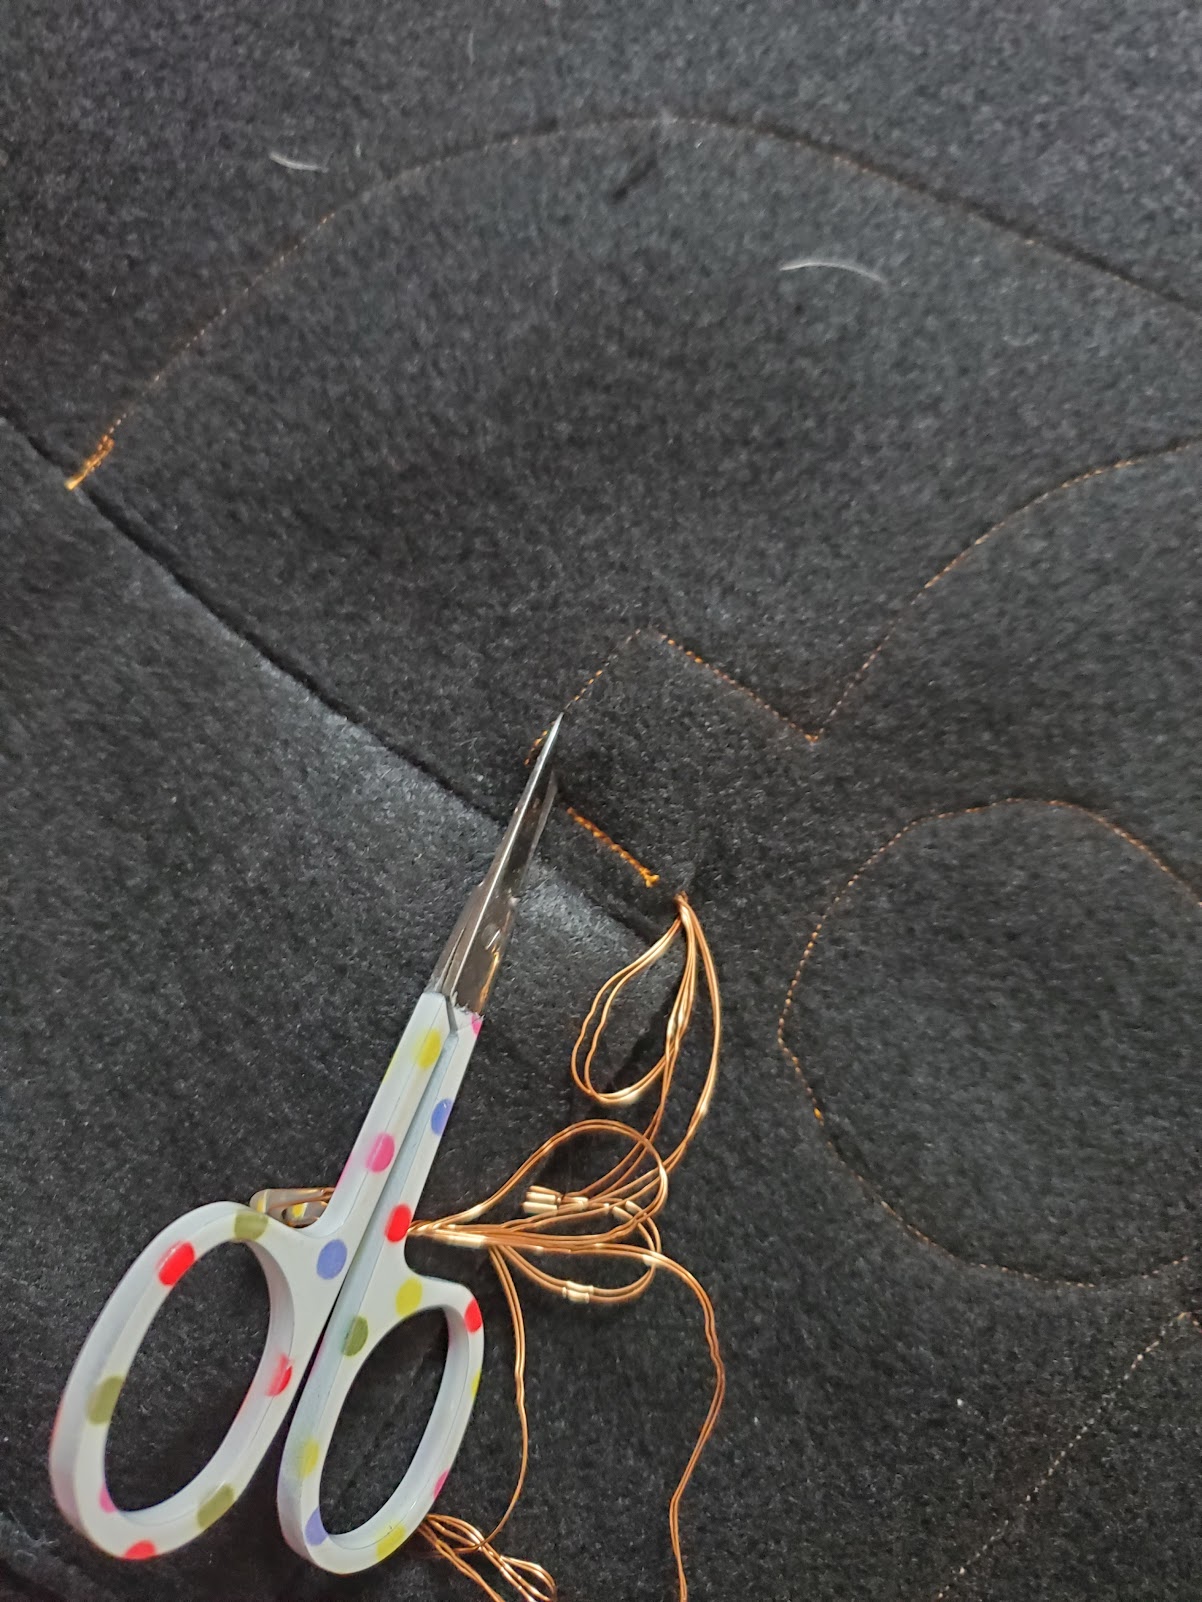
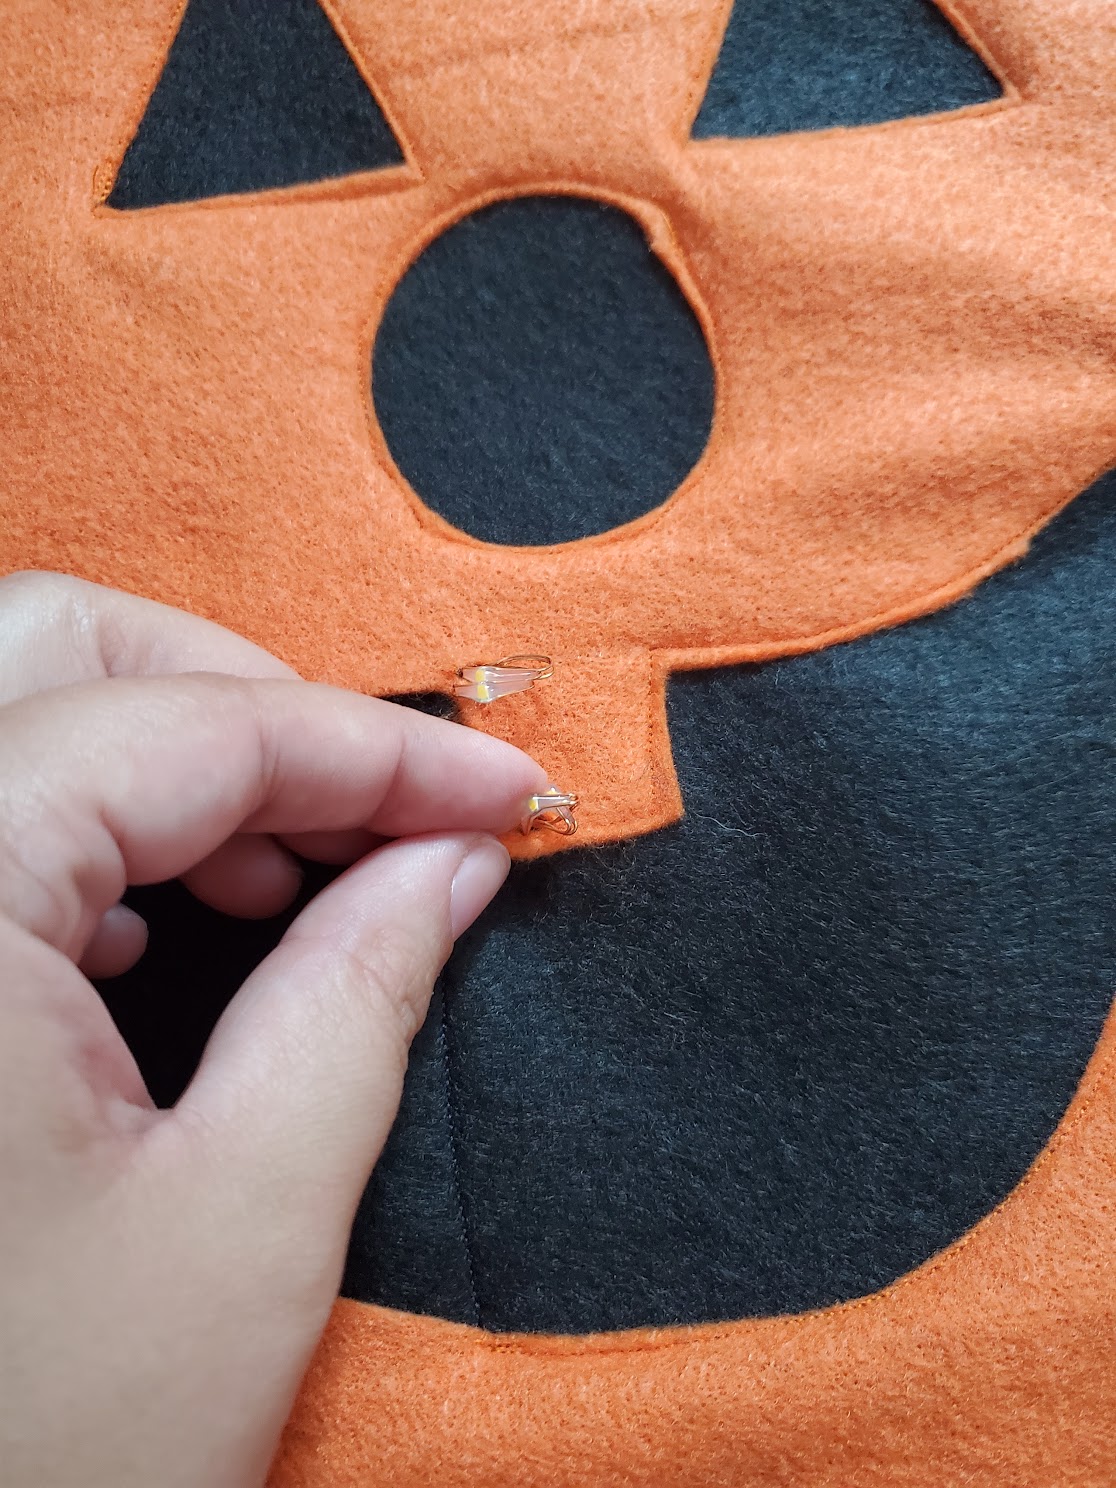
Step 12: Now using sharp scissors, make a small hole in the pumpkin along one of the cut outs near the battery pack pocket, cutting through both the black and orange felt. The hole should be big enough to fit the lights through, but not so big that they can easily come back out. It is a bit of learning curve and that's okay! Poke a double strand through the hole. Bend the lights upward to prevent them from slipping out.
.
Step 13: Now make a new hole, being careful not to stretch your light cord. Continue this process throughout the entire outline.
.
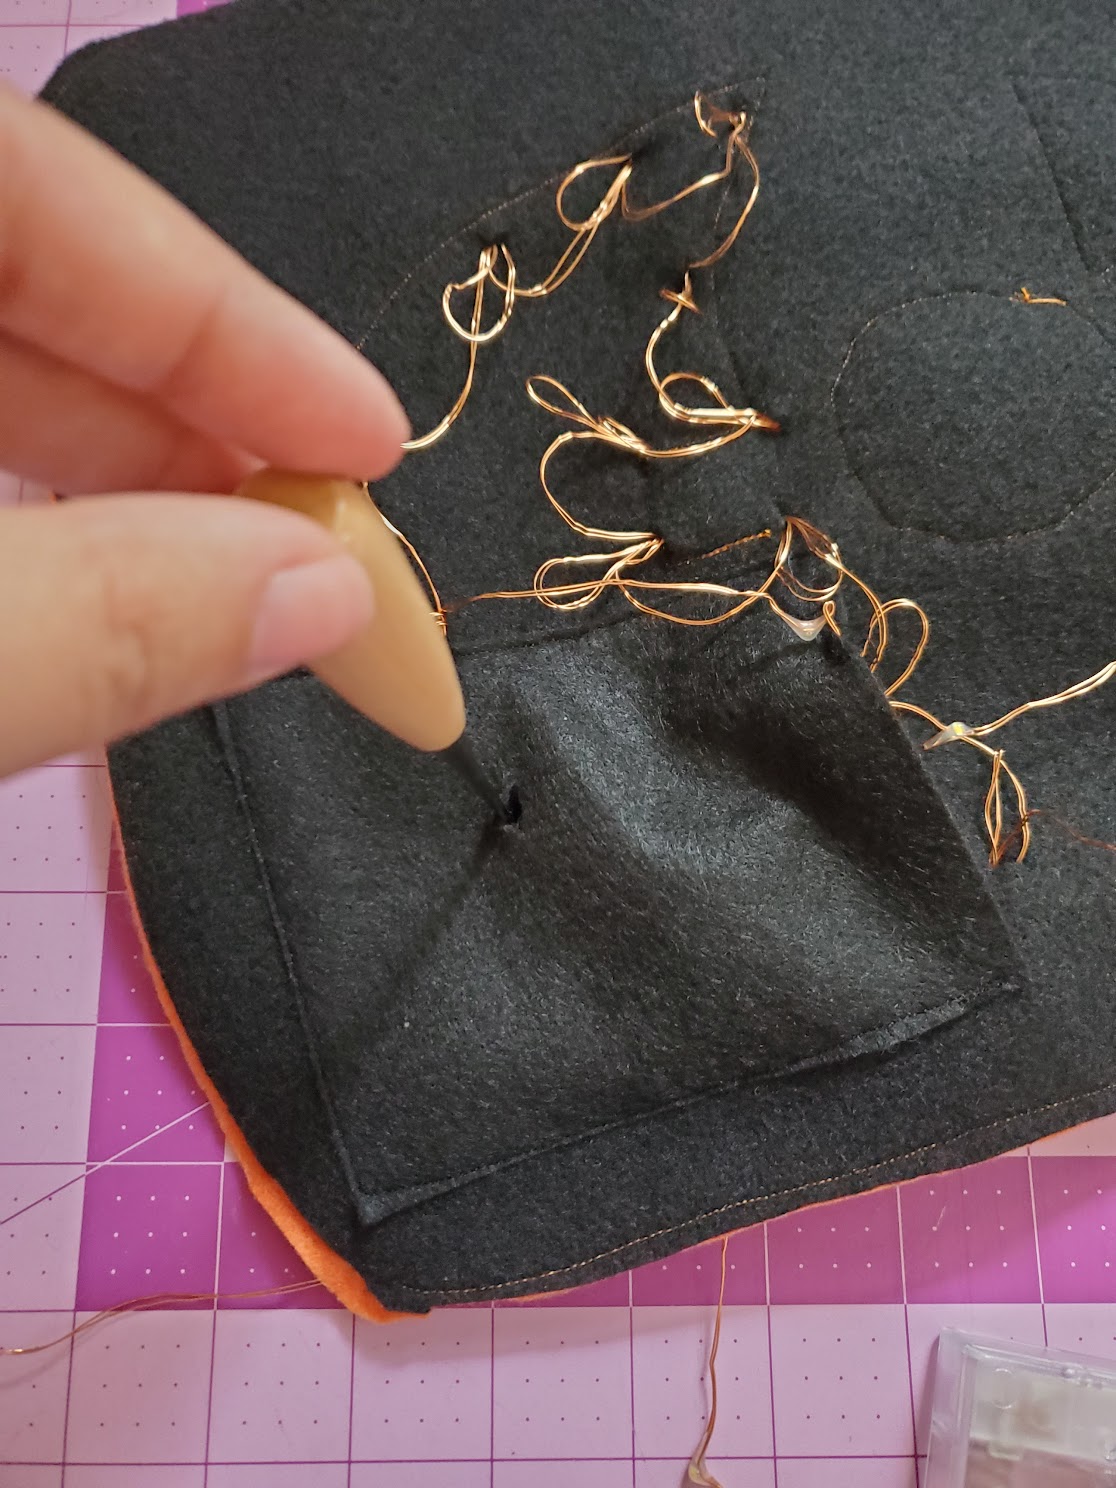
Step 14: If desired, you can add lights to the area covered by the battery pack pocket. I did this by punching the hole all the way through the battery pack, but then placing the lights inside the pocket and through only the black and orange felt, and not the pocket.
.
Once you have used all of your lights, your pumpkin is ready to light up!
.
You can now insert a dowel into the dowel rod sleeve and attach ribbon to either side to hang up! I used Wednesday's Dangling Spider Bow for additional spook!

If you make Jack, make sure to tag us on Instagram or share in our Facebook group. We cannot wait to see what you create!
Meg