Posted by Kristen Nelson on 15th Nov 2021
Turkey Hair Clip
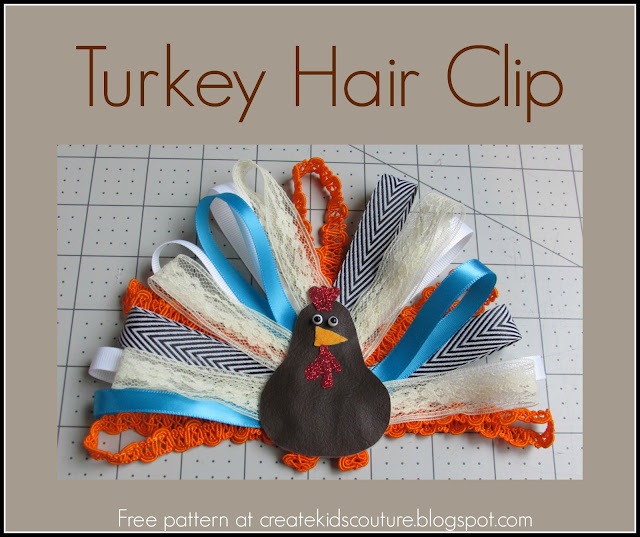
If you're looking for a quick Thanksgiving project that will make a WOW impact on your little girl, today's free pattern is just the thing for you! You can use whatever supplies you already have on hand, and we even have an easy printable template for you.
Isn't it fun!? I told my daughter I would be making a turkey hair clip while she's at school and now I can't wait for her to get home and see it! She said she wanted it *this big* (motioning with her hands) and that's exactly what I did. It's definitely going to be noticeable! This is the large version, but the template includes medium and small sizes as well, if you want yours to be a little more subtle. Keep in mind you could also use this for a pin to put on your blouse or purse! Around here we're all about the hair clips.
(Click here for free download)
Scraps of brown faux leather or felt for the body
Variety of ribbon or trim scraps (any width or style!)
Hot glue gun
Hair clip, pin, or other fastener
Optional: Scraps of glitter vinyl or felt, two ballpoint pins, or other embellishments for face
Optional: Spray starch, Quicken-Stiff, or hairspray to stiffen lace ribbon
Let's get started!
Print and cut out the size of turkey body you want to make. The large body is about 2.5" tall, the medium is about 2" tall, and the small is about 1.5" tall. (Keep in mind that the finished clip will be much larger than that after you add the ribbon!
After cutting out the paper piece, lay it on your fabric and cut out two turkey bodies that are mirrored. I used faux leather but you could also use felt. Be sure to use a fabric that doesn't fray at the edges. You should have two body pieces at this point, as shown above.
Now take your ribbon scraps and cut them into a bunch of pieces that are equal lengths:
Large Turkey: 7" long ribbon pieces
Medium Turkey: 5.5" long ribbon pieces
Small Turkey: 4" long ribbon pieces
You can cut as many ribbon pieces as you want on your turkey. I cut an odd amount of each of the ribbons, using more pieces for my main colors (orange, white, lace), and fewer pieces for the accent colors (blue, chevron). It's easiest to cut a bunch all at first so you don't have to come back and do more later. Also note that you can use all different sizes and textures of ribbon -- the more variety the cuter it is!
Take the body piece that you want for the back of the turkey, and lay it on a flat surface with its wrong side facing up. (In my photo, the white is the back side of my faux leather.)
Starting with your most distinct ribbon, fold each ribbon piece in half and use a hot glue gun to secure its raw edges in place. Use an even placement around the sides and top of the turkey, as shown above. Note that the ribbon extends onto the body a good amount so it will be stable. If you are using ribbon or lace with holes, you can probably glue both ribbon ends at the same time, as I did above, because the glue goes through both layers.
If your ribbon does not have holes, you will glue one end in place first, then add more glue and fold the second end over and glue on top, as shown above and below with the white grosgrain ribbon.
As you glue more ribbon colors in place, try to keep the overall look balanced -- however, I also try to make the project have a not-perfectly-symmetrical look to it. Notice that I purposely put two white ribbons next to each other in the photo above. I'm a perfectionist so it pains me to do this (haha), but the end result turns out really awesome if you allow some imperfections like you'd see in a real turkey tail. This also allowed me to keep my two main orange pieces at the bottom edges of the tail.
Continue adding new ribbon layers, filling in gaps and keeping it balanced, gluing each in place as you go. Don't worry if your layers start to get thick and bulky -- your turkey will turn out fine!
Continue adding ribbon pieces until you have it as full as you'd like! Don't be afraid to use more or less than I did -- this is *your* project!
Note: If your lace is not stiff, you can add a tiny glue dot to help it stay in place on the ribbon layer beneath it. Don't add too many glue dots though, because you want the turkey tail to have fun texture.
Every so often as you add your ribbon pieces, lay the front turkey body in place to make sure you like how it is overlapping and that all the ribbon ends will be hidden. (Don't glue in place yet though!) When you get it to where you want it, stop adding ribbons and admire your work!
So far so good!
Now you're ready to add the front turkey details. You can do this any way you want! You could cut out felt pieces to glue on, paint it on with craft paint, add googly eyes, or even use a sharpie to draw the details on! For my turkey, I used leftover scraps of glitter vinyl to cut the red pieces and a scrap of orange knit fabric for the beak. I glued them in place with hot glue.
For the eyes, I used the end of a ballpoint pin and drew a circle "pupil" on it with a black sharpie, as shown above. (The white dot in the center is just the light shining off it. I colored a simple circle.)
I made two eyes like that, pulled the ends off the pins, and then glued them in place above the beak. I love my turkey! He reminds me of the chickens on the movie "Chicken Run."
For the feet, I cut two orange ribbon pieces about 2" long.
I folded those over and glued in place where I wanted them. My turkey front is now complete!
When you're ready, glue the front turkey body in place on top of all the ribbon layers. Be sure to use LOTS of hot glue around the edges and the center. Also, try to line up your front turkey piece with the one in back.
Optional: If any of your ribbons are not stiff enough to stand up on their own, you can spray some starch or "Stiffen Quick" onto your finished turkey! Some people even use hairspray. Using one of these will help the ribbons stay upright and sturdy so your turkey tail can continue looking its finest. Be sure to spray it on both sides of the turkey (front and back) while laying flat, and allow it to dry fully before flipping or moving.
Now you're ready to glue on your hair clip or other fastener. Be sure to glue it in the center of the head so it holds the upper weight steady when being worn. For the largest size, you may even want to use two clips on the back! (I will need to add my clips when my daughter gets home -- I'm not sure where she put our box of clips!)
And that's it!
Not only am I super excited to see how this looks on my daughter for Thanksgiving, but I also can't wait to see how YOURS turn out! Please be sure to come share your photos in our patterns group on Facebook when you're done. We are also happy to answer any questions you might have.
Let's Create! ~ Kristen


